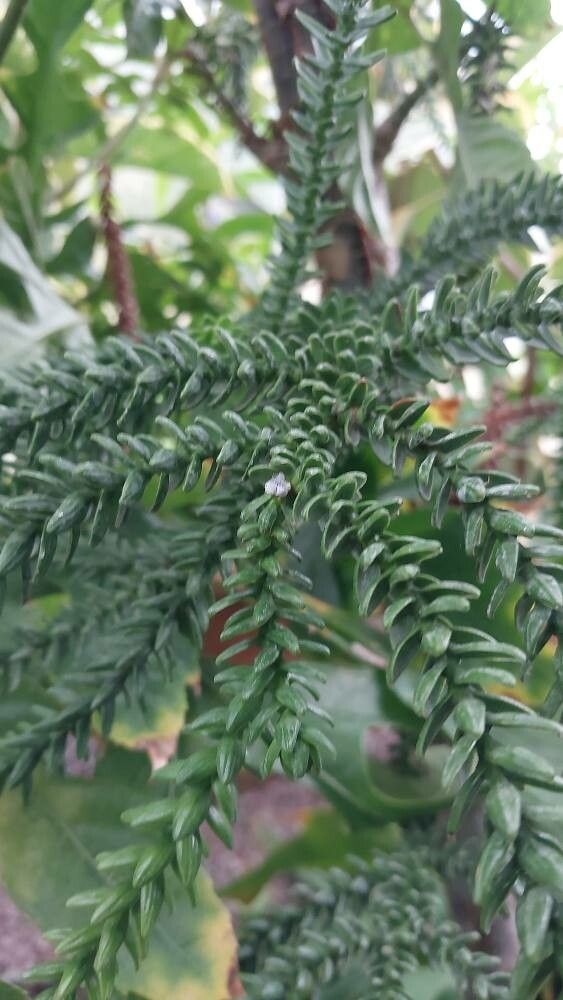
Oh, do you have an Araucaria laubenfelsii? What a magnificent tree to admire! Those architectural, whorled branches and the scent of pine they give off are just so captivating. Growing them from seed can be a bit of a gamble, but propagating from cuttings is a wonderful way to get more of these beauties to enjoy, whether it’s to fill out your own garden or share with fellow plant lovers. Now, I won’t lie to you, propagating Araucaria can be a bit of a slow burn and might not be the absolute easiest for a brand-new plant parent. But with a little patience and the right approach, it’s incredibly rewarding!
The Best Time to Start
For the highest chance of success, I always recommend taking cuttings in late spring or early summer. This is when the plant is actively growing and has a good amount of energy stored up. You’re looking for semi-hardwood cuttings – think of a stem that’s flexible but no longer bright green and floppy. It should have a bit of “give” when you bend it, but not snap easily.
Supplies You’ll Need
Gathering your tools beforehand makes the whole process smoother. Here’s what I like to have on hand:
- Sharp pruning shears or a clean, sharp knife: A sterile tool is crucial to prevent disease.
- Rooting hormone powder or gel: This really gives your cuttings a boost. Pelleted forms are easy to use.
- Well-draining potting mix: A good blend for me is typically 50% perlite and 50% peat moss or coir. You can also find specific cacti and succulent mixes that work well.
- Small pots or trays: Clean ones, of course! Small plastic pots about 4-6 inches deep are perfect.
- Plastic bags or a propagator: To create a humid environment for your cuttings. Clear plastic bags work great.
- Watering can or spray bottle: For gentle watering.
Propagation Methods
We’ll focus on the most reliable method for Araucaria laubenfelsii, which is taking stem cuttings.
- Select Your Cutting: As I mentioned, choose a healthy, semi-hardwood stem. Look for one that’s about 6-8 inches long.
- Make the Cut: Using your clean shears or knife, make a clean cut just below a leaf node (where a branch or leaf attaches to the main stem). This is where those magical rooting hormones are concentrated.
- Prepare the Cutting: Gently remove the lower leaves from the bottom couple of inches of the cutting. You want a clear stem to insert into the soil. If the remaining leaves are very large, you can even trim them in half to reduce water loss through transpiration.
- Apply Rooting Hormone: Dip the cut end of the stem into your rooting hormone. Give it a gentle tap to remove any excess.
- Potting Up: Fill your clean pots with your well-draining potting mix. Make a small hole in the center of the soil with your finger or a pencil.
- Insert the Cutting: Carefully place the hormone-coated end of the cutting into the hole. Gently firm the soil around the stem to ensure good contact.
- Water Gently: Water the soil lightly to settle it around the cutting. You don’t want to drown it, just make it moist.
The “Secret Sauce” (Pro Tips)
Now, here are a few little tricks I’ve learned over the years that can make a big difference:
- Bottom Heat is Your Friend: Araucaria cuttings really appreciate a bit of warmth from below. Placing your pots on a heated propagator mat or even on top of a gently warm appliance (like a router) can significantly speed up root development. It mimics the warmth they’d get from the soil in their natural environment.
- Don’t Suffocate, Condense: When you cover your cuttings with a plastic bag, make sure the bag doesn’t touch the leaves too much. This can encourage fungal issues. You can prop up the bag with a twig or two if needed. The goal is high humidity, not a damp, close environment.
- Patience is Key (Seriously!): Araucaria can be on the slower side when it comes to rooting. Don’t be discouraged if you don’t see new growth for many weeks, or even a couple of months. Resist the urge to constantly pull them up to check for roots – this just disturbs the process.
Aftercare & Troubleshooting
Once you start to see signs of growth – perhaps a new tiny branch or leaf emerging – that’s a good indicator that roots are forming! This is when you can start to gradually acclimate your new plant to normal conditions.
- Reduce Humidity: Slowly open the plastic bag a little each day over a week or two.
- Watering: Water when the top inch of soil feels dry. Avoid overwatering, as this is the quickest way to invite root rot.
- Light: Keep your new plants in bright, indirect light. Direct sun can scorch tender new growth.
The biggest challenge you’ll likely face is rot. If a cutting turns mushy or black, sadly, it’s usually a lost cause. This is often due to overwatering or poor air circulation. If you notice this, remove the affected cutting immediately to prevent it from spreading to others.
A Encouraging Closing
Propagating any plant is an act of hope and a wonderful way to connect with the magic of growth. Araucaria laubenfelsii cuttings might take their sweet time, but the satisfaction of nurturing a new tree from a simple cutting is truly something special. Just remember to be patient, stay observant, and most importantly, enjoy the journey! Happy gardening!
Resource:
https://identify.plantnet.org/k-world-flora/species/Araucaria%20laubenfelsii%20Corbasson/data