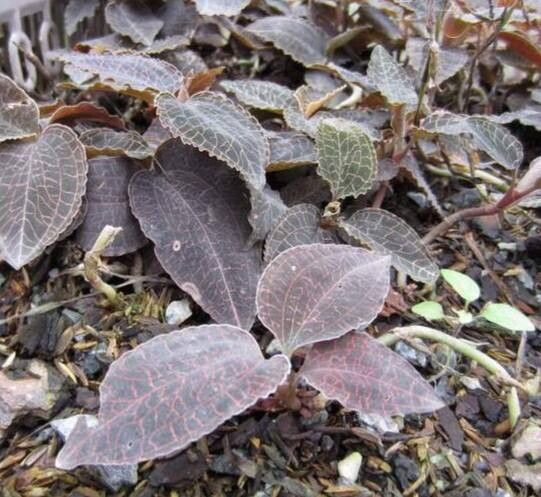
Hey there, fellow plant lovers! It’s so wonderful to have you join me today. We’re going to dive into a truly special plant: Anoectochilus imitans. If you’ve ever laid eyes on these beauties, you know exactly why I’m so smitten. Their velvety leaves, often adorned with intricate gold or silver veining, are simply breathtaking. They bring a touch of the exotic rainforest right into our homes.
Propagating Anoectochilus imitans might sound a little daunting, and I won’t lie, they can be a tad fussy. They’re not quite a beginner-level plant, but with a little patience and the right approach, you can absolutely achieve success and multiply these jewels. The reward of seeing a tiny cutting transform into a thriving new plant is just immense, isn’t it?
The Best Time to Start
When it comes to getting your Anoectochilus imitans off to a good start, spring is your best friend. Think of it as your plant’s natural waking-up period after a winter’s rest. The days are getting longer, the sun is returning with a gentle warmth, and new growth is generally more vigorous. Aim for when you see active new shoots emerging from your parent plant. This tells you it has the energy reserves to spare for a cutting.
Supplies You’ll Need
Gathering your supplies ahead of time makes the whole process so much smoother. Here’s what I always have on hand:
- Sharp, sterilized pruning shears or a clean razor blade: You want a precise cut to avoid crushing the plant’s delicate tissues.
- A loose, well-draining potting mix: I like to use a blend of orchid bark, perlite, and a bit of sphagnum moss. Think airy and moist, not soggy.
- Small pots or propagation trays: Anything that can hold your potting mix and your cutting.
- Optional: Rooting hormone powder or gel: While not strictly necessary for Anoectochilus imitans, it can give your cuttings a little extra encouragement.
- A spray bottle: For misting.
- A clear plastic bag or a propagation dome: To create a humid environment.
Propagation Methods
For Anoectochilus imitans, simple propagation via stem cuttings is usually the most effective. They don’t readily divide like some other plants.
Here’s how I do it:
- Select a healthy stem: Look for a mature stem on your parent plant that has at least two to three leaf nodes. A node is where a leaf attaches to the stem. These are where root buds will form.
- Make a clean cut: Using your sterilized shears or razor, make a cut just below a leaf node. Try to get a cutting that’s about 3-4 inches long.
- Remove the lower leaves: Gently pinch off the leaves from the bottom half of the cutting. This prevents them from rotting when they’re buried in the substrate. You want one or two leaves remaining at the top to help with photosynthesis.
- Optional step: Apply rooting hormone: If you’re using it, lightly dip the cut end into the rooting hormone powder or gel. Tap off any excess.
- Plant your cutting: Gently insert the cut end into your prepared potting mix, ensuring at least one node is buried beneath the surface. Firm the mix gently around the stem.
- Create a humid environment: Water the potting mix lightly until it’s just moist, not waterlogged. Then, cover the pot or propagation tray with a clear plastic bag or a propagation dome. This traps humidity, which is crucial for these sensitive plants.
The “Secret Sauce” (Pro Tips)
Now for a couple of little tricks I’ve picked up over the years that really seem to make a difference:
- Avoid “drowning” the leaves: When misting or watering, be super careful that water doesn’t sit on the leaves for extended periods, especially the lower ones that might be touching the soil. This can lead to nasty fungal issues and rot.
- The magic of bottom warmth: Anoectochilus imitans get a real boost when their roots are cozy. Placing your propagation setup on a gentle heat mat can significantly speed up root development. Just keep the temperature at a consistent, warm level, around 75-80°F (24-27°C).
Aftercare & Troubleshooting
Once your cutting is planted and nestled in its humid haven, patience is key!
Keep the soil consistently moist but never soggy. You’ll want to mist the leaves lightly every day or two, and give the soil a gentle watering when the top layer starts to feel dry. Keep it out of direct sunlight – bright, indirect light is perfect.
The first sign of success will be new leaf growth emerging from the top. This usually takes several weeks, sometimes even a couple of months. You might also see tiny white root nubs peeking out from the drainage holes, or feel a gentle tug when you lightly pull on the cutting.
Now, what if things go wrong? The most common culprit is rot. If your cutting turns mushy and black, especially at the base, it’s a sign of too much moisture and not enough air circulation. If you see this happening, try to remove the affected part immediately with your sterile shears and allow the remaining part to dry slightly before replanting in fresh, drier mix. Overwatering is the biggest danger here. If you notice leaves wilting and the soil is dry, it’s usually just thirst, but if the soil is wet and they’re wilting, it points to root rot.
And there you have it! Propagating these velvet beauties is a journey that’s well worth the effort. Don’t be discouraged if your first attempt isn’t perfect. Every plant is a learning opportunity. Enjoy the process, celebrate each tiny sign of progress, and soon you’ll have a collection of these magnificent Anoectochilus imitans to share. Happy gardening!
Resource:
https://identify.plantnet.org/k-world-flora/species/Anoectochilus%20imitans%20Schltr./data