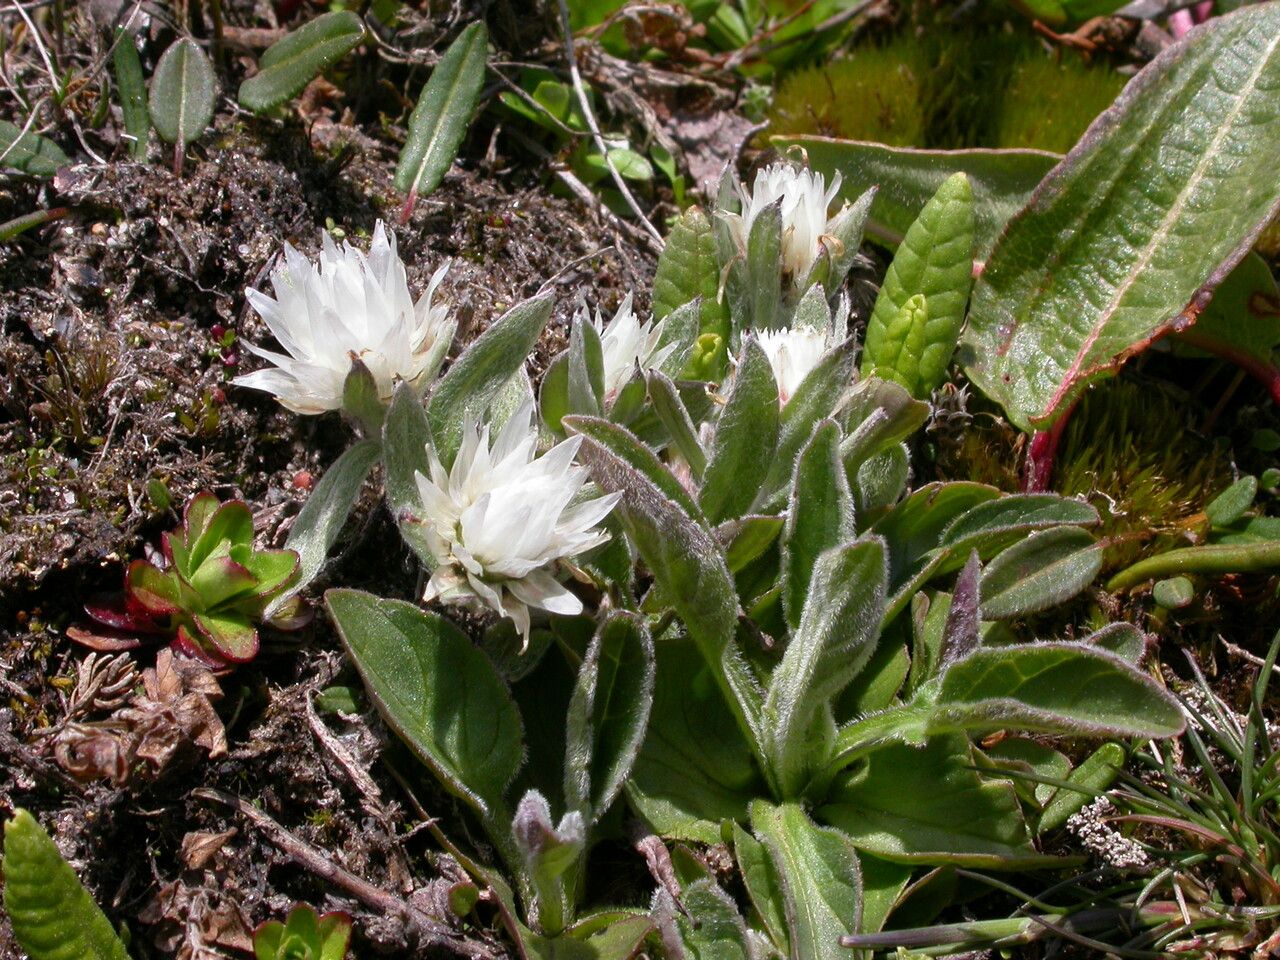
Oh, hello there! Grab a cuppa, and let’s talk about a real gem of a plant: Anaphalioides papuana. If you’ve ever seen this beauty gracing someone’s garden or a plant shop, you’ll know why it’s so special. It boasts this incredible, fuzzy foliage that just begs to be touched, and it sends up delicate little papery flowers that add such a unique texture. Growing more of these lovelies from cuttings or divisions is just about as satisfying as it gets in the garden. For those dipping their toes into propagation, I’d say Anaphalioides papuana is a moderately easy plant to work with. It’s not going to throw a fit if you miss a watering, but a little bit of know-how goes a long way.
The Best Time to Start
For the highest success rate with our papery friend, I’ve found that late spring to early summer is your sweet spot. This is when the plant is in its most vigorous growth phase, meaning cuttings are packed with energy and ready to make roots. So, look for new, healthy stems that aren’t woody or too soft.
Supplies You’ll Need
You don’t need a fancy lab to get started! Here’s what I always have on hand:
- Sharp, clean pruning shears or a sharp knife: Essential for making clean cuts.
- Well-draining potting mix: A mix of perlite, peat moss, and a bit of coir works wonders, or even a sturdy succulent mix.
- Small pots or seed trays: Clean ones, of course!
- Rooting hormone (optional but recommended): A powder or gel can give your cuttings a helpful boost.
- Plastic bags or a propagator: To create a humid environment.
- Watering can with a fine rose: For gentle watering.
- Labels and a pen: To keep track of your precious new plants!
Propagation Methods
Let’s get our hands dirty! Anaphalioides papuana is quite amenable to a few different propagation techniques.
Stem Cuttings
This is my go-to method because it’s so effective.
- Select Your Stems: Look for softwood or semi-hardwood cuttings from healthy, non-flowering stems. Aim for pieces about 4-6 inches long.
- Make the Cut: Using your clean shears, make a clean cut just below a leaf node. This is where the magic of rooting tends to happen.
- Prepare the Cutting: Gently remove the lower leaves. You want to expose the nodes where roots will emerge. You can leave a couple of leaves at the top to help the cutting photosynthesize. If the leaves are large, don’t hesitate to pinch them in half to reduce water loss.
- Apply Rooting Hormone (Optional): Dip the cut end into your rooting hormone, tapping off any excess.
- Potting Up: Fill your small pots with your well-draining mix. Make a dibble hole with a pencil or your finger.
- Insert the Cutting: Gently push the cutting into the hole, ensuring the leaf nodes are in contact with the soil. Firm the soil gently around the base.
- Create Humidity: Water the soil lightly, then cover the pot with a clear plastic bag, propping it up with a small stick or wire so it doesn’t touch the leaves. Alternatively, place the pots in a propagator.
Division
If your plant is already a nice clump, division is a fantastic way to get multiple plants quickly.
- Gently Excavate: Carefully lift the entire plant from its pot or a sunny spot in the garden. If it’s in the ground, dig around it and lift carefully.
- Loosen the Root Ball: Gently shake off excess soil from the roots.
- Separate the Divisions: You can often gently pull the root ball apart with your hands. If it’s a bit stubborn, use a clean, sharp knife or trowel to slice through the roots. Ensure each new division has a healthy portion of roots and some top growth.
- Pot Them Up: Pot each division into its own container filled with your well-draining mix.
The “Secret Sauce” (Pro Tips)
Here are a couple of tricks I’ve learned over the years that make a big difference:
- The Humidity Hut is Key: That plastic bag or propagator? It’s your best friend! These fuzzy leaves can dry out quickly, so maintaining consistently high humidity around the cuttings is crucial until they root. I often mist the inside of the bag lightly every few days, but be careful not to overdo it.
- Bottom Heat is Your Unsung Hero: While not strictly necessary, placing your pots on a gentle heat mat can significantly speed up root development. It mimics the warmth of spring soil and really encourages those roots to get moving.
Aftercare & Troubleshooting
Once your cuttings start to show signs of life – think new leaf growth or resistance when you very gently tug on them – it’s time for them to get a bit more air.
- Acclimatize: Gradually remove the plastic bag or open the propagator vents over a week or so. This allows the new plant to adjust to normal humidity levels.
- Watering: Water when the top inch of soil feels dry. Avoid letting them sit in soggy soil, as this is a prime cause of root rot, which looks like browning or mushy stems.
- Light: Place them in a bright, indirect light location. Direct sun can scorch tender new growth.
- Troubleshooting: If you see your cuttings wilting, yellowing, or developing black spots, it could be too much water, not enough humidity, or even fungal issues. Remove any affected parts immediately and adjust your care. If a cutting just doesn’t seem to be doing anything after several weeks, don’t despair! Sometimes they take their sweet time, or unfortunately, they just don’t make it. Gardening is a journey, after all.
A Little Word of Encouragement
Propagating plants is a beautiful dance with nature. Don’t be discouraged if not every cutting takes off. Each attempt is a learning experience, and the joy of nurturing a new life from a tiny piece of your beloved plant is truly immense. So, be patient, be observant, and most importantly, enjoy the process. Happy propagating!
Resource: