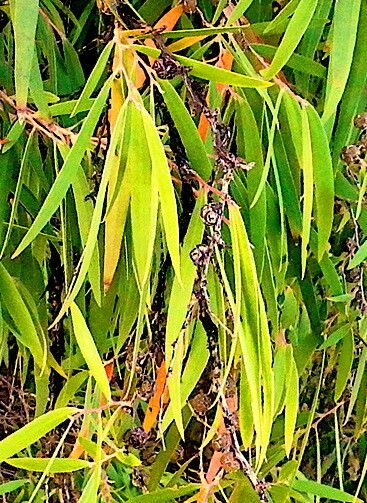
Oh, hello there, fellow plant lover! It’s so lovely to have you join me for a chat about one of my absolute favorite trees: the Agonis flexuosa, or as we often lovingly call it, the Willow Myrtle. Its graceful, weeping branches and delicate, fragrant foliage cast such a beautiful, almost ethereal, spell in the garden. Growing them from scratch? Well, that’s a special kind of joy, like watching a tiny miracle unfold right before your eyes. And the great news is, propagating this beauty is wonderfully rewarding, and I’d say it’s a pretty approachable project for most gardeners, even if you’re just starting out on your green-thumb journey.
The Best Time to Start
When it comes to coaxing new life from your beloved Agonis flexuosa, timing is key. I’ve found the absolute best window for taking cuttings is during the late spring to early summer. This is when the plant is actively growing, full of vigor, and has plenty of energy to invest in rooting. Look for semi-hardwood cuttings – that’s wood that’s starting to firm up but still has a bit of flexibility. You don’t want to go for brand-new, floppy soft growth, nor do you want wood that’s completely hardened off.
Supplies You’ll Need
Before we get our hands dirty, let’s gather our tools. Having everything ready makes the process so much smoother.
- Sharp Pruning Shears or a Craft Knife: Clean cuts are essential for successful rooting.
- Rooting Hormone Powder or Gel: This is a fantastic boost for cuttings, encouraging them to develop roots more readily.
- A Well-Draining Potting Mix: I love a mix of perlite, peat moss, and a good quality potting soil. You can also use a specialized seedling mix.
- Small Pots or Seed Trays: Clean containers are a must.
- A Clear Plastic Bag or Dome: This helps maintain high humidity around your cuttings.
- Water Spray Bottle: For keeping things moist.
- Optional: Small Labels and a Pen: To keep track of what you’ve propagated.
- Optional: A Heat Mat: Especially helpful if your ambient room temperature is on the cooler side.
Propagation Methods
Let’s dive into how to bring new Agonis flexuosa plants to life!
Stem Cuttings: My Go-To Method
This is generally the most reliable way to propagate Agonis flexuosa.
- Select Your Cuttings: Head out to your Agonis flexuosa and look for healthy, vigorous stems. You want pieces that are about 4-6 inches long. Gently bend a stem. If it snaps cleanly, it’s too hard. If it bends without breaking, it’s likely too soft. Aim for that sweet spot in between.
- Make the Cut: Using your sharp pruning shears or a clean knife, take your cuttings. Make the cut just below a leaf node (where leaves emerge from the stem). This is where the magic happens for root formation.
- Prepare the Cuttings: Carefully remove the lower leaves from the bottom 2-3 inches of each cutting. This prevents them from rotting in the soil. You can leave the top few leaves on, but if they are very large, consider trimming them in half to reduce moisture loss through transpiration.
- Apply Rooting Hormone: Dip the cut end of each prepared cutting into your rooting hormone, tapping off any excess.
- Plant Your Cuttings: Fill your clean pots with your prepared potting mix. Make a small pilot hole in the center of the soil with a pencil or your finger. Gently insert the end of the cutting into the hole, making sure the rooting hormone stays on the stem. Firm the soil gently around the base of the cutting.
- Water and Cover: Water the soil thoroughly until it’s evenly moist but not waterlogged. Then, either place a clear plastic bag over the pot, securing it with a rubber band around the rim, or place the pot inside a humidity dome. This creates a mini-greenhouse effect.
Water Propagation (Less common for Agonis, but can work!)
While cuttings often do best in soil, you can experiment with water propagation, though it’s often a bit fussier for woody plants.
- Prepare Cuttings: Follow steps 1-3 above for selecting and preparing your cuttings.
- Place in Water: Put the cuttings in a clean jar or vase filled with fresh water. Ensure that no leaves are submerged in the water; they will rot.
- Change Water Regularly: Change the water every few days to keep it fresh and oxygenated.
- Wait for Roots: Be patient! You’re looking for small, white roots to emerge from the nodes. Once they are about an inch long, you can try to pot them up into soil. This transition can be tricky for some plants.
The “Secret Sauce” (Pro Tips)
Here are a few tricks I’ve picked up over the years that can really make a difference:
- Bottom Heat is Your Friend: If you have a heat mat, place your pots on it. This gently warms the soil from below, which is a huge encouragement for root development. Plants often root faster and more reliably with it.
- Don’t Disturb Too Soon: Resist the urge to tug on your cuttings to see if they have roots! Let them be. I usually wait at least 4-6 weeks before gently checking. You’ll see new leaf growth or feel a slight resistance when they’ve taken.
- Think About Air Circulation: While humidity is crucial, you don’t want stagnant, damp air. Periodically open the plastic bag or dome for a few minutes each day to allow for some air exchange. This helps prevent fungal issues.
Aftercare & Troubleshooting
Once you see those glorious little roots appearing, it’s time for a new phase of care.
- Transplanting: When your cuttings have a good network of roots (you might see them peeking out of the drainage holes), it’s time to transplant them into individual pots. Use a good quality, lightweight potting mix. Water them in gently.
- Gradual Acclimatization: The new baby plants have been living in a humid, protected environment. They need to get used to your home’s conditions. Slowly start to open their covering over a few days, or gradually increase the time they spend outside their dome.
- Keep Them Moist: Until they’re well established, keep the soil consistently moist but not soggy. You’ll get a feel for it.
- Troubleshooting: The most common issue you might face is rot. If your cuttings turn yellow, mushy, and brown, they’ve likely rotted. This can be due to overwatering or poor air circulation. If you see a white, fuzzy mold on the soil surface, it’s a sign of too much moisture. Prune away any affected parts immediately. If your cuttings simply don’t show any signs of life after a couple of months, don’t get discouraged; sometimes, they just don’t take.
Growing Agonis flexuosa from cuttings is such a fulfilling experience. It connects you to the plant’s life cycle in a truly meaningful way. Be patient with the process, celebrate each little success, and don’t be afraid to experiment. Happy propagating!
Resource:
https://identify.plantnet.org/k-world-flora/species/Agonis%20flexuosa%20(Willd.)%20Sweet/data