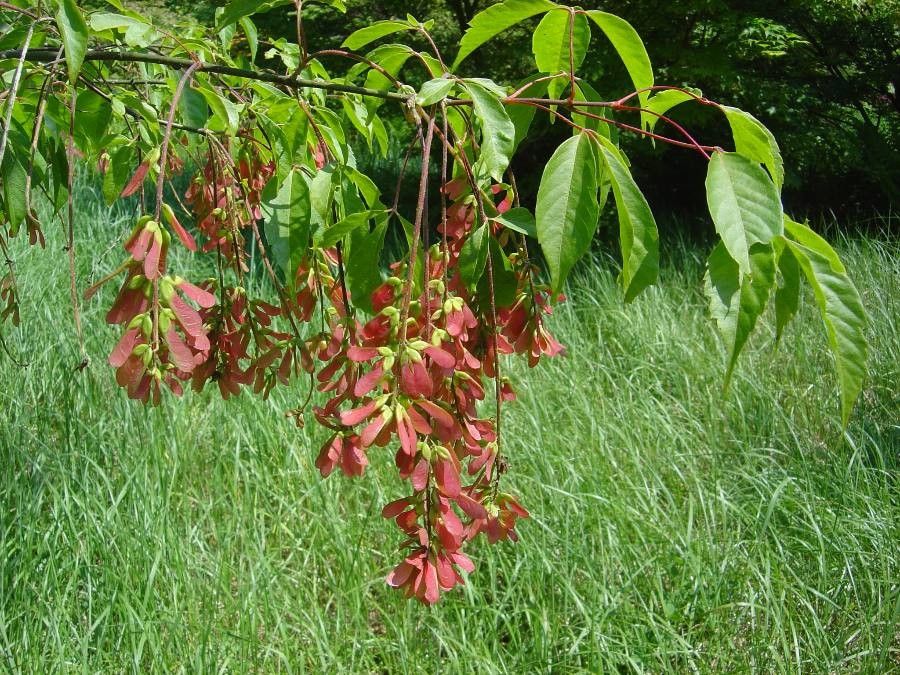
Oh, Acer henryi! It’s such a lovely choice for any garden, isn’t it? I remember the first time I saw its delicate, three-lobed leaves unfurl in spring, a soft bronze that deepened to a gorgeous green, then flushed with fiery reds and oranges in autumn. It’s truly a showstopper. And let me tell you, propagating this little gem is incredibly rewarding. It’s not the absolute easiest plant for a complete beginner, but with a little focused attention, you’ll be handsomely rewarded with a whole new generation of these beauties. It’s a process that connects you deeply to the rhythm of your garden.
The Best Time to Start
For Acer henryi, late spring to early summer is your sweet spot. This is when the plant is actively growing, and the new shoots are semi-hardwood. They’re not too soft and floppy, but not too mature and woody either. This stage offers the best chance for cuttings to strike root successfully.
Supplies You’ll Need
- Clean, sharp pruning shears or a sharp knife: To make clean cuts and avoid damaging the stems.
- Rooting hormone powder or gel: This isn’t always strictly necessary, but it gives your cuttings a fantastic head start.
- A well-draining potting mix: I like a blend of equal parts peat moss or coco coir, perlite, and vermiculite. This ensures good aeration and prevents waterlogging.
- Small pots or trays with drainage holes: Cleanliness is key here!
- A clear plastic bag or a propagator with a lid: To create a humid environment for your cuttings.
- Spray bottle: For lightly misting the cuttings.
Propagation Methods
We’ll focus on stem cuttings, as it’s the most reliable method for Acer henryi.
- Take Your Cuttings: In late spring to early summer, select healthy, vigorous stems that have started to mature slightly (they’ll snap cleanly when bent, not just bend). Look for stems that are about pencil-thick and have at least two or three sets of leaves. Using your clean shears, take cuttings that are 4-6 inches long. Make your cut just below a leaf node (the point where a leaf attaches to the stem).
- Prepare the Cuttings: Gently remove the lower leaves from the cutting, leaving just one or two sets at the very top. This prevents them from rotting in the soil and encourages root development. If the remaining leaves are large, you can carefully cut them in half horizontally to reduce water loss through transpiration.
- Dip in Rooting Hormone: Dip the cut end of each stem into your rooting hormone. Tap off any excess. This step is crucial for boosting your success rate.
- Potting Up: Fill your clean pots with your prepared well-draining potting mix. Make a small hole in the center of the soil with your finger or a pencil. Insert the prepared cutting into the hole, ensuring the bottom nodes are buried. Gently firm the soil around the base of the cutting.
- Create a Humid Environment: Water the soil lightly. Then, cover each pot loosely with a clear plastic bag (you can use a wooden skewer to support the bag and keep it from touching the leaves) or place them inside a propagator. This creates a mini-greenhouse effect, maintaining the humidity your cuttings need to survive while they establish roots.
- Placement: Place your pots in a bright location, but out of direct sunlight. A warm spot is ideal.
The “Secret Sauce” (Pro Tips)
- Bottom Heat is Your Friend: If you have a heated propagator mat, using it can make a world of difference. A gentle warmth from below encourages root formation much more effectively than just ambient temperature.
- The Air Layering Trick: For a slightly more advanced but often very successful method, consider air layering. This involves making a shallow cut on a well-formed branch still attached to the parent plant, then wrapping that wounded area with moist sphagnum moss and covering it securely with plastic wrap. Roots will form within the moss, and once they’re substantial, you can sever the branch below the roots and plant it. It’s like giving your plant a head start before it even leaves its mother!
- Don’t Disturb Them Too Soon: Resist the urge to pull on your cuttings to see if they have roots. You’ll only damage delicate new growth. Wait at least 4-6 weeks before gently tugging. If there’s resistance, you’ve got roots!
Aftercare & Troubleshooting
Once you see new growth appearing on your cuttings, it’s a very good sign! This usually means roots are forming. Gradually acclimatize your new plants to normal humidity by opening the plastic bag or propagator vents a little each day over a week. Continue to keep the soil lightly moist but not waterlogged.
The most common sign of trouble is rot. If your cuttings turn mushy, black, or start to wilt significantly despite being kept humid, it’s usually due to too much moisture. Overwatering is the biggest culprit. Ensure your potting mix is well-draining and that your pots have drainage holes. If you see signs of rot, remove the affected cuttings immediately to prevent it from spreading. Sometimes, a slightly less humid environment can help if rot is persistent.
A Encouraging Closing
Propagating Acer henryi is a journey, and like all good gardening, it requires a touch of patience and a good dose of hope. Don’t be discouraged if not every cutting succeeds; nature has its own way. Celebrate the wins, learn from the setbacks, and most importantly, enjoy the quiet satisfaction of nurturing a new plant into existence. Happy gardening!
Resource:
https://identify.plantnet.org/k-world-flora/species/Acer%20henryi%20Pax/data