Oh, hello there! Come on in, pull up a chair. I’ve got a fresh pot of coffee brewing, and today, we’re going to talk about a truly delightful plant: Bunchosia argentea, or as many of us affectionately call it, the silver bush or peanut butter tree. Isn’t that just the most charming name? And believe me, a plant that smells a bit like peanut butter isn’t something you forget easily!
Introduction
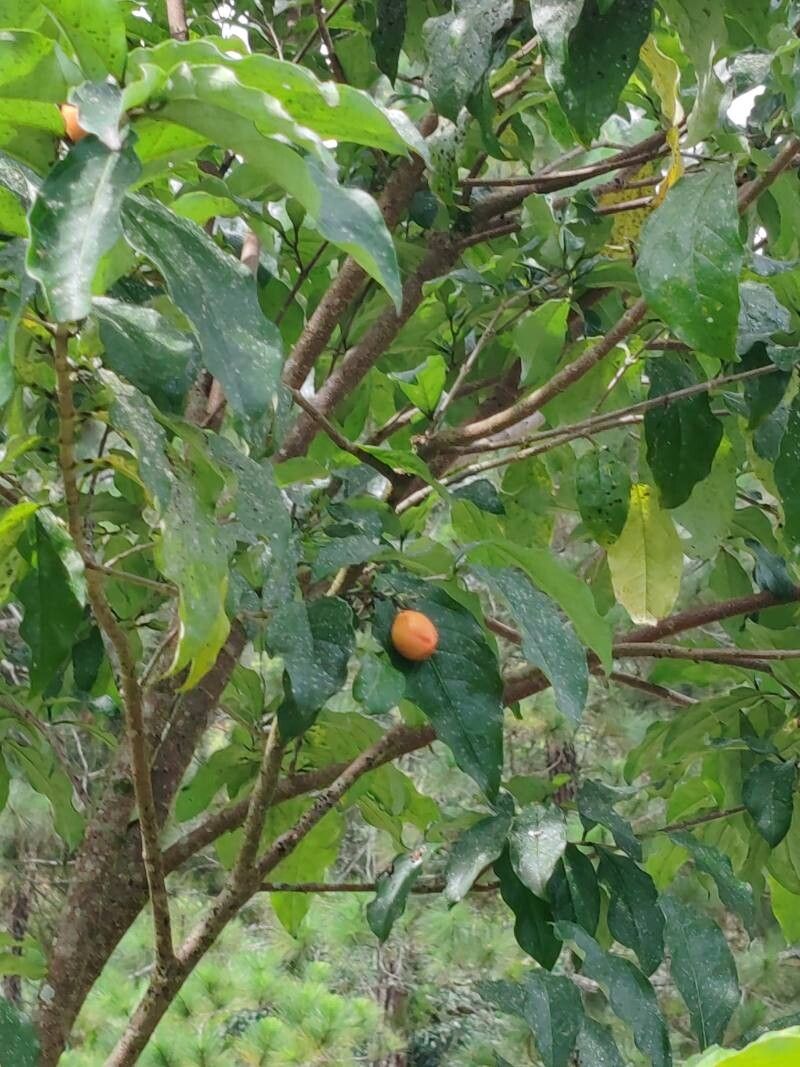
The Bunchosia argentea is a real gem. Its shimmering silver-green leaves are beautiful year-round, adding a touch of elegance to any garden or even a bright indoor space. And the flowers? Delicate little yellow blooms that often precede those intriguing, reddish, peanut-butter-scented fruits. Getting your own little silver bush is incredibly rewarding, a tangible connection to something you’ve helped bring to life. Is it for absolute beginners? I’d say it’s moderately easy. It’s not as foolproof as a pothos, but with a little attention, you’ll have success.
The Best Time to Start
When it comes to timing, I’ve found that late spring or early summer is your sweet spot. This is when the plant is really in its active growth phase, sending out nice, healthy new shoots. We want those to be our best candidates for taking cuttings. Trying to propagate when the plant is dormant just doesn’t give us the energy we need to get those roots forming.
Supplies You’ll Need
Before we get our hands dirty, let’s gather our little helpers. Having everything ready makes the process so much smoother:
- Sharp Pruning Shears or a Clean Knife: For making clean cuts. I always like to sterilize mine with rubbing alcohol.
- Rooting Hormone: This is like a little booster shot for your cuttings. You don’t have to use it, but it certainly speeds things up and increases your success rate.
- Well-Draining Potting Mix: I usually mix about half good quality potting soil with half perlite or coarse sand. This ensures no soggy feet!
- Small Pots or Propagation Trays: Clean ones, of course! About 4-6 inch pots are usually perfect.
- Clear Plastic Bags or Domes: To create a humid environment for your cuttings.
- Watering Can or Spray Bottle: For gentle watering.
Propagation Methods
For Bunchosia argentea, stem cuttings are my go-to method. It’s reliable and gives you a nice, established plant relatively quickly.
Here’s how I do it:
- Select Your Cuttings: Look for healthy, vigorous stems that are semi-hardwood. This means they’re not brand new, floppy growth, but also not old, woody stems. You’re looking for a bend when you gently try to snap them – not too stiff, not too limp. Aim for cuttings about 4-6 inches long.
- Make the Cut: Using your sterilized shears or knife, make a clean cut just below a leaf node (that little bump where a leaf grows from the stem). This is where the magic happens for root formation.
- Prepare the Cutting: Gently remove any lower leaves from your cutting. You want to leave about 2-3 leaves at the top. If the remaining leaves are very large, I sometimes trim them in half to reduce water loss.
- Dip in Rooting Hormone (Optional but Recommended): Dip the cut end of the stem into your rooting hormone powder or gel. Tap off any excess.
- Plant Your Cutting: Fill your small pots with your prepared potting mix. Make a small hole with your finger or a pencil. Gently insert the end of the cutting into the hole, ensuring the leaf nodes where you removed leaves are buried. Firm the soil gently around the cutting.
- Water Gently: Water the soil thoroughly until water drains from the bottom.
- Create a Humid Environment: Place your potted cuttings inside a clear plastic bag or cover them with a propagation dome. This traps moisture, creating that humid microclimate they love. Make sure the leaves do not touch the inside of the plastic bag if possible – that can lead to rot. You can use stakes to prop up the bag if needed.
- Provide the Right Conditions: Place your cuttings in a bright spot, but out of direct sunlight, which can scorch them. A place with indirect light, like on an east-facing windowsill or a couple of feet away from a south-facing window, is ideal.
The “Secret Sauce” (Pro Tips)
After all these years, I’ve learned a few little tricks that make a big difference.
- Don’t be afraid to use bottom heat if you have it. A small seedling heat mat kept at around 70-75°F (21-24°C) can significantly speed up root development. It mimics the cozy warmth of spring.
- Mist regularly. Even with the humidity dome, giving the leaves a light misting every few days can help keep them plump and happy while they’re trying to establish roots.
- Be patient with watering. Once your cuttings are planted, you want to keep the soil consistently moist, but not waterlogged. Overwatering is the fastest way to end up with sad, rotten cuttings. It’s better to let the very surface of the soil dry out slightly between waterings than to drown your efforts.
Aftercare & Troubleshooting
Once you start to see signs of life – that’s the exciting part! You might notice new leaf growth appearing after a few weeks. This is your cue that roots are forming!
When your cuttings have developed a decent root system (you can gently tug on them to feel resistance, or if you’re really curious, you can carefully tip them out of the pot), it’s time to transplant them into slightly larger pots. Continue to water them consistently, and gradually introduce them to more light.
What if things go wrong? The most common issue is rot. If your cuttings look mushy, discolored (brown or black), or just droop and refuse to perk up, it’s likely rot. This is usually caused by too much moisture and not enough airflow. If you catch it early, you might be able to salvage a healthy section by cutting it off and trying again, but often, it’s best to discard and start fresh. Another sign of failure is simply no growth after an extended period. This might mean the cutting wasn’t viable, or the conditions weren’t quite right.
A Encouraging Closing
Taking cuttings can feel a bit like a gamble at first, can’t it? But each attempt is a learning experience. Remember to celebrate the small victories, like a perfectly healthy cutting or the first hint of green. Be patient, keep your soil moist but not soggy, and enjoy the quiet satisfaction of nurturing something new into existence. You’ve got this!
Resource:
https://identify.plantnet.org/k-world-flora/species/Bunchosia%20argentea%20(Jacq.)%20DC./data