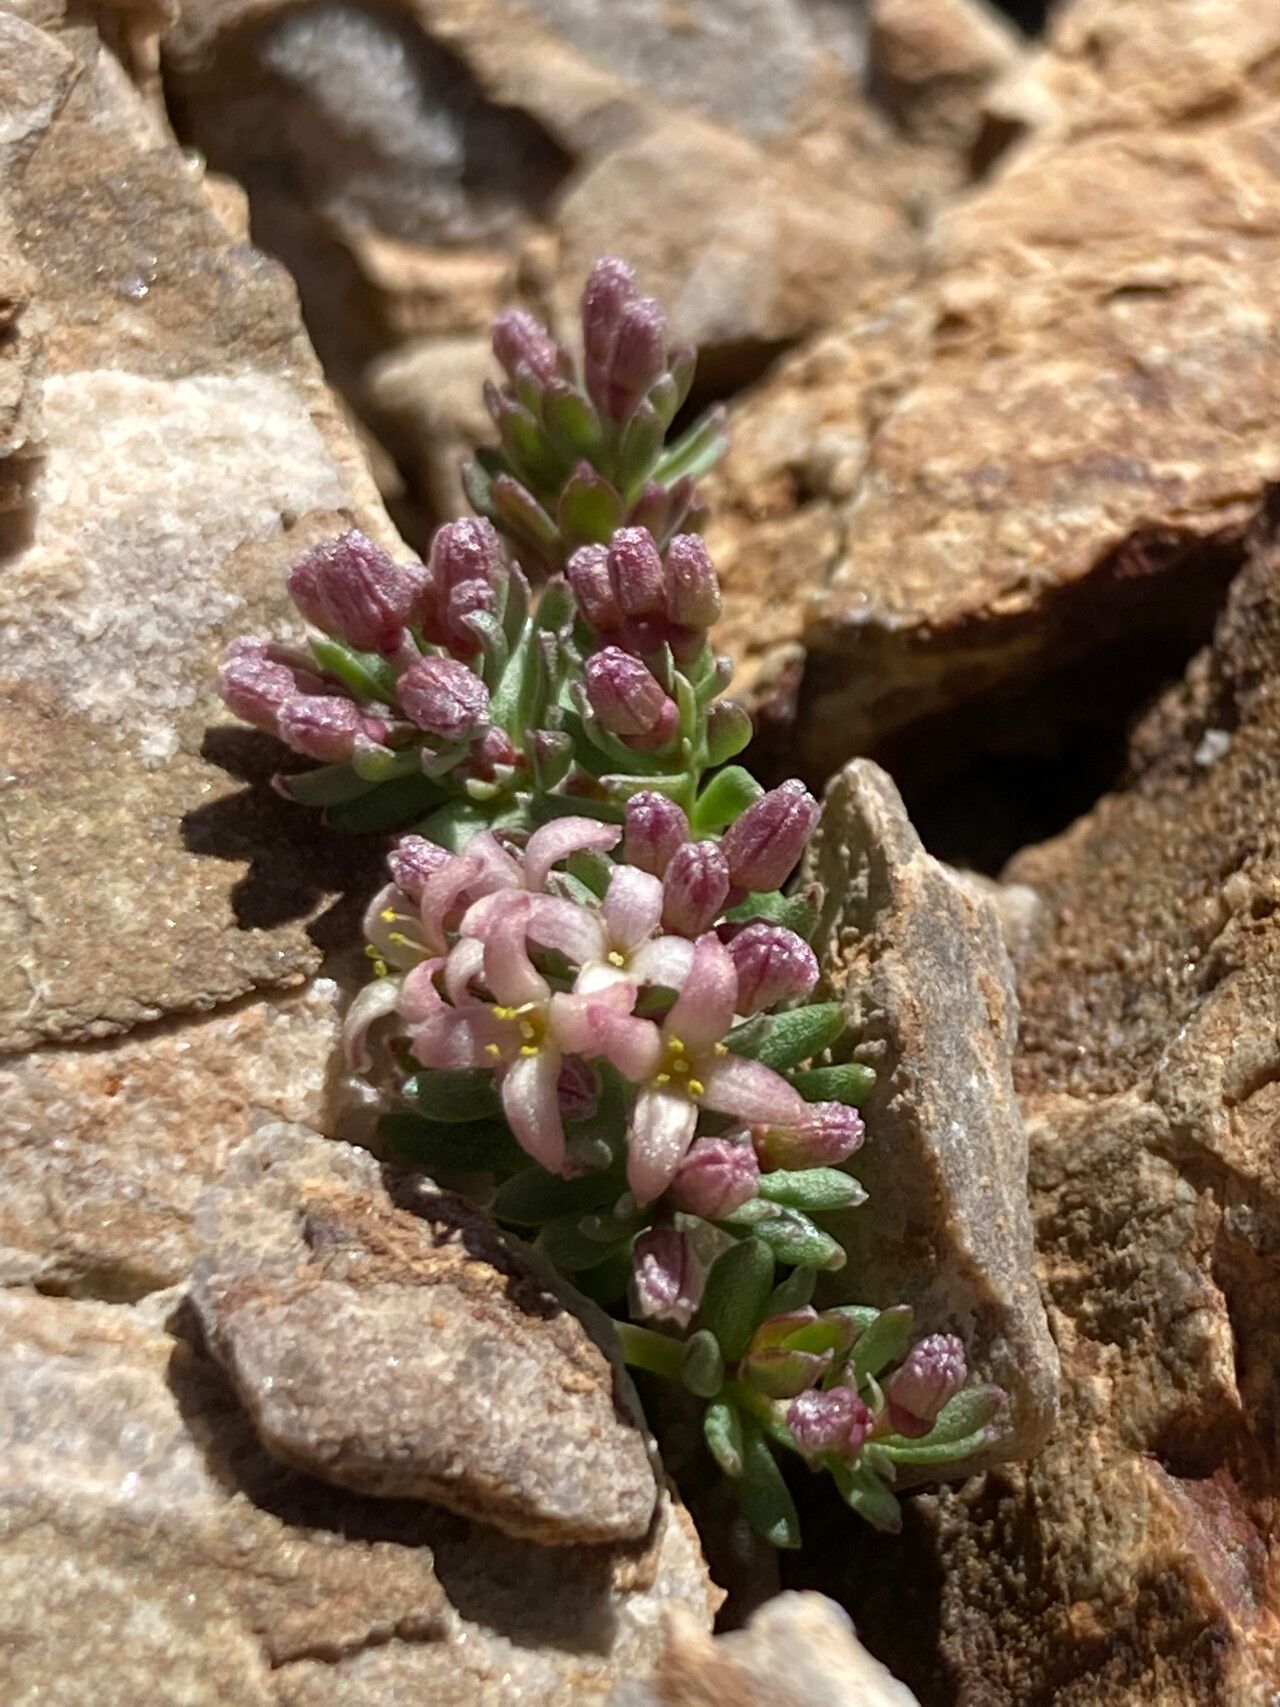
Well hello there, fellow green-thumb enthusiasts! It’s so lovely to have you join me for a chat about a truly special plant: Galium cometerhizon, often charmingly called comet’s tail bedstraw. This isn’t your average garden filler. Its delicate, wispy foliage, often tipped with tiny starry flowers, brings an airy, ethereal beauty to any garden. Imagine it trailing over a stone wall or spilling from a hanging basket – it’s pure magic.
Now, if you’re new to this whole gardening adventure, you might be wondering if Galium cometerhizon is going to be a tough nut to crack. I’m happy to say, it’s quite generally a forgiving plant to propagate. With a little patience and these tips, you’ll be well on your way to multiplying its charm in no time. It’s a wonderfully rewarding experience to take a piece of a plant you love and nurture it into a new life.
The Best Time to Start
When it comes to Galium cometerhizon, I find late spring to early summer is your golden ticket. This is when the plant is actively growing, sending out fresh, vibrant shoots. These younger, more vigorous stems are much more likely to root successfully than older, woodier ones. Think of it as taking cuttings from a teenager – full of energy and ready to take on the world (or, in this case, the soil!).
Supplies You’ll Need
Let’s get our toolkit ready! Here’s what you’ll want to have on hand:
- Sharp, clean pruning shears or a sharp knife: Cleanliness is key to preventing disease.
- Rooting hormone (optional but recommended): This gives your cuttings an extra boost.
- Seed starting mix or a well-draining potting mix: A light, airy mix is perfect. I often use a blend of peat moss, perlite, and a touch of compost.
- Small pots or seed trays with drainage holes: Little homes for your new plants.
- Plastic bags or a propagator lid: To create a humid environment.
- Watering can or spray bottle with a fine mist setting.
- A sunny, but not scorching, spot.
- Bottom heat mat (optional but beneficial): This can speed up rooting.
Propagation Methods
There are a couple of reliable ways to get more Galium cometerhizon from your existing plants. I’ll walk you through my favorites.
Stem Cuttings
This is probably my go-to method for Galium cometerhizon. It’s straightforward and usually yields great results.
- Select your stems: Look for healthy, non-flowering shoots that are about 3-4 inches long. Gently bend one; if it snaps easily, it’s a good candidate.
- Make the cut: Using your sharp, clean pruners, make a clean cut just below a leaf node. The leaf node is where a leaf joins the stem, and it’s where roots are most likely to form.
- Prepare the cutting: Carefully remove the lower leaves. You want to strip away any leaves that might fall below the soil line. Leave just two or three sets of leaves at the top.
- Dip in rooting hormone (if using): Lightly dip the cut end of the stem into your rooting hormone powder. Tap off any excess.
- Plant your cutting: Gently insert the prepared cutting into your pots filled with your prepared potting mix. Make sure the leaf nodes you stripped are buried in the soil.
- Water gently: Give the soil a good, but gentle, watering. You want it moist, not waterlogged.
- Create humidity: Cover the pots with clear plastic bags or a propagator lid. This creates a mini-greenhouse effect, keeping the humidity high, which is crucial for cuttings to root before they can take up water through their roots.
Division
If your Galium cometerhizon has grown into a nice clump, division is a simple way to expand your collection.
- Gently lift the plant: In early spring (before it really takes off) or early autumn, carefully dig around the base of the plant and lift the entire clump from the soil.
- Separate gently: You can often gently pull the root ball apart with your hands. If it’s a bit stubborn, use a clean trowel or a sharp knife to cut it into smaller sections. Each section should have a good portion of roots and some healthy shoots.
- Replant immediately: Plant the divisions into their new homes as soon as possible. Water them in well.
The “Secret Sauce” (Pro Tips)
Here are a few little tricks I’ve picked up over the years that can make a big difference:
- Don’t let the leaves touch the water (for water propagation): If you decide to try rooting a few cuttings in water (which can be fun to watch!), make sure only the bare stem ends are submerged. Any leaves in the water will likely rot and can take the whole cutting down with them.
- Bottom heat is your friend: For stem cuttings, placing your pots on a gentle bottom heat mat can significantly speed up the rooting process. It mimics the warmth of spring soil and encourages those roots to get moving. Just a gentle warmth is all you need; too hot and you’ll cook your cuttings!
- Mist, don’t soak: When misting your cuttings under cover, don’t overdo it. A light misting two or three times a day is usually enough to keep the humidity up without making the soil soggy, which can lead to rot.
Aftercare & Troubleshooting
Once you start seeing signs of roots – little leaves unfurling, or a gentle tug on the cutting meeting resistance – you’re in business!
- Gradually acclimate: Slowly remove the plastic cover over a few days. Start by opening the bag a little, then taking it off for a few hours, and so on. This toughens up your new plant, preparing it for life outside the humid environment.
- Move to a brighter spot: Once the cuttings are well-rooted, they can handle more light. Move them to a spot where they’ll receive bright, indirect sunlight.
- Watering: Continue to water when the top inch of soil feels dry. Avoid overwatering, as this is the quickest way to invite root rot.
- Signs of trouble: The most common issue you’ll face is rot. If your cuttings turn black or mushy, especially at the base, it’s likely rot. This usually happens due to too much moisture and not enough airflow. If you see this, sadly, you’ll need to discard the affected cutting and review your watering and humidity levels. Yellowing leaves can sometimes indicate insufficient light.
A Encouraging Closing
There you have it! Propagating Galium cometerhizon is a truly delightful way to share its beauty. Don’t get discouraged if your first few attempts aren’t perfect. Gardening is a journey of learning and observation. Be patient, enjoy the process of nurturing these tiny new lives, and soon you’ll have a whole garden full of comet’s tails to admire. Happy growing!
Resource:
https://identify.plantnet.org/k-world-flora/species/Galium%20cometerhizon%20Lapeyr./data