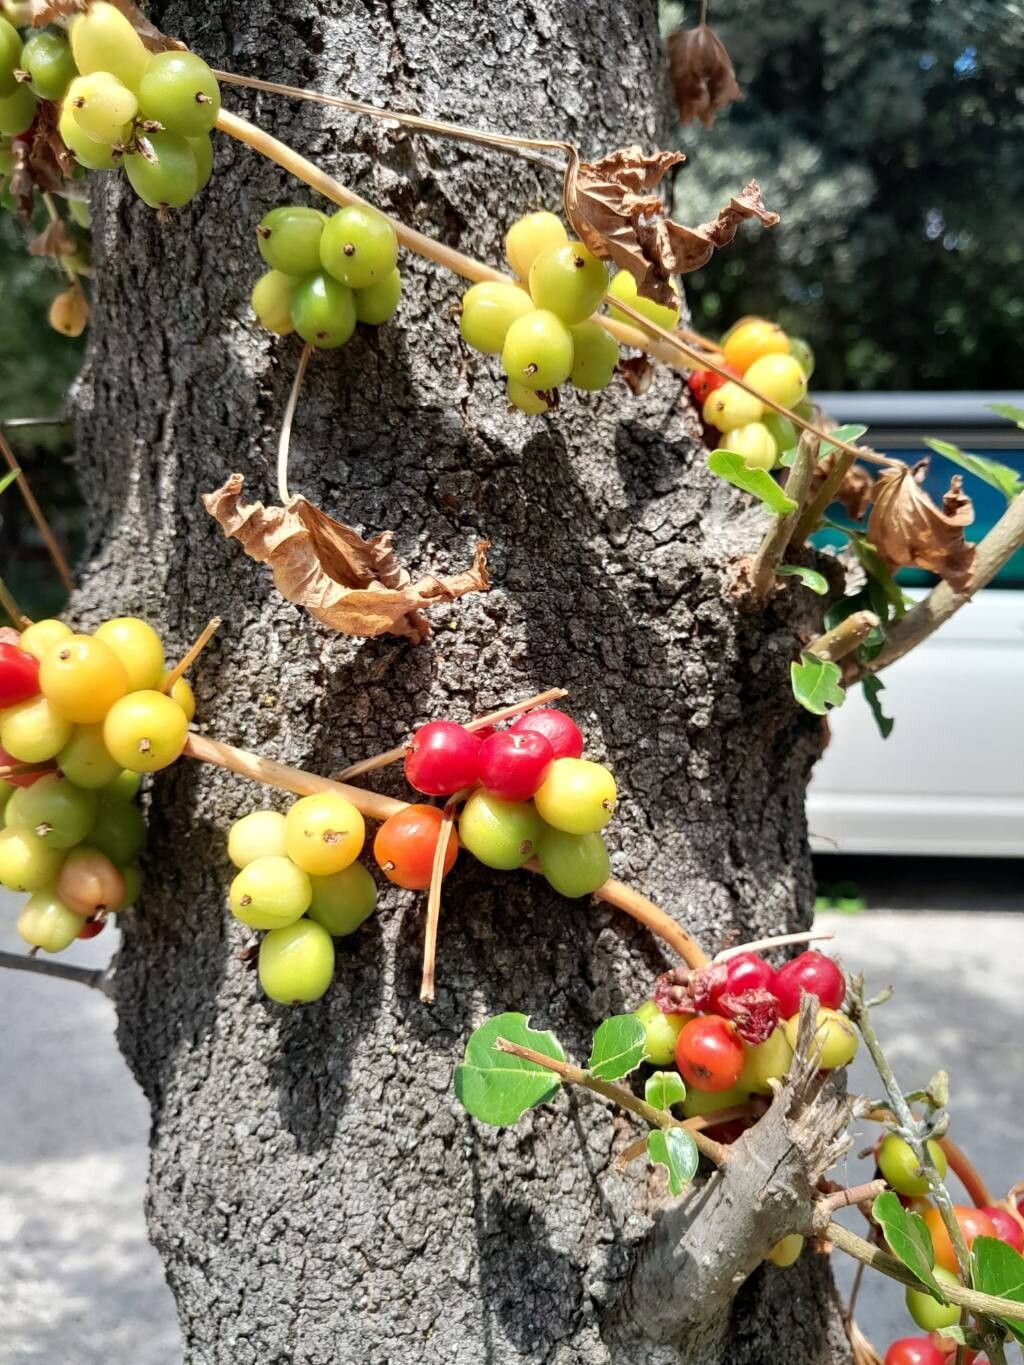
Hello, fellow garden enthusiasts! Today, I want to talk about a plant that holds a special place in my heart, and I think it just might steal yours too: Dioscorea communis, commonly known as Black Bryony. This vigorous climber, with its lush, heart-shaped leaves and delicate green flowers followed by striking red berries, adds a wonderful wild charm to any garden. It’s a fantastic choice for covering pergolas, trellises, or even rambling through trees. And the best part? Propagating it is incredibly rewarding, and surprisingly accessible. Don’t let its wild look fool you; while it demands a little attention, it’s not a particularly challenging plant to propagate, even for those of us just starting our gardening journey.
The Best Time to Start
When it comes to Dioscorea communis, timing is everything for the best results. I find that spring, as the plant is waking up from its winter dormancy and new growth is just starting to emerge, is your prime window. You can also have success later in the late spring or early summer with actively growing stems. Waiting until the plant is actively showing signs of life means you’re working with its natural energy reserves.
Supplies You’ll Need
Gathering your tools beforehand makes the whole process smoother. Here’s what I recommend having on hand:
- Sharp pruning shears or secateurs: Clean cuts are crucial for healthy cuttings.
- Well-draining potting mix: A blend of perlite, peat moss, and compost works wonders.
- Small pots or propagation trays: About 4-6 inches deep are ideal.
- Rooting hormone (optional but recommended): A powder or gel will help encourage root development.
- Plastic bags or a propagator lid: To maintain humidity.
- Watering can with a fine rose: For gentle watering.
- Labels and a marker: To keep track of your projects!
Propagation Methods
Several methods work well for Dioscorea communis, but my favorites are stem cuttings and division.
Stem Cuttings: This is my go-to for creating new plants.
- Select your stem: Look for healthy, non-flowering stems from the current season’s growth. They should be firm but not woody.
- Make the cut: Using your clean secateurs, take cuttings about 6-8 inches long. Make a clean cut just below a leaf node (where a leaf attaches to the stem).
- Prepare the cutting: Remove the lower leaves, leaving just one or two at the top. If the leaves are very large, you can even cut them in half horizontally to reduce water loss.
- Apply rooting hormone (optional): Dip the cut end of the stem into your rooting hormone, tapping off any excess.
- Plant your cutting: Fill your pots with your well-draining mix and make a hole with your finger or a pencil. Gently insert the cut end of the stem into the hole, ensuring the lowest leaf node is below the soil surface. Firm the soil around the stem.
- Water gently: Water the pot thoroughly until water drains from the bottom.
- Create humidity: Place the pot inside a plastic bag, sealing it loosely, or cover it with a propagator lid. This mini-greenhouse will keep the humidity high, which is vital for cuttings. Place the pot in a bright spot, but out of direct sunlight.
Division: For larger, established plants, division is a simple and effective way to get more plants.
- Dig up the plant: In early spring, carefully dig up your Dioscorea communis plant. Try to disturb the roots as little as possible.
- Locate the divisions: You’ll see that the root system often has natural growing points or clumps.
- Separate the sections: Using a clean spade or even your hands, carefully pull or cut the root ball into sections. Each section should have at least one strong bud or shoot and a good portion of roots.
- Replant immediately: Pot up the divisions in well-draining soil and water them in well.
The “Secret Sauce” (Pro Tips)
After years of getting my hands dirty, I’ve learned a few tricks that really boost my success rates:
- Don’t let the leaves touch the water: If you ever try water propagation (which Dioscorea communis can often tolerate, though I prefer soil), it’s crucial that the leaves aren’t submerged. Rot will set in quickly if they are. Aim to keep only the stem in the water.
- Bottom heat is your friend: For stem cuttings, placing your pots on a heated propagator mat can significantly speed up root formation. It mimics the warmth of spring soil and gives those roots a cozy environment to develop. You’ll be amazed at the difference it makes!
Aftercare & Troubleshooting
Once roots begin to form (you might see new leaf growth, or you can gently tug on the cutting – resistance means roots!), it’s time to transition your new plant.
- Gradually acclimate: If you used a plastic bag, gradually introduce the cuttings to normal humidity by opening the bag a little more each day over a week.
- Watering: Keep the soil consistently moist, but not waterlogged. As the plant grows, you can water it more like a mature specimen, allowing the top inch of soil to dry out between waterings.
- Signs of rot: The most common issue you’ll encounter is rot. If your cutting turns black and mushy, it’s a sign of too much moisture combined with poor air circulation. Unfortunately, a rotted cutting is usually unsalvageable. This is why good drainage and not overwatering are so critical.
A Little Patience Goes a Long Way
Growing new plants from cuttings or divisions is one of the most satisfying aspects of gardening. It feels like a small miracle to take a piece of a plant and nurture it into a whole new life. Be patient with your Dioscorea communis cuttings; they might take a few weeks to show signs of life, but when they do, you’ll feel a real sense of accomplishment. Enjoy the process, embrace the learning, and happy gardening!
Resource: