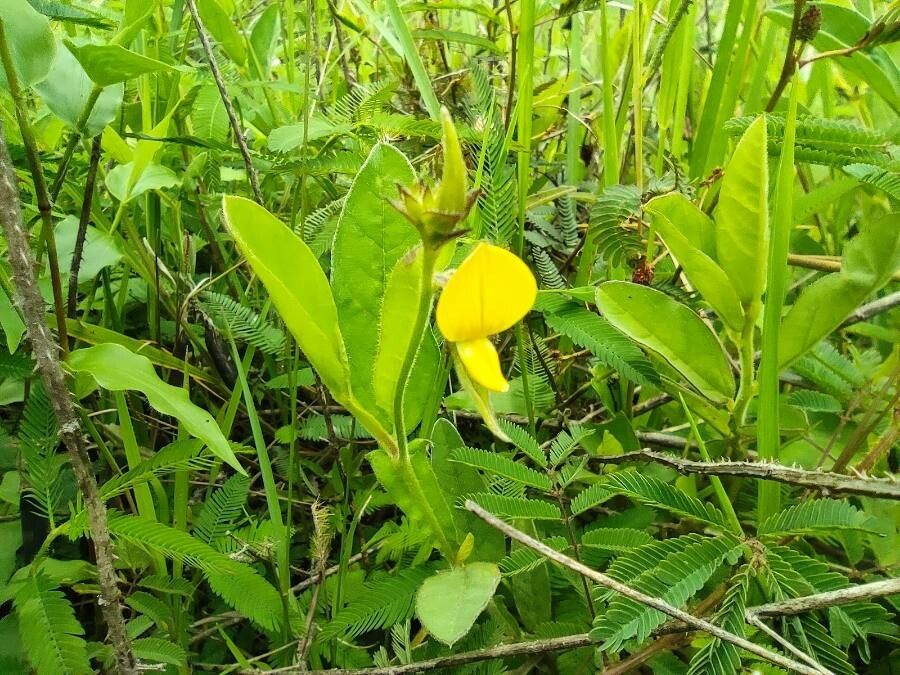
Hello, fellow plant lovers! I’m so excited to chat with you today about a truly delightful plant: Crotalaria alata. It’s a real gem, often overlooked, with its gorgeous, cascading yellow blooms and attractive foliage. If you’re looking for a plant that brings a sunshine-y vibe to your garden or home, this is it.
And the best part? Propagating it is a wonderfully rewarding experience. It’s accessible even for those just dipping their toes into the world of plant propagation. I’ve had great success with it, and I’m confident you will too!
The Best Time to Start
For the best chances of success with Crotalaria alata, I always recommend starting in late spring or early summer. This is when the plant is in its active growth phase. You’ll find that cuttings taken during this time root much more readily. Look for new, healthy growth – those little stems that are firm but not yet woody.
Supplies You’ll Need
Here’s what you’ll want to have on hand before you get started:
- Sharp pruning shears or a clean craft knife: We need to make clean cuts for healthy new plants.
- Rooting hormone (optional but helpful): This little booster can speed things up and increase your success rate.
- Well-draining potting mix: A mix of equal parts perlite and peat moss is ideal, or a good quality seed-starting mix will do in a pinch.
- Small pots or seed trays: Clean containers are key to preventing disease. Make sure they have drainage holes!
- Plastic bags or a propagation dome: This creates a humid microclimate for your cuttings.
- Watering can with a fine rose: Gentle watering is crucial.
- Labels: Don’t forget to label your new little babies!
Propagation Methods
Let’s get our hands dirty! Here are the methods I find most effective for Crotalaria alata:
Stem Cuttings:
This is my go-to method for Crotalaria alata. It’s straightforward and yields fantastic results.
- Select your cutting: Look for a healthy, non-flowering stem that’s about 4-6 inches long. It should have at least a few sets of leaves.
- Make the cut: Using your clean shears or knife, make a clean cut just below a leaf node (where a leaf attaches to the stem). This is where the magic of rooting often happens.
- Prepare the cutting: Gently remove the lower leaves, leaving 2-3 sets of leaves at the top. If the top leaves are quite large, you can even cut them in half horizontally to reduce water loss.
- Apply rooting hormone (optional): Dip the cut end of the stem into your rooting hormone, tapping off any excess.
- Plant the cutting: Make a small hole in your prepared potting mix with a pencil or chopstick, then insert the cutting about an inch deep. Gently firm the soil around the base.
- Water gently: Water thoroughly but carefully, ensuring the soil is moist but not soggy.
- Create humidity: Cover the pot with a clear plastic bag or a propagation dome, making sure the plastic doesn’t touch the leaves. You can use stakes to prop it up if needed.
Water Propagation:
This method is also quite successful and fun to watch!
- Take your cutting: Follow steps 1 and 2 from the stem cutting method.
- Remove lower leaves: Just like before, remove the lower leaves so they won’t rot in the water.
- Place in water: Fill a clean jar or glass with room-temperature water and place the cutting in it. Make sure no leaves are submerged in the water.
- Find a bright spot: Place the jar in a bright location, out of direct sunlight.
- Change the water: Change the water every few days to keep it fresh and prevent bacterial growth.
The “Secret Sauce” (Pro Tips)
Here are a few tricks I’ve learned over the years that can make all the difference:
- Bottom Heat is Your Friend: If you’re struggling with rooting, especially in cooler weather, a heating mat designed for plants can be a game-changer. It encourages root development from below, mimicking ideal soil temperatures.
- Patience with Perlite: When using a perlite-heavy mix for stem cuttings, the perlite can sometimes create tiny air pockets around the cutting. Gently firming the soil after insertion helps minimize these and ensures good contact for rooting.
- Don’t Fuss Too Much: I know it’s tempting to constantly check for roots, but try to resist the urge to pull and prod. Let them do their thing. Too much disturbance can set them back.
Aftercare & Troubleshooting
Once you start seeing new root growth (you might see it peeking out of the drainage holes or gently tugging on the cutting in water), it’s time for a little extra care.
- Acclimate gradually: If you used a plastic bag or dome, start by opening it up for a few hours each day to get the new plant used to drier air.
- Potting up: Once the roots are well-established (you’ll see a good network of roots), you can carefully transplant your new Crotalaria alata into its own small pot with a good quality potting mix.
- Watering: Water regularly, keeping the soil consistently moist but never waterlogged.
- Light: Provide bright, indirect light to get it established.
Troubleshooting:
- Wilting or yellowing leaves: This is often a sign of too much water or not enough light. Check your watering habits.
- Rotting at the base: This usually means it’s too wet and hasn’t been able to establish roots before succumbing to fungal issues. Ensure good drainage and don’t overwater. Discard any cuttings that show signs of rot.
A Little Encouragement
Propagating plants is a journey, and Crotalaria alata is a wonderfully rewarding one to embark on. Be patient with your new little plants, offer them consistent care, and celebrate every tiny bit of progress. Before you know it, you’ll have a whole collection of your own sunny Crotalaria beauties! Happy growing!
Resource: