Hello fellow garden enthusiasts!
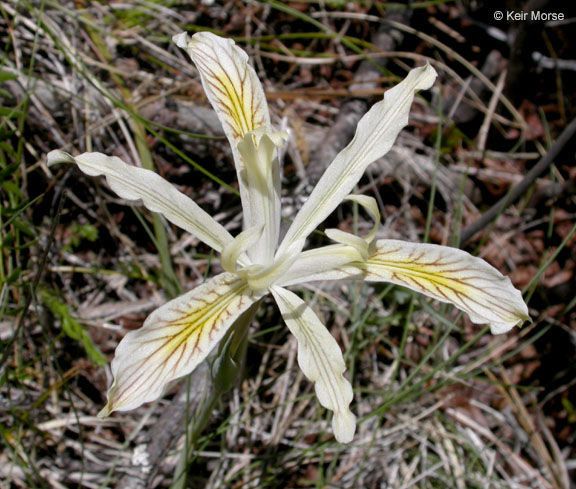
Let’s talk about a gem in the iris family that brings a unique touch to any space: Iris chrysophylla. With its delicate, often golden-yellow blooms, it’s a real charmer, isn’t it? Growing more of these beauties from your existing plants is incredibly satisfying. It’s a way to share the joy, fill in those bare spots, or just ensure you never run out of your favorites. I’d say Iris chrysophylla is moderately easy to propagate, a good step for those who have dabbled a bit and want to try something new.
The Best Time to Start
For Iris chrysophylla, the sweet spot for propagation is right after they finish blooming, typically in late spring or early summer. This is when the plant is transitioning out of its active flowering phase and has plenty of energy stored to put into new growth. Waiting until after they’ve done their stunning show ensures you’re not stressing them out during their prime.
Supplies You’ll Need
Gathering your supplies beforehand makes the whole process smooth sailing. Here’s what I tend to have on hand:
- Sharp Pruning Shears or a Clean Knife: For clean cuts, which are crucial.
- Rooting Hormone (Optional but Recommended): A powder or gel that encourages root development.
- Well-Draining Potting Mix: A mix of peat moss, perlite, and a little compost is usually perfect. You want it airy!
- Small Pots or Trays: Clean containers are a must.
- Watering Can with a Fine Rose: For gentle watering.
- Labels: To keep track of your new darlings!
- A Plastic Bag or Propagator Lid: To create a humid environment.
Propagation Methods
Iris chrysophylla is best propagated through division, which is essentially separating mature plants into smaller, viable sections. It’s quite straightforward once you get the hang of it.
- Gently Excavate: Carefully dig up the entire clump of your Iris chrysophylla plant. Do this during the dormant season or just after flowering. Try to disturb the roots as little as possible.
- Clean the Clumps: Gently shake off excess soil from the root ball. You can even rinse them lightly with water if they’re very mucky to get a clear view of the rhizomes.
- Assess and Divide: Look for distinct sections where new growth (the leafy shoots) emerges from the main rhizome (the thick, fleshy stem that grows horizontally just below the soil surface). Using your clean pruning shears or knife, carefully cut or break the rhizome into smaller pieces. Each piece should have at least one healthy leafy shoot and a good portion of rhizome with some attached roots.
- Prepare the Divisions: If you’re using rooting hormone, dip the cut end of each division into it. This isn’t strictly necessary, but I find it gives them a good head start.
- Planting Time: Fill your clean pots with your well-draining potting mix. Plant each division so that the top of the rhizome is just at the soil surface, or slightly covered. You want the roots to be nestled in the soil. Leave a little space at the top for watering.
- Water In: Water the newly potted divisions thoroughly but gently.
The “Secret Sauce” (Pro Tips)
Having gardened for a while, I’ve picked up a few little tricks that seem to make a difference:
- Don’t Be Too Anxious to Divide: Sometimes, a clump just needs a little nudge. If your iris isn’t blooming as well as it used to, or if it looks overcrowded, division is often the answer. But don’t split up a plant that’s perfectly happy and vigorous; wait for the right moment.
- Consider the Direction of Growth: When dividing, orient your new divisions so the leafy shoots are pointing upwards and outwards. This mimics how they naturally grow and helps them establish faster.
- Give Them a Boost: After replanting, I often give my divisions a mild liquid feed designed for flowering plants about two to three weeks later. This helps them get that extra bit of energy for root development and future blooms.
Aftercare & Troubleshooting
Once your Iris chrysophylla divisions are potted, keep them in a bright, but not scorching hot, location. Water them regularly, keeping the soil consistently moist but never waterlogged. You’ll know they’re happy when you start to see new leafy growth emerging.
The most common issue you might encounter is rot. If you see the rhizome becoming mushy or the leaves yellowing and dying off rapidly, it’s usually a sign of too much moisture or poor drainage. If you catch it early, you might be able to salvage a healthy part of the rhizome by cutting away the rotted bits and replanting it in fresh, dry soil. Don’t be discouraged if a few don’t make it; it’s part of the learning process!
A Encouraging Closing
Propagating Iris chrysophylla is a wonderful way to connect with your garden and watch new life emerge. Be patient with your new plants; they might take a little time to settle in and show their true potential, with blooming sometimes occurring in the second year. So grab your trowel, enjoy the process, and look forward to more of those beautiful golden blooms gracing your garden next season! Happy growing!
Resource:
https://identify.plantnet.org/k-world-flora/species/Iris%20chrysophylla%20Howell/data