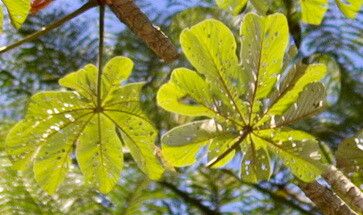
Oh, Cecropia glaziovii! What a magnificent tree. Seeing those giant, silvery leaves unfurl is just a thrill, isn’t it? They bring such a tropical, airy feel to any space. If you’ve fallen in love with one, or even just a cutting you’ve admired, propagating your own is incredibly rewarding. You’ll have the satisfaction of nurturing a new life from a tiny piece of what you already cherish. Now, for the $64,000 question: is it easy? I’d say it’s moderately easy, especially with a few pointers. You won’t be pulling your hair out, but a little attention to detail goes a long way.
The Best Time to Start
For Cecropia, the springtime is your golden ticket. Think of it as the plant’s natural burst of energy. When the days are getting longer, and the temperatures are warming up but not yet scorching, that’s when cuttings call out to be taken. You’re looking for actively growing wood, not anything too hard or old. Spring or early summer will give you the best chance of success.
Supplies You’ll Need
Before we get our hands dirty, let’s gather our tools. A good set of sharp pruning shears or a clean, sharp knife is essential for making clean cuts. You’ll want a well-draining potting mix. I like a blend of equal parts perlite, peat moss, and a bit of coarse sand. Some gardeners swear by rooting hormone, and while it’s not strictly necessary for all Cecropias, it can certainly give your cuttings a helpful boost. You’ll also need small pots or propagation trays and a plastic bag or propagation dome to maintain humidity. A spray bottle with water is also handy.
Propagation Methods
My favorite and usually most successful method for Cecropia is stem cuttings.
- Select Your Cutting: Look for a healthy stem that’s about 6-10 inches long. It should have at least a few sets of leaves. You want green, but not brand new, wispy growth. Slightly woody is good. Using your sharp shears, make a clean cut just below a leaf node (where a leaf meets the stem).
- Prepare the Cutting: Gently remove the lower leaves, leaving just a couple of sets at the very top. This helps the plant focus its energy on rooting, not on keeping too many leaves alive.
- Apply Rooting Hormone (Optional but Recommended): If you’re using rooting hormone, dip the cut end into it, tapping off any excess.
- Pot It Up: Fill your small pot with your well-draining mix. Make a hole in the center with your finger or a pencil. Insert the cutting into the hole, ensuring the nodes where you removed the leaves are buried. Gently firm the soil around the stem.
- Water Gently: Water your cutting thoroughly until you see water drain from the bottom.
- Create a Humid Environment: This is crucial! Place the potted cutting inside a clear plastic bag or a propagation dome. Seal it up to trap moisture. You can also use stakes to keep the bag from touching the leaves.
- Find a Bright Spot: Place your propagation setup in a bright location that gets indirect light. No direct sun, please! It will scorch your delicate cutting.
Another method you can try is water propagation, although I find it a bit trickier for long-term stability with Cecropias.
- Prepare the Cutting: Same as above, take a 6-10 inch stem cutting with a few leaves at the top.
- Place in Water: Put the cutting in a clean vase or jar filled with room-temperature water. Make sure no leaves are submerged below the water line. They’ll just rot!
- Change Water Regularly: Change the water every few days to keep it fresh and prevent bacterial growth.
- Wait for Roots: You should start to see roots forming from the nodes within a few weeks. Once the roots are about an inch long, you can carefully transplant it into soil.
The “Secret Sauce”
Here are a couple of tricks I’ve learned over the years that really make a difference:
- Bottom Heat is Your Friend: A heating mat placed beneath your pots can dramatically speed up root development. It mimics the warmth of the soil in a tropical environment. You don’t need it super hot, just a gentle warmth is perfect.
- Don’t Be Afraid to Be a Little Ruthless: When you take your cuttings, if a leaf looks like it’s wilting or struggling, a light trim can sometimes help the plant conserve energy. It feels counterintuitive, but sometimes less is more.
Aftercare & Troubleshooting
Once you start seeing new growth or feel resistance when you gently tug on the cutting, that’s a good sign roots are developing! Carefully remove the plastic bag or dome gradually over a few days to let the plant acclimate to normal humidity. Keep the soil consistently moist, but not waterlogged. Water when the top inch of soil feels dry.
The most common problem you’ll encounter is rot. If your cutting turns brown and mushy, or if you see mold growing, it’s a sign of too much moisture and not enough air circulation. Discard the affected cutting and start fresh, paying close attention to your watering and drainage. Yellowing leaves on a cutting can sometimes indicate it’s trying to adapt, or it might be getting too much light.
A Little Patience Goes a Long Way
Propagating can feel like magic, but it does take patience. Don’t get discouraged if your first attempt isn’t a roaring success. Each time you try, you learn a little more. Enjoy the process, celebrate every tiny sign of life, and soon you’ll have a whole new Cecropia to love. Happy gardening!
Resource:
https://identify.plantnet.org/k-world-flora/species/Cecropia%20glaziovii%20Snethl./data