Hello, fellow plant lovers! Today, we’re diving into the wonderful world of Galium corymbosum, also known as clusters of bedstraw. I’ve had these beauties gracing my garden for years, and I can tell you, there’s a special kind of joy in multiplying a plant you love.
Why Propagate Galium corymbosum?
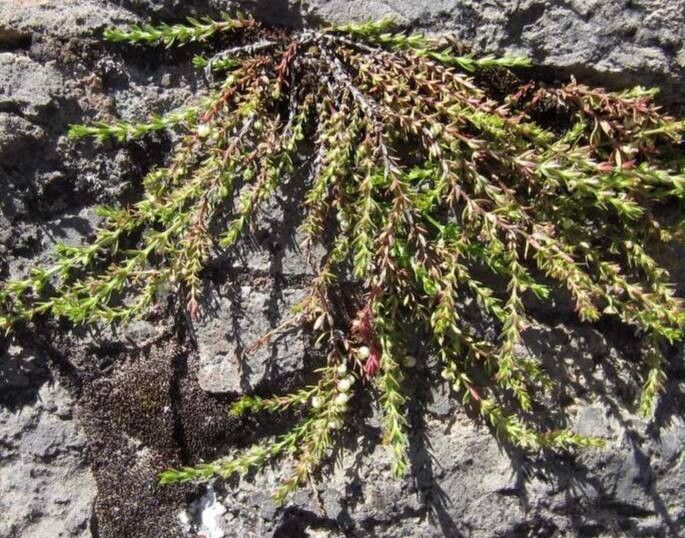
Galium corymbosum is such a charming groundcover, isn’t it? Its delicate, starry white flowers create a frothy carpet in the garden, attracting all sorts of beneficial insects. Plus, it has this lovely, earthy scent after a rain. Propagating it means you can fill more of your garden beds, share with friends, or even create a whole new patch for a different sunny spot. For beginners, I’d say Galium corymbosum is quite forgiving when it comes to propagation – a definite win!
The Best Time to Start
I’ve found the late spring to early summer is your golden window for success with most propagation methods. This is when the plant is actively growing, and its stems are firm but still somewhat flexible. You want those new shoots that are developing but haven’t hardened off into tough, woody growth yet.
Supplies You’ll Need
Gathering your tools beforehand makes the whole process much smoother. Here’s what I usually have on hand:
- Sharp pruning shears or a sharp knife: For clean cuts.
- Rooting hormone (optional, but helpful): I like a powdered one.
- Well-draining potting mix: A mix of perlite, peat moss (or coco coir), and some compost works wonders. Avoid heavy garden soil.
- Small pots or seed trays: Clean ones are best to prevent disease.
- Watering can with a fine rose: For gentle watering.
- Plastic bags or propagation domes: To create a humid environment.
- Small pebbles or grit (for water propagation): To anchor the cuttings.
Let’s Get Our Hands Dirty: Propagation Methods
Galium corymbosum is a breeze to propagate, and I find two methods work especially well.
Stem Cuttings: My Go-To
This is my favorite because it’s so efficient.
- Select your cuttings: Look for healthy, non-flowering stems. You want pieces that are about 4-6 inches long. Gently bend a stem; if it snaps cleanly, it’s likely a good candidate.
- Make the cut: Using your clean shears, make a cut just below a leaf node (where a leaf attaches to the stem). These nodes are where roots will emerge later.
- Prepare the cuttings: Gently remove the lower leaves from the bottom half of the cutting. This prevents them from rotting in the soil and encourages rooting from the exposed nodes.
- Dip in rooting hormone (optional): If you’re using it, dip the cut end of the stem into the rooting hormone, tapping off any excess.
- Plant your cuttings: Fill your small pots with your prepared well-draining mix. Make a small hole with a pencil or your finger. Insert the cuttings into the holes, ensuring at least two leaf nodes are buried in the soil. Gently firm the soil around them.
- Water gently: Water thoroughly until you see water drain from the bottom of the pot.
- Create humidity: Cover the pots with a clear plastic bag or a propagation dome. You can secure the bag with a rubber band. Make sure the leaves aren’t touching the plastic if possible.
Water Propagation: Simple and Satisfying
This method lets you watch the magic happen!
- Take your cuttings: Follow steps 1 and 2 from the stem cutting method.
- Prepare the cuttings: Again, remove the lower leaves.
- Place in water: Find a clean jar or glass. Fill it with fresh water. Place your cuttings in the water, making sure none of the leaves are submerged. You can add a few small pebbles or grit to help keep the cuttings upright if needed.
- Find a good spot: Place the jar in a bright spot out of direct sunlight.
The “Secret Sauce” (Pro Tips!)
Here are a few little tricks I’ve picked up over the years that really boost your success rate:
- Bottom Heat is Your Friend: For stem cuttings, placing the pots on a heated propagation mat can significantly speed up root development. It mimics that cozy, warm soil temperature the plant loves.
- Don’t Overcrowd: Give your cuttings space! Too many in one pot can increase the risk of fungal diseases. If you’re using a tray, make sure there’s a bit of airflow between them.
- Tap Water Woes? Use Filtered! Sometimes, the chemicals in tap water can hinder rooting. If you have particularly hard water, try using filtered or rainwater for your water propagation jars.
Aftercare & Troubleshooting
Once roots begin to form (you’ll see them peeking out the bottom of the pot or developing in the water), it’s time for a bit more attention.
- Acclimatize: Gradually remove the plastic covering from your potted cuttings over a week. This lets them get used to drier air. For water-propagated cuttings, gently plant them in pots with soil once the roots are about an inch long. Again, plant them shallowly and water well.
- Ongoing Care: Keep the soil consistently moist but not waterlogged. Bright, indirect light is ideal. Once they’ve established themselves for a few weeks and you see new leaf growth, you can start feeding them with a diluted liquid fertilizer.
The most common sign of failure is rot. If your cuttings turn mushy or develop dark, sunken spots, it’s often a sign of too much moisture and poor air circulation. Don’t be discouraged if a few don’t make it – gardening is all about learning!
Go Forth and Multiply!
Propagating Galium corymbosum is such a rewarding experience. Be patient with your new baby plants, give them a little TLC, and soon you’ll have more of these delightful blooms to enjoy. Happy gardening!
Resource:
https://identify.plantnet.org/k-world-flora/species/Galium%20corymbosum%20Ruiz%20&%20Pav./data