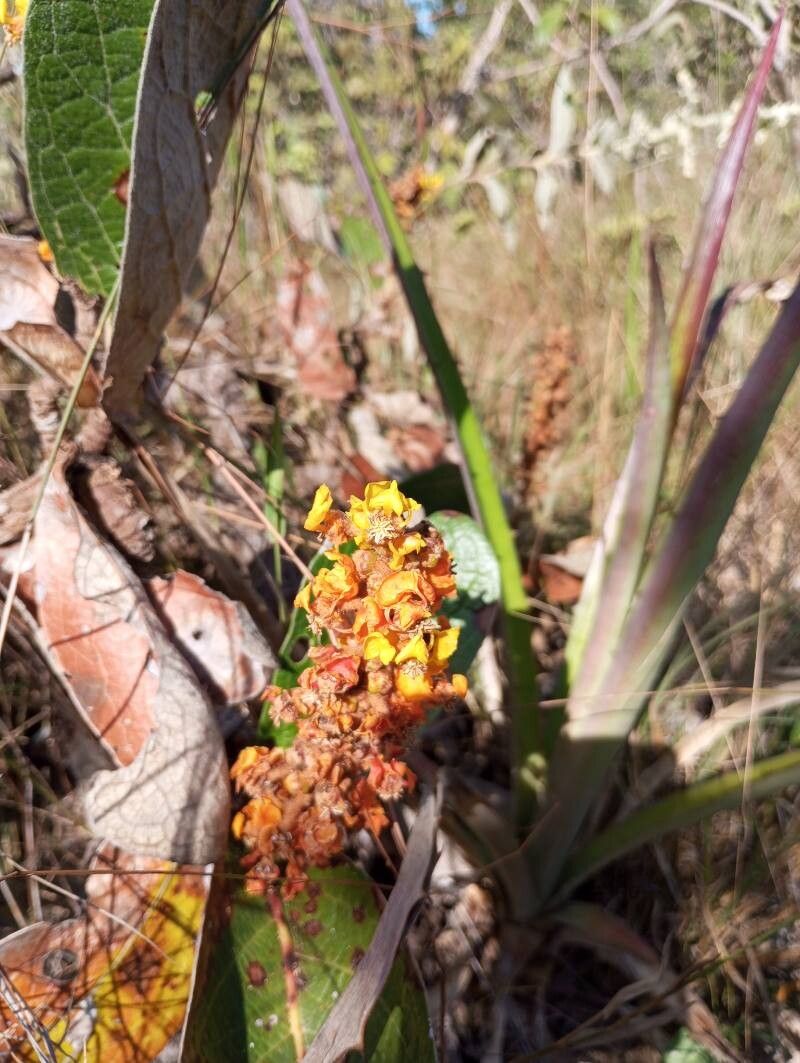
Oh, hello there! Pull up a chair and let’s talk about Byrsonima guilleminiana. I’ve always had a soft spot for this particular gem. Its vibrant blooms and lush foliage bring such a cheerful energy to any space, and truthfully, there’s something incredibly satisfying about nurturing a new plant from scratch. If you’ve ever admired its beauty and thought, “I wish I could grow more of those,” then you’re in the right place. Propagating Byrsonima guilleminiana can be a wonderfully rewarding experience. For absolute beginners, it might present a slight learning curve, but trust me, with a little patience and these tips, you’ll be well on your way to success.
The Best Time to Start
When it comes to getting those cuttings to root, timing is everything. The most beautiful time to take stem cuttings from your Byrsonima guilleminiana is during its active growing season, usually from late spring through summer. During this period, the plant has plenty of energy stored up, which translates to faster rooting and a higher success rate. You’re looking for new growth that’s firm but not yet woody – often called semi-hardwood cuttings.
Supplies You’ll Need
Before we get our hands dirty, let’s gather our tools. Having everything on hand makes the process so much smoother.
- Sharp Pruning Shears or a Craft Knife: Clean cuts are crucial for good rooting.
- Rooting Hormone: This is optional, but it can give your cuttings a significant boost. I like to use a powder form.
- Well-Draining Potting Mix: A good blend of perlite, peat moss, and a bit of sterile potting soil works wonders. You can also use a specialized seedling or propagation mix.
- Small Pots or Trays: Clean containers with drainage holes are a must.
- Plastic Bag or Dome: This will create a humid environment for your cuttings.
- Water: For moistening the soil.
- Labels: Don’t forget to label your pots! You’ll thank me later.
Propagation Methods: Stem Cuttings
Stem cuttings are my go-to method for Byrsonima guilleminiana. It’s straightforward and generally yields excellent results.
- Select Your Cuttings: Look for healthy, vigorous stems on your established plant. Choose pieces that are about 4-6 inches long. You want to see a few sets of leaves along the stem.
- Make the Cut: Using your sharp shears or knife, make a clean cut just below a leaf node (where a leaf attaches to the stem). This is where the magic happens for rooting. Gently remove the lower leaves, leaving about 2-3 sets of leaves at the top.
- Apply Rooting Hormone (Optional but Recommended): Dip the cut end of the stem into your rooting hormone. Tap off any excess.
- Plant Your Cuttings: Fill your small pots with your prepared well-draining potting mix. Make a small hole in the center with your finger or a pencil. Carefully insert the cut end of the stem into the hole, ensuring it makes good contact with the soil. Gently firm the soil around the base.
- Water Lightly: Water the soil thoroughly but gently, just enough to moisten it all the way through. You don’t want soggy soil.
- Create a Humid Environment: Cover the top of the pot with a clear plastic bag or place it under a clear propagation dome. Make sure the leaves don’t touch the plastic if possible. This traps humidity, which is vital for cuttings that can’t yet take up water through roots.
- Provide Light and Warmth: Place the pots in a bright location with indirect sunlight. Avoid direct sun, as it can scorch the young cuttings. A little gentle bottom heat (like a heat mat designed for plants) can significantly speed up the rooting process, but it’s not strictly necessary.
The “Secret Sauce” (Pro Tips)
Alright, let’s talk about a few little tricks I’ve picked up over the years. These are the things that really make a difference.
- Mist Regularly: Even with the plastic bag, the air inside can dry out. I like to lightly mist the leaves and soil every few days, or whenever I check on them. This keeps things nice and humid.
- Sterilize Everything: This is absolutely non-negotiable! Always use clean tools and pots. Any lingering bacteria or fungi can spell disaster for your precious cuttings, leading to rot before they even have a chance to root.
- Don’t Be Impatient with the “Wiggle Test”: It’s tempting to constantly tug on your cuttings to see if they’ve rooted. Resist the urge! When you think they might have roots (usually after 4-6 weeks for this plant), give them a very gentle tug. If you feel resistance, congratulations – they’re likely rooted!
Aftercare & Troubleshooting
Once you start to see signs of new growth – little leaves unfurling or tiny shoots appearing – that’s a great indicator that roots have formed.
- Gradual Acclimation: It’s time to slowly acclimate your new plant to the outside air. For the first week, lift the plastic bag or dome for a few hours each day. Gradually increase this time until the cuttings are happy without the cover.
- Transplanting: Once your new plant has a good root system and feels sturdy (you can see roots coming out of the drainage holes or it holds its shape well), it’s time to transplant it into a slightly larger pot with its regular potting mix.
- Troubleshooting: Rot: The most common problem you might encounter is rot. If you see stems turning black and mushy, or leaves wilting and falling off even when the soil feels moist, it’s a sign of too much moisture and not enough air circulation. Unfortunately, rotten cuttings are usually a lost cause. This is where ensuring that sharp cut, good drainage, and not letting them sit in water are so important.
Your Green Thumb Journey
See? It’s not as daunting as it might seem. Propagating Byrsonima guilleminiana is a wonderful way to enjoy more of this beautiful plant and to connect with the natural magic of growth. Be patient, observe your cuttings, and don’t get discouraged if not every single one makes it. Each attempt is a learning experience, and soon you’ll have a small jungle of your own. Happy propagating!
Resource:
https://identify.plantnet.org/k-world-flora/species/Byrsonima%20guilleminiana%20A.Juss./data