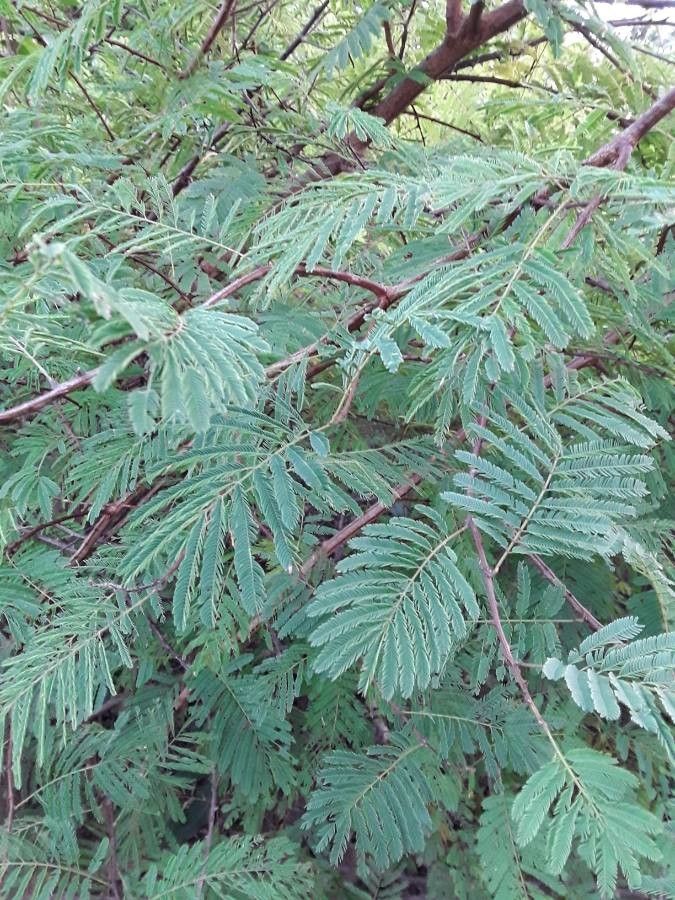
Hello there, fellow plant adventurers! Today, we’re diving into the delightful world of Senegalia erythrocalyx, a tree I’ve come to adore over the years for its elegant display and surprisingly easygoing nature. If you’re looking to expand your collection or share this beauty with friends, propagating it yourself is incredibly rewarding. Honestly, for those of you just starting out, this particular Senegalia is a fantastic choice. You’ll find it’s quite forgiving, which makes the whole journey even more enjoyable.
The Best Time to Start
When it comes to getting the most bang for your buck – or rather, the most successful roots – I find late spring to early summer is your golden ticket. This is when the plant is in its most vigorous growth phase. The new shoots are tender but have had a bit of time to mature, making them ideal for cuttings. Waiting until after the plant has finished its initial spring flush of growth gives you the best chance of success.
Supplies You’ll Need
Before we get our hands dirty, let’s gather our tools:
- Sharp, clean pruning shears or a craft knife: For making clean cuts.
- Rooting hormone powder or gel: This is a great booster.
- Small pots or trays: Clean ones are a must! Drainage holes are non-negotiable.
- A well-draining potting mix: I personally love a blend of equal parts perlite, coco coir, and a little sterile potting soil. You want something airy that won’t hold too much moisture around the developing roots.
- A plastic bag or propagation dome: To create a mini-greenhouse effect.
- Water: For misting and eventually watering.
Propagation Methods
Let’s get down to the nitty-gritty! We’ll focus on the method that brings me the most joy with Senegalia erythrocalyx: stem cuttings.
- Select Your Cuttings: Look for healthy, non-flowering stems from your established plant. You want pieces that are about 4-6 inches long. Ideally, they should have a bit of both soft and slightly woody tissue – think of the newest growth that’s just starting to firm up. Gently snap or cut just below a leaf node. These nodes are where roots are most likely to form.
- Prepare the Cuttings: Remove the lower leaves from your cuttings. You want to keep just a few sets of leaves at the top. This reduces water loss through transpiration. If your chosen cuttings have very large leaves, you can even cut those larger leaves in half horizontally.
- Apply Rooting Hormone: Dip the cut end of each stem into your rooting hormone. Tap off any excess. This step significantly increases your odds of a strong root system.
- Plant the Cuttings: Moisten your potting mix thoroughly. Then, gently insert the treated cuttings about an inch deep into the mix. You can plant several cuttings in the same pot, giving them a little space between each.
- Create a Humid Environment: Water the soil gently so it’s moist but not waterlogged. Then, cover the pot with a clear plastic bag, securing it with a rubber band, or place it under a propagation dome. This traps humidity, which is crucial for cuttings.
The “Secret Sauce” (Pro Tips)
Now, for a couple of little tricks that have made all the difference for me:
- Bottom Heat is Your Friend: While not strictly essential for this plant, placing your pots on a gentle seedling heat mat can speed up root development considerably. It mimics the warmth of spring soil and really encourages those roots to kick into gear.
- Don’t Overwater, But Don’t Let Them Dry Out: This is a delicate balance. The soil should always feel slightly damp to the touch. I like to check mine daily. If the very top layer feels dry, a light misting or a gentle watering is in order. But never let them sit in soggy soil!
Aftercare & Troubleshooting
Once your cuttings are happily nestled in their new home, keep them in bright, indirect light. Avoid direct sun, which can scorch those tender young leaves. Be patient! It can take 4-8 weeks for roots to develop sufficiently. You’ll know they’re ready when you gently tug on a cutting and feel resistance.
The most common issue you might encounter is rot. This usually happens from overwatering or poor air circulation. If you see mushy, brown stems, or if your cuttings are just wilting and dying despite your best efforts, it’s likely due to too much moisture. Make sure that bag or dome isn’t completely sealed to allow for some air exchange.
Once rooted, you can gradually introduce your new Senegalia to more regular watering and eventually plant them into their own small pots.
So there you have it! Propagating Senegalia erythrocalyx is a wonderfully accessible way to bring more of this stunning plant into your life. Don’t be discouraged if your first few attempts aren’t perfect. Gardening is all about learning and growing, and the joy of nurturing a new plant from a tiny cutting is truly special. Happy propagating!
Resource: