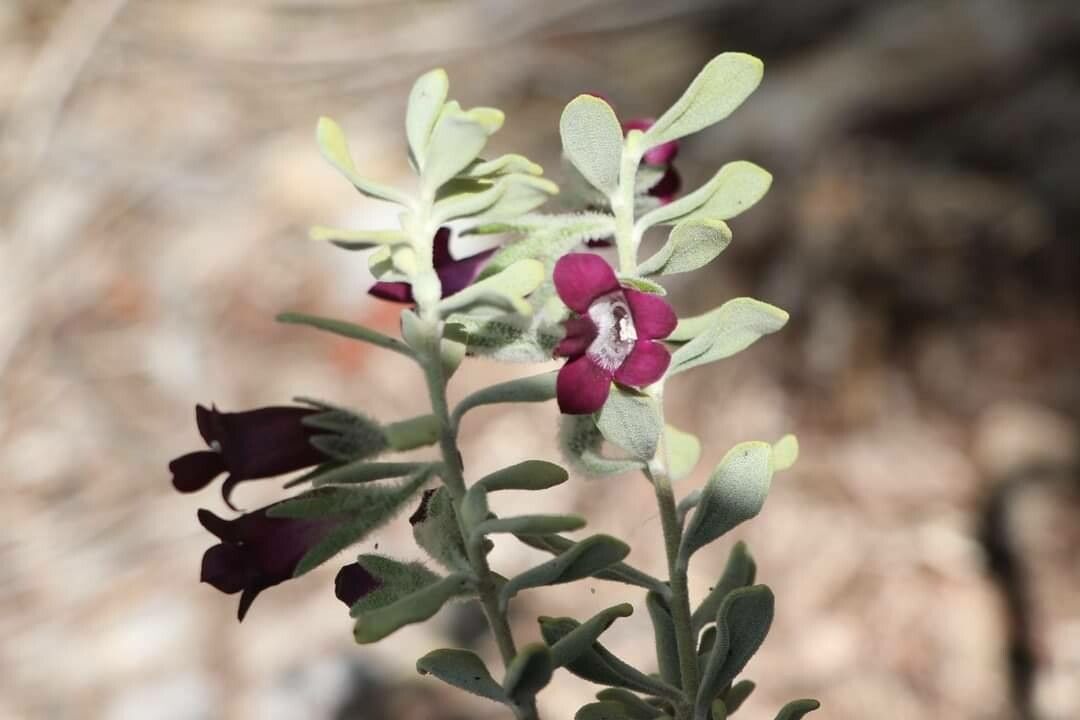
Hello fellow plant lovers! Today, I want to talk about a gem that deserves more space in our gardens: Eremophila muelleriana. This Australian native is a real stunner, with its delicate, tubular flowers that attract all sorts of beneficial visitors. It’s the kind of plant that makes you feel like a gardening superhero when you see it thrive. And the best part? You can easily multiply its beauty through propagation. Don’t be intimidated; while it has its own personality, it’s definitely achievable for most gardeners.
The Best Time to Start
For Eremophilas like muelleriana, I find the late spring to early summer is your golden window. This is when the plant is actively growing and has the energy reserves to put into developing new roots. You’re looking for semi-hardwood cuttings – think stems that are still a bit flexible but have lost that super-soft, new growth feel.
Supplies You’ll Need
Gathering your tools beforehand makes the whole process so much smoother. Here’s what I always have on hand:
- Sharp, clean pruning shears or a sharp knife: Essential for clean cuts that reduce the risk of disease.
- Rooting hormone: This provides a little boost to encourage root development. Liquid or powdered forms work well.
- Well-draining potting mix: A good blend is crucial. I often use a mix of seed-raising mix and perlite or coarse sand (around a 50/50 ratio).
- Small pots or trays: Clean containers with drainage holes are a must.
- Plastic bags or a propagation lid: To create a humid environment.
- Water mister: For keeping the foliage hydrated.
Propagation Methods
Let’s get our hands dirty! Stem cuttings are generally the most successful route for Eremophila muelleriana.
-
Taking the Cuttings:
- Select a healthy, non-flowering stem from your parent plant.
- Using your sharp tool, take cuttings that are about 10-15 cm long. Make the cut just below a leaf node. A leaf node is where a leaf attaches to the stem.
- Remove the lower leaves from each cutting, leaving just a few at the top. This prevents leaves from rotting in the soil.
-
Preparing the Cuttings:
- Gently dip the bottom end of each cutting into water, then into your rooting hormone. Tap off any excess.
-
Planting the Cuttings:
- Make small holes in your prepared, damp potting mix with a pencil or a skewer.
- Carefully insert the bottom end of each cutting into the holes.
- Gently firm the soil around the base of the cuttings to ensure good contact.
-
Creating a Humid Environment:
- Water the soil lightly.
- Cover the pots or trays with a plastic bag or a propagation lid. This traps moisture and keeps the humidity high. If using a bag, you can use stakes to keep it from touching the leaves.
-
Placement:
- Place your pots or trays in a bright spot with indirect light. Avoid direct sun, which can scorch the delicate cuttings.
The “Secret Sauce” (Pro Tips)
Over the years, I’ve learned a few tricks that really help improve my success rate:
- Bottom Heat is Your Friend: If you have it, placing your propagation tray on a gentle heat mat can make a world of difference. It encourages the roots to form more quickly. Just a low to medium setting is all you need.
- Don’t Let Them Drown: When you water your cuttings, make sure the soil is moist, not waterlogged. Overwatering is a sure way to invite root rot. Also, if any of your leaves end up touching the surface of the water (if you’re using a method that involves water), prune them off quickly. They’ll just go slimy and contribute to rot.
- Patience, Young Grasshopper: Eremophilas aren’t the fastest propagators. Don’t be tempted to dig them up to check for roots too soon! You might have to wait 4-8 weeks, sometimes even longer, for good root development.
Aftercare & Troubleshooting
Once you see signs of new growth – tiny leaves unfurling, for example – it’s a good sign that roots are forming!
- Gradual Acclimation: Start to gradually remove the plastic bag or lid over a few days. This helps the new plant adjust to the drier air without shocking it.
- Continue Watering: Keep the soil consistently moist but not soggy.
- Light Feed: Once the new growth looks established (after a few weeks of acclimatizing), you can give them a very dilute liquid fertilizer, about a quarter strength.
- Troubleshooting: The most common issue is rot. If you see your cuttings turning black and mushy, it’s usually a sign of too much moisture and/or poor drainage. Sadly, these are usually lost causes. Another sign of stress can be wilting, which might indicate not enough humidity or that they’re drying out too quickly.
A Bit of Encouragement
Propagating plants is a journey, and it’s all about learning and experimenting. Don’t be discouraged if your first few attempts aren’t perfect. Each cutting you take is a chance to learn more about your plant and its needs. Enjoy the process of nurturing these tiny new lives – it’s incredibly rewarding! Happy gardening!
Resource:
https://identify.plantnet.org/k-world-flora/species/Eremophila%20muelleriana%20C.A.Gardner/data