Hello fellow garden enthusiasts! It’s so lovely to have you here, ready to dive into the wonderful world of plant propagation. Today, we’re going to talk about a plant that truly captures the spirit of the Pacific Northwest: Epilobium oreganum, also known as Oregon Fireweed.
Oregon Fireweed: A Burst of Beauty Worth Sharing
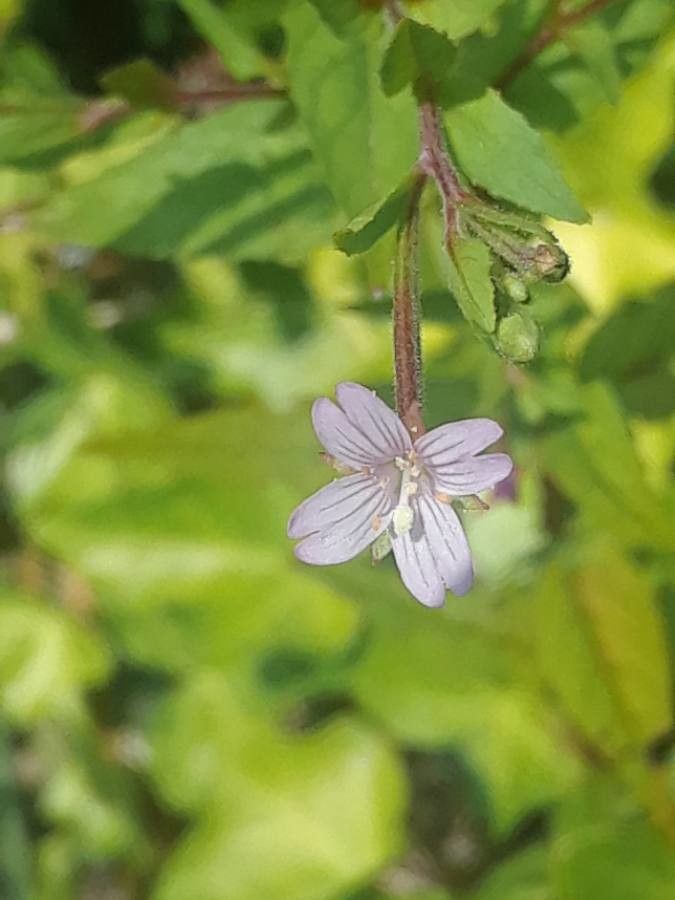
There’s something about Epilobium oreganum that just makes you smile. Its vibrant pink to reddish-purple blooms are a beacon of color, buzzing with pollinators all summer long. It’s a native beauty that’s surprisingly resilient once established. And the best part? Sharing its beauty by propagating it is incredibly rewarding. For those of you just starting your propagation journey, I’m happy to report that Epilobium oreganum is generally quite forgiving and can be a wonderful plant to practice your skills on!
When Does the Magic Happen? The Best Time to Start
The sweet spot for propagating Epilobium oreganum is typically in late spring to early summer. This is when the plant is actively growing and has plenty of fresh, pliable stems to work with. You’re looking for healthy, non-flowering shoots that are about 4-6 inches long. Waiting until after the initial flush of growth gives you the best chance of success.
Gathering Your Tools: What You’ll Need
Before we get our hands dirty, let’s make sure we have everything ready. A little preparation goes a long way!
- Sharp Pruning Shears or a Knife: Clean, sharp tools are essential to make clean cuts and prevent introducing diseases.
- Rooting Hormone (Optional but Recommended): This can give your cuttings a helpful boost to develop roots faster.
- Well-Draining Potting Mix: A mix of equal parts perlite and peat moss or coco coir works beautifully. You want good aeration!
- Small Pots or Seed Trays: Clean pots are key to preventing fungal issues.
- Plastic Bags or a Propagator: To create a humid environment for your cuttings.
- Watering Can with a Fine Rose: For gentle watering.
Bringing New Life: Propagation Methods for Oregon Fireweed
Epilobium oreganum is wonderfully responsive to stem cuttings. It’s straightforward, and I find it’s the most reliable method for this plant.
Here’s how we do it:
- Take Your Cuttings: In late spring or early summer, select healthy, vigorous stems from a mature plant. Using your clean pruners, cut a 4-6 inch section of stem, focusing on the softer, new growth rather than woody material. Make the cut just below a leaf node (where a leaf attaches to the stem).
- Prepare the Cuttings: Gently remove the lower leaves from the cutting, leaving just two or three sets of leaves at the top. If your cuttings are very long, you can pinch off the very tip of the stem to encourage branching later on, but it’s not strictly necessary.
- Apply Rooting Hormone (If Using): Dip the cut end of each stem into your rooting hormone powder, tapping off any excess. This creates a nice, even coating.
- Plant Your Cuttings: Fill your small pots with the well-draining potting mix. Make a small hole in the center of each pot with your finger or a pencil. Insert the prepared cutting into the hole, ensuring the leaf nodes are buried. Gently firm the soil around the stem.
- Create a Humid Environment: Water the soil gently until it’s moist but not waterlogged. You can then cover the pots with a clear plastic bag, securing it around the rim with a rubber band, or place them in a propagator. This helps retain moisture, which is crucial for cuttings to root.
The Gardener’s Little Secrets: Pro Tips for Success
Over the years, I’ve picked up a few tricks that seem to make all the difference.
- Bottom Heat is Your Friend: If you can, place your pots on a propagation mat. A little gentle warmth from below encourages root development much faster than ambient room temperature alone.
- Don’t Let Those Leaves Drip: If you’re using a plastic bag, make sure the leaves aren’t collapsing and sitting in water within the bag. This can lead to rot. A few small stakes can help keep the bag from touching the foliage.
- Patience is a Virtue, Especially with Airflow: While humidity is key, you don’t want stagnant air. Open the plastic bags or propagator lid for a few minutes each day to allow for air circulation. This helps prevent fungal diseases from taking hold.
Nurturing Your New Sprouts and What to Watch For
Once your cuttings have been planted, find them a spot with bright, indirect light. Avoid direct sun, as it can scorch those delicate new cuttings. Keep the soil consistently moist but not soggy.
You’ll know your cuttings are rooting when you see new leaf growth appearing or feel a gentle resistance when you tug lightly on the stem. This usually takes anywhere from 3 to 6 weeks, sometimes a little longer depending on conditions.
If you notice mushy stems or the entire cutting wilting and turning black, that’s often a sign of rot. This is usually caused by too much moisture and not enough air circulation. Don’t be discouraged if a few don’t make it! It’s part of the learning process. Sometimes, a cutting might just fail to root, and that’s okay too. Pull out any rotted cuttings immediately to prevent it from spreading.
Once your little Oregon Fireweeds have developed a good root system, you can transition them into their own pots to grow on. Gradually acclimate them to less humid conditions before transplanting them to their final garden home.
Happy Rooting!
Propagating Epilobium oreganum is a truly delightful way to expand your garden and share its vibrant spirit. Be patient with yourself and the process. Every successful cutting is a small triumph, a little piece of your garden you’ve brought into being. So, go ahead, get your hands dirty, and enjoy the incredibly satisfying journey of growing your own Oregon Fireweed! Happy gardening!
Resource:
https://identify.plantnet.org/k-world-flora/species/Epilobium%20oreganum%20Greene/data