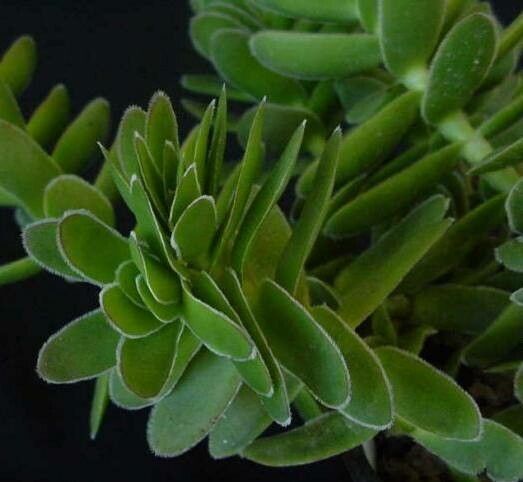
Hello fellow plant enthusiasts! Today, we’re diving into the delightful world of Crassula ciliata, also known as the Fringed Crassula. This little succulent is such a charmer with its fuzzy, ciliated leaf edges. It adds such a unique texture to any collection. And the best part? Propagating it is surprisingly rewarding and can be an absolute joy, even for those new to the succulent scene. You’ll have more little C. ciliatas to share or enjoy in no time!
When to Get Your Hands Dirty
The sweet spot for propagating Crassula ciliata is generally during its active growing season, which is typically spring and summer. This is when the plant has plenty of energy to put into developing new roots. You can also have good luck with cuttings taken in early fall, as long as you can provide them with ample light and warmth. Basically, aim for a time when your plant is looking healthy and vigorous.
What You’ll Need for Success
Gathering your supplies beforehand makes the whole process so much smoother. Here’s what I usually have on hand:
- Sharp, clean pruning shears or a knife: Make sure they’re sterilized to prevent introducing any nasty bugs or diseases.
- Well-draining potting mix: A cactus or succulent blend is perfect. You can also mix your own with equal parts potting soil, perlite, and coarse sand.
- Small pots or trays: Terracotta pots are lovely because they breathe.
- Rooting hormone (optional but recommended): This can give your cuttings a nice little boost.
- Spray bottle: For keeping things lightly moist.
- Gloves (optional): Succulent sap can sometimes be a bit sticky.
Methods for Making More *Crassula Ciliata***
There are a few tried-and-true ways to get more of this beautiful plant. I find stem cuttings to be the most reliable for Crassula ciliata.
Propagation by Stem Cuttings:
- Select a healthy stem: Look for a mature stem that’s at least a few inches long and has plenty of leaves.
- Make a clean cut: Using your sharp shears, cut the stem just above a leaf node. A node is where a leaf attaches to the stem.
- Remove lower leaves: Gently strip off the bottom few leaves. This exposes the small nodes where roots will emerge. You can toss these leaves into a separate propagation tray if you like; sometimes they’ll sprout babies too!
- Let it callous: This is a crucial step! Leave the cuttings to air dry in a bright, indirect light spot for 2-7 days. You’ll see the cut end form a dry, leathery scab. This prevents rot when you plant it.
- Plant your cuttings: Once calloused, dip the cut end in rooting hormone if you’re using it. Then, gently insert the stem into your prepared well-draining soil. You can plant several cuttings in the same pot, leaving a little space between them.
- Water sparingly: Give the soil a light misting with your spray bottle. You want the soil to be barely moist, not soggy.
The “Secret Sauce” – My Insider Tips
Over the years, I’ve learned a few little tricks that make a big difference.
- Avoid direct water contact: When you’re misting, try your best to keep the leaves themselves dry. Excess moisture sitting on the foliage is an open invitation for rot, especially in the early stages.
- Bottom heat makes a difference: If you can, place your pots on a seedling heat mat. This gentle warmth from below encourages root development much faster than room temperature alone. It’s like giving your cuttings a cozy heated blanket to grow roots under!
- Patience with leaf propagation: While stem cuttings are my go-to, if you decide to try propagating from leaves, remember to place them on top of the soil, not buried. And for Crassula leaves, I often find they do best when they are almost completely dried out before placing them on the soil surface, and I only mist lightly thereafter.
Aftercare and Watching for Trouble
Once your cuttings are planted and you’ve given them a light misting, place them in a bright location that doesn’t get direct, scorching sun. Avoid the urge to water them frequently.
You’ll know your cuttings are rooting when you see new growth emerging – tiny leaves or even little roots poking out of the drainage holes. This can take anywhere from a few weeks to a couple of months. At this point, you can start watering them a bit more deeply, allowing the soil to dry out between waterings.
The most common sign of failure is rot. If your cutting turns mushy, darkens, or just looks sad and defeated, it’s likely rotted. This usually happens if the cutting was planted before callousing or if the soil was kept too wet. Don’t be discouraged if a few don’t make it; it happens to the best of us! Just pull out the failed cutting and try again with a fresh one.
Enjoy the Journey
Growing new plants from cuttings is such a rewarding experience. There’s a special kind of satisfaction in nurturing a tiny piece of a plant into a fully formed individual. Be patient, trust the process, and most importantly, enjoy watching your new Crassula ciliata babies thrive! Happy planting!
Resource:
https://identify.plantnet.org/k-world-flora/species/Crassula%20ciliata%20L./data