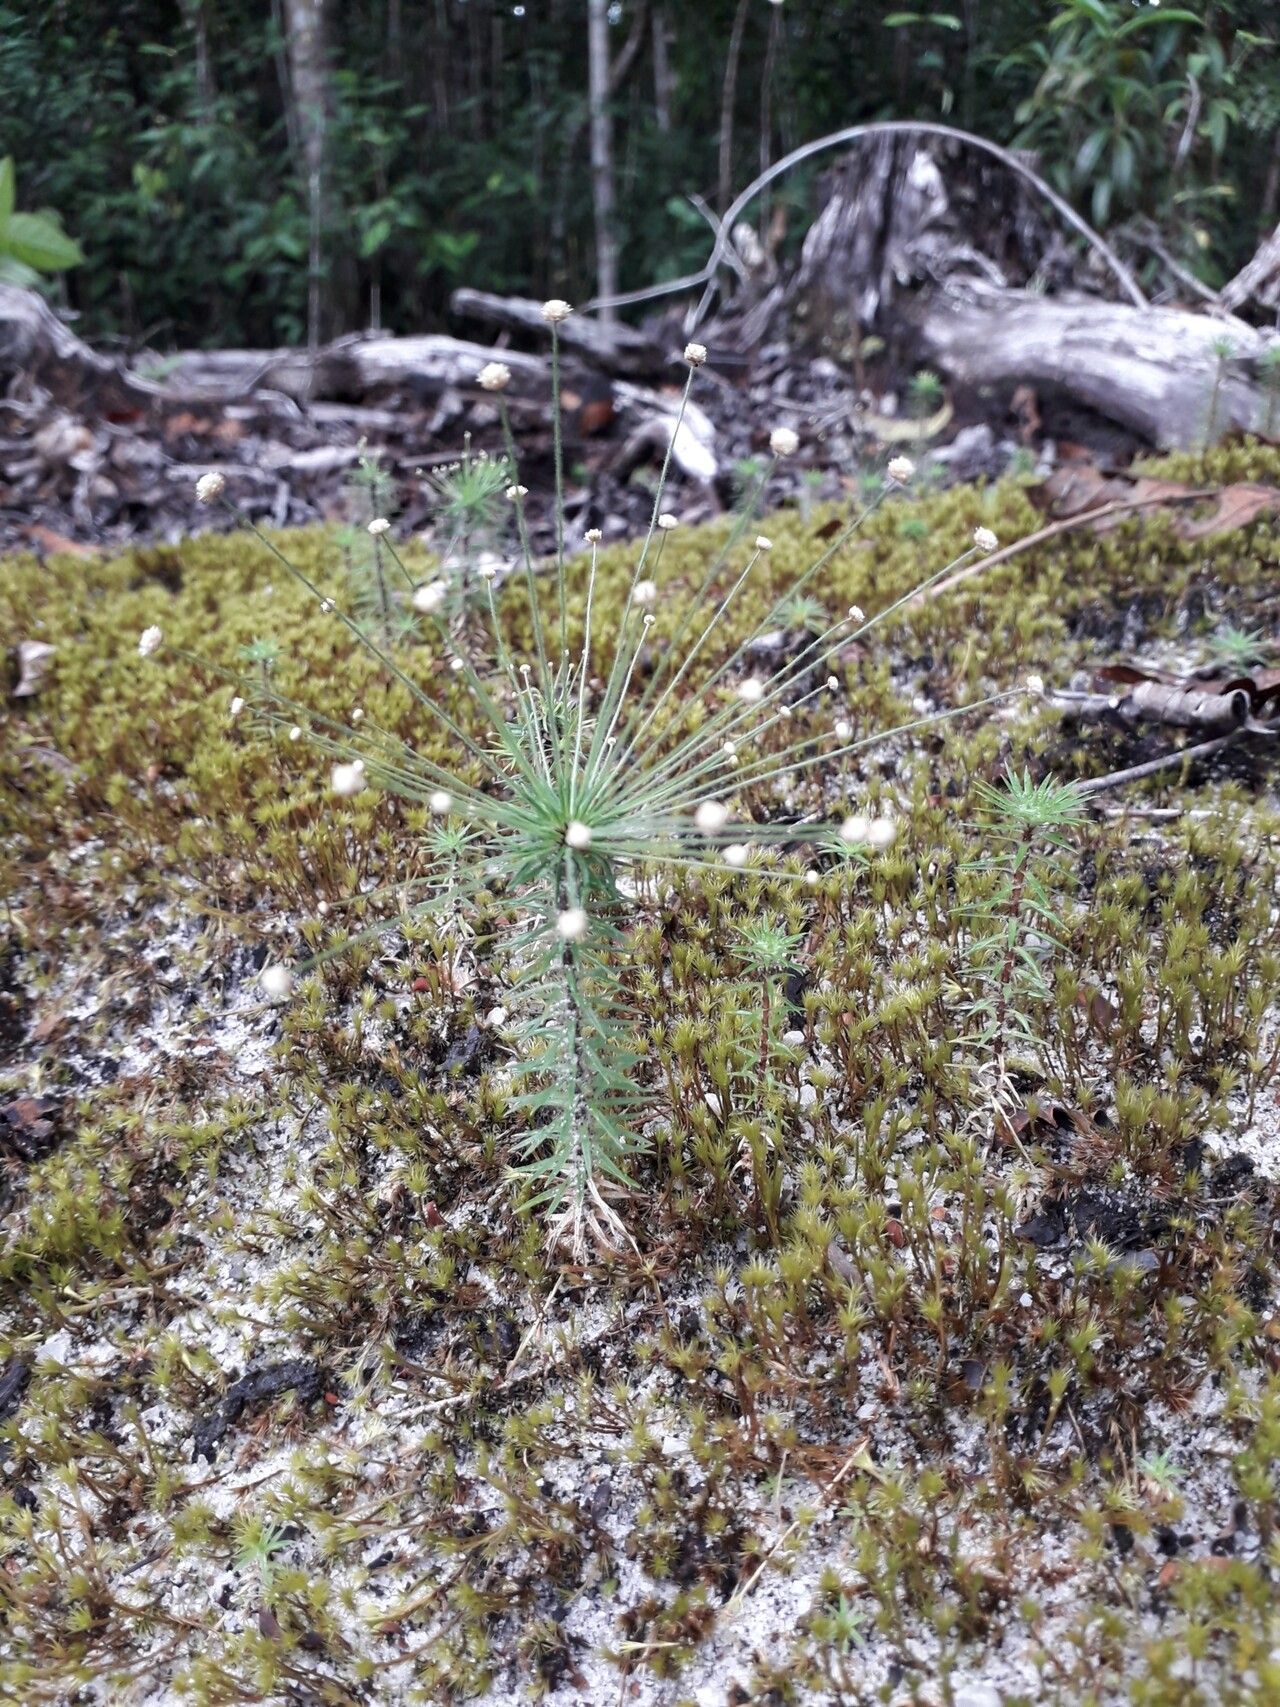
Oh, Paepalanthus fasciculatus! What a beauty. Those feathery, silvery-green leaves, forming those intricate rosettes… they just have a way of drawing you in, don’t they? If you’re anything like me, once you see one, you’ll want more. And the good news? Propagating this stunner is a wonderfully rewarding journey. Now, I’d be honest and say it’s not the absolute easiest plant for a complete beginner, but with a little care and attention, you’ll be well on your way to success. Think of it as a delightful challenge that pays off beautifully.
The Best Time to Start
For Paepalanthus fasciculatus, spring and early summer are your prime propagation windows. This is when the plant is actively growing, full of energy, and eager to put out new shoots. Waiting until after it’s finished its main growth spurt, usually by mid-summer, gives you the best chance for those cuttings to root and establish before the cooler weather sets in.
Supplies You’ll Need
- Sharp, clean pruning shears or a craft knife: For taking your cuttings without crushing them. Sterilize them with rubbing alcohol before and after use!
- Well-draining potting mix: A mix specifically for succulents and cacti is a fantastic starting point. You can also create your own by combining equal parts perlite, coarse sand, and a good quality potting soil.
- Small pots or trays: Clean containers with drainage holes are essential.
- Rooting hormone (optional but recommended): A powder or gel can give your cuttings a helpful boost.
- Spray bottle: For misting.
- Plastic bag or propagation dome: To create a humid environment for cuttings.
- Gravel or perlite (for water propagation): To keep cuttings stable.
Propagation Methods
We’ll focus on two of the most reliable methods for Paepalanthus fasciculatus: stem cuttings and division.
1. Stem Cuttings: Making New Plants from Shoots
This is my go-to method for increasing my collection.
- First, gently examine your parent plant. Look for healthy, actively growing shoots that are at least 3-4 inches long. These are often found emerging from the base or along the stems.
- Using your sterilized shears or knife, carefully cut the shoot away from the main plant. Try to make the cut just below a leaf node, where new roots are most likely to form.
- Gently remove the lower leaves from the cutting. It’s important to do this to prevent them from rotting once planted or placed in water. You want to expose a bit of the stem.
- If you’re using rooting hormone, lightly dip the cut end into the powder or gel. Tap off any excess.
- Now, you have two choices:
- Soil Propagation: Fill your small pot with your well-draining mix. Make a small hole in the center with your finger or a pencil. Gently insert the cut end of the stem into the hole, ensuring the leaf nodes you exposed are at least partially buried. Firm the soil around the cutting.
- Water Propagation: Place the cutting in a small jar or glass of clean water. Make sure no leaves are submerged below the waterline. You can add a few small pebbles or a piece of gravel to help the cutting stand upright. Place it in a bright spot, but out of direct sunlight.
- After planting or placing your cutting, lightly water the soil (if using soil method) or ensure the water is fresh (for water method).
- Create a humid environment. For soil cuttings, lightly mist the leaves and cover the pot with a plastic bag or a propagation dome. For water cuttings, you can loosely cover the jar with a bag.
- Place your cuttings in a spot that receives bright, indirect light.
2. Division: Separating Established Clumps
If your Paepalanthus fasciculatus has grown into a substantial clump with multiple rosettes, division is an excellent and often faster way to get new plants.
- Carefully remove the entire plant from its pot. You might need to gently loosen the soil around the edges.
- Gently shake away excess soil from the root ball.
- Look for natural breaks or divisions within the clump where you can see where root systems are distinct.
- Using your hands, and if needed, your sterilized pruning shears or knife, carefully separate the clump into smaller sections. Each section should have a good portion of roots attached and at least one healthy rosette.
- Inspect the roots and trim away any dead or mushy ones.
- Pot up each division into its own small pot filled with your well-draining potting mix. Ensure the soil level is just at the base of the rosette.
- Water gently to settle the soil around the roots.
The “Secret Sauce” (Pro Tips)
Here are a couple of things I’ve learned over the years that really make a difference:
- Don’t let those leaves touch the water! This is so crucial for water propagation. Any submerged foliage is an invitation for rot, and we absolutely don’t want that. Keep those cuttings clean and dry above the waterline.
- Bottom heat is your friend. If you’re having trouble with cuttings rooting, especially in cooler conditions, a propagation mat placed underneath your pots can significantly speed things up. It encourages root development from the bottom up. You can find inexpensive ones online or at garden centers.
- Patience with cuttings. Sometimes, it can take several weeks, or even a couple of months, for cuttings to show signs of rooting, especially if they don’t have that extra bit of heat. Don’t give up too soon! Resist the urge to constantly tug on them to check for roots.
Aftercare & Troubleshooting
Once your cuttings have developed a healthy root system (you might see roots peeking out of the drainage holes, or feel a gentle resistance when you lightly tug), it’s time to transition them to their permanent homes.
- Gradually acclimate them to less humidity. If they were in a bag, start by opening it for a few hours a day, then remove it completely.
- Continue to water judiciously. Allow the top inch or so of soil to dry out between waterings. Overwatering is the quickest way to lead to root rot.
- Fertilize lightly with a diluted, balanced liquid fertilizer once you see active new growth.
- Signs of failure usually point to rot. If your cutting turns mushy, black, or develops fuzzy grey mold, it’s unfortunately likely gone. This is often due to too much moisture and poor air circulation. If you catch it early, you might be able to salvage a healthy section of the stem and try again. For divisions, mushy roots are also a sign of rot, usually from overwatering or poor drainage.
A Little Patience Goes a Long Way
Propagating plants is a process of observation and gentle nurturing. Don’t be discouraged if your first attempt isn’t perfect. Each new plant is a little victory, a testament to your growing skills and the plant’s resilience. Enjoy the journey of watching those tiny roots emerge and new growth unfurl. Happy propagating!
Resource: