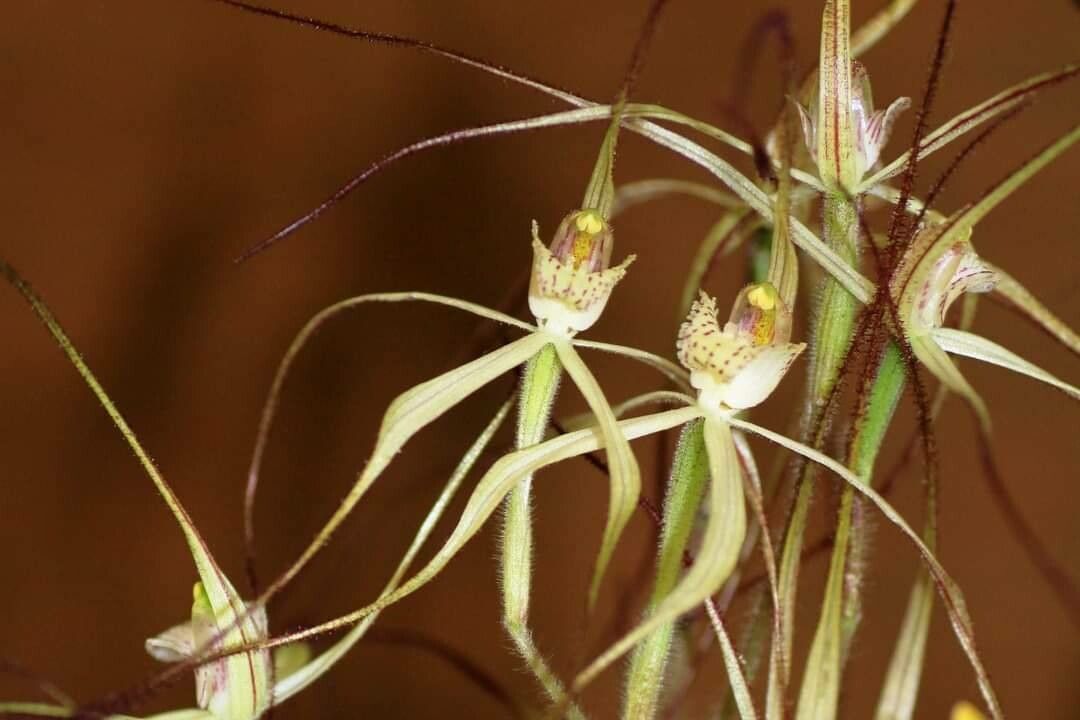
Oh, hello there, fellow plant lover! Pull up a chair and let’s chat about a truly special bloom: Caladenia horistes. You know, the one with those elegant, intricate flowers that seem to dance in the breeze? They have this delicate beauty that’s just captivating. And the reward of coaxing a new one into existence from a parent plant? Pure gardening joy, I tell you. Now, for the nitty-gritty: is Caladenia horistes a beginner-friendly propagation project? I’d say it leans towards the moderately challenging side. It requires a bit of patience and attention to detail, but with the right approach, you can absolutely succeed.
The Best Time to Start
When is the sweet spot for giving propagation a go? For Caladenia horistes, the late spring to early summer is generally your best bet. This is when the plant is actively growing and has plenty of energy reserves to put into developing new roots. You’ll typically be looking at propagating from established, healthy specimens that have recently finished their flowering cycle.
Supplies You’ll Need
Gathering your tools beforehand makes the whole process smoother. Here’s what I usually have on hand:
- Sharp, sterile pruning shears or a craft knife: For clean cuts.
- Clean pots or trays: Small ones are good for starting.
- A well-draining potting mix: I use a blend of coarse orchid bark, perlite, and a little bit of sphagnum moss. This imitates their natural habitat and prevents waterlogging.
- Rooting hormone powder (optional but recommended): This can give your cuttings a helpful boost.
- A spray bottle: For gentle misting.
- Labels and a marker: So you don’t forget what you’ve planted!
- Perlite or coarse sand: For improving drainage in the potting mix or as a top layer.
Propagation Methods
Caladenia horistes is often best propagated through division. While stem cuttings can work, they can be finicky. Division is usually more reliable and less stressful for the parent plant.
Division:
- Gently excavate: When your Caladenia horistes plant is dormant or just finished flowering (think late spring/early summer), carefully dig it up. You want to disturb the roots as little as possible.
- Inspect the root ball: Look for natural separation points. You’ll often see where new pseudobulbs (the swollen stem parts) have formed from the old ones.
- Make the cut: Using your sharp, sterile shears or knife, carefully separate a division. Each division should have at least one healthy pseudobulb and a good portion of its root system. Don’t be afraid to cut through tougher rhizomes if needed, but aim for clean, precise cuts.
- Allow to callous (optional but good practice): If you made any significant cuts, let the division sit in a dry, airy spot for a few hours, or even overnight, to allow the cuts to dry and form a protective callus. This helps prevent rot.
- Pot up: Plant each division in its own small pot filled with your well-draining mix. Ensure the pseudobulb is sitting just at the surface of the soil, or slightly exposed.
The “Secret Sauce” (Pro Tips)
Here are a few things I’ve learned over the years that can make a real difference:
- Don’t overwater, EVER: This is probably the most crucial tip for Caladenia horistes. They are very susceptible to rot. Water sparingly, only when the potting mix is nearly dry to the touch. Bottom watering can be a good way to ensure the roots get hydration without saturating the top layer of soil.
- Think about humidity, not direct water: While you don’t want the leaves touching water, new divisions appreciate a bit of humidity. Misting the air around the pot a couple of times a day, especially in drier environments, can really help.
- Patience is key: These orchids can be slow to establish. Don’t be discouraged if you don’t see immediate new growth. They are quietly working underground.
Aftercare & Troubleshooting
Once your divisions are potted up, keep them in a spot with bright, indirect light. Avoid harsh, direct sun, which can scorch young plants. Continue with the sparing light watering as the soil dries.
The biggest challenge you might face is rot. If you see your pseudobulb looking mushy or turning black, it’s likely waterlogged. Sadly, once rot sets in, it’s hard to recover the plant. This is why excellent drainage and careful watering are paramount. Another sign of trouble is wilting without obvious cause; this could indicate root rot has already set in, or the plant is too dry for too long.
A Encouraging Closing
Propagating Caladenia horistes is a journey, not a race. Celebrate the small victories – a new root peeking out, a fresh leaf unfurling. Be patient with yourself and with your new plants. The joy of watching them grow and eventually bloom, knowing you helped bring them to life, is an experience unlike any other. Happy gardening!
Resource:
https://identify.plantnet.org/k-world-flora/species/Caladenia%20horistes%20Hopper%20&%20A.P.Br./data