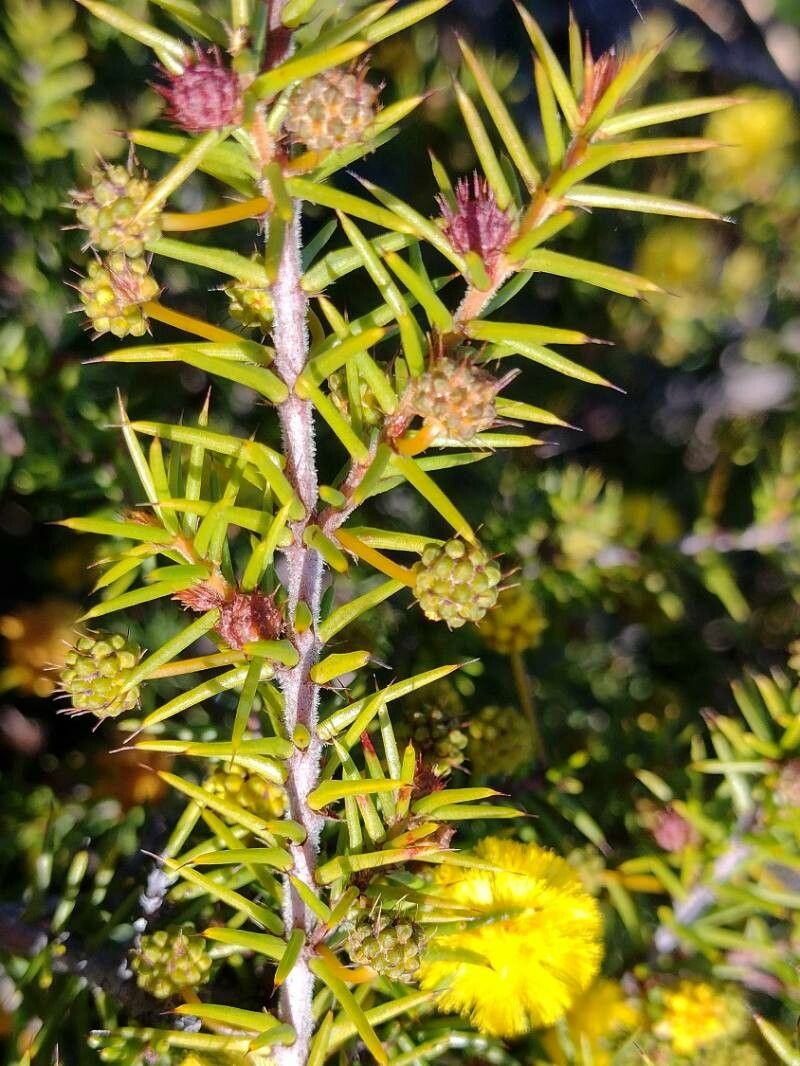
Hello there, fellow garden lovers! It’s so good to be sharing a cup of coffee with you today, virtually of course. We’re going to dive into a plant that’s truly special: Acacia echinula, or, as some of us affectionately call it, the Prickly Moses wattle. Its delicate, fluffy yellow blooms are just stunning, appearing like little sunbursts against its fine, fern-like foliage. And the reward of growing your own from scratch? Simply unparalleled. Now, for those of you just starting out, I won’t lie – Acacia echinula can be a tad bit challenging. But don’t let that deter you! With a little know-how and a lot of patience, you can absolutely do this.
The Best Time to Start
When it comes to getting your Acacia echinula off to a good start, spring is your best friend. Think of it as the plant waking up after a long rest. During this time, new growth is vigorous, and cuttings taken from this fresh wood have a much better chance of rooting. Aim for soft, new growth that hasn’t yet become woody. We’re after that pliable stage.
Supplies You’ll Need
Let’s get our toolkit ready. Here’s what you’ll want to have on hand:
- Sharp Pruning Shears or a Knife: Clean cuts are vital. We want to avoid tearing the delicate tissues.
- Rooting Hormone: This is a little booster that encourages root development. Look for one that’s suitable for woody cuttings.
- Well-Draining Potting Mix: A 50/50 blend of perlite and peat moss or coco coir works beautifully. You could also use a commercially available cactus or succulent mix.
- Small Pots or Trays: Clean pots with drainage holes are a must.
- Plastic Bags or a Propagator: To keep humidity levels high.
- Labels or Markers: To keep track of your precious cuttings.
- Watering Can with a Fine Rose: Gentle watering is key.
Propagation Methods
For Acacia echinula, I’ve found stem cuttings to be the most successful and straightforward method. Let’s get down to the nitty-gritty.
- Take Your Cuttings: Select healthy, non-flowering stems from your mature plant. Using your sterilized pruning shears or knife, take cuttings that are about 4-6 inches long. Make a clean, angled cut just below a leaf node (where a leaf attaches to the stem).
- Prepare the Cuttings: Gently remove the lower leaves, leaving just a few at the top. If the leaves are very large, you can even cut them in half to reduce water loss through transpiration.
- Apply Rooting Hormone: Dip the cut end of each stem about an inch into your rooting hormone powder or gel. Tap off any excess.
- Plant Your Cuttings: Fill your clean pots with your prepared, moistened potting mix. Make a small hole in the center with your finger or a pencil. Carefully insert the cutting into the hole, ensuring the base is securely in the soil. Gently firm the soil around the cutting.
- Create a Humid Environment: Water the soil lightly. Then, cover the pot with a clear plastic bag, securing it around the rim with a rubber band, or place the pots in a propagator. This will create that essential humid microclimate.
The “Secret Sauce” (Pro Tips)
Now, here are a few little tricks I’ve picked up over the years that can make a big difference:
- Don’t Overwater the Soil: You want the potting mix to be consistently moist, but not soggy. Too much water is a fast track to rot, which is often the downfall of cuttings. Think “damp sponge” consistency.
- Bottom Heat is Your Friend: If you have a seedling heat mat, placing your pots on it can significantly speed up root development. It encourages the roots to grow from the base of the cutting. It truly makes a world of difference for many woody cuttings.
- Air Circulation is Key: While we want high humidity, stagnant air can also promote fungal issues. Once a week, take the plastic bag off for an hour or so to allow for some air exchange. You’ll also get that fresh air for yourself!
Aftercare & Troubleshooting
Once your cuttings are planted, find them a spot with bright, indirect light. Avoid direct sun, as this can scorch the delicate new growth. Keep the soil consistently moist. In a few weeks, you might start to see tiny new leaves appearing – that’s a very good sign!
The biggest challenge you might face is rot. If a cutting turns black and mushy, it’s a sign of too much moisture and poor air circulation. Sadly, these are usually lost. If you see fuzzy mold on the soil surface, it’s another indicator of overly wet conditions. You can try scraping off the mold and allowing the soil to dry out a bit more.
When you tug gently on a cutting and feel resistance, that means roots have formed! At this stage, you can gradually acclimate them to normal conditions by gradually removing the plastic bag over a week or two. Then, it’s time to transplant them into their own small pots.
A Encouraging Closing
Growing new plants is such a rewarding journey, isn’t it? Be patient with your Acacia echinula cuttings. Some might take their sweet time, and a few might not make it. That’s all part of the beautiful learning process of gardening. So, happy propagating, and may your Prickly Moses wattle flourish!
Resource:
https://identify.plantnet.org/k-world-flora/species/Acacia%20echinula%20DC./data