Hello there, fellow garden enthusiasts!
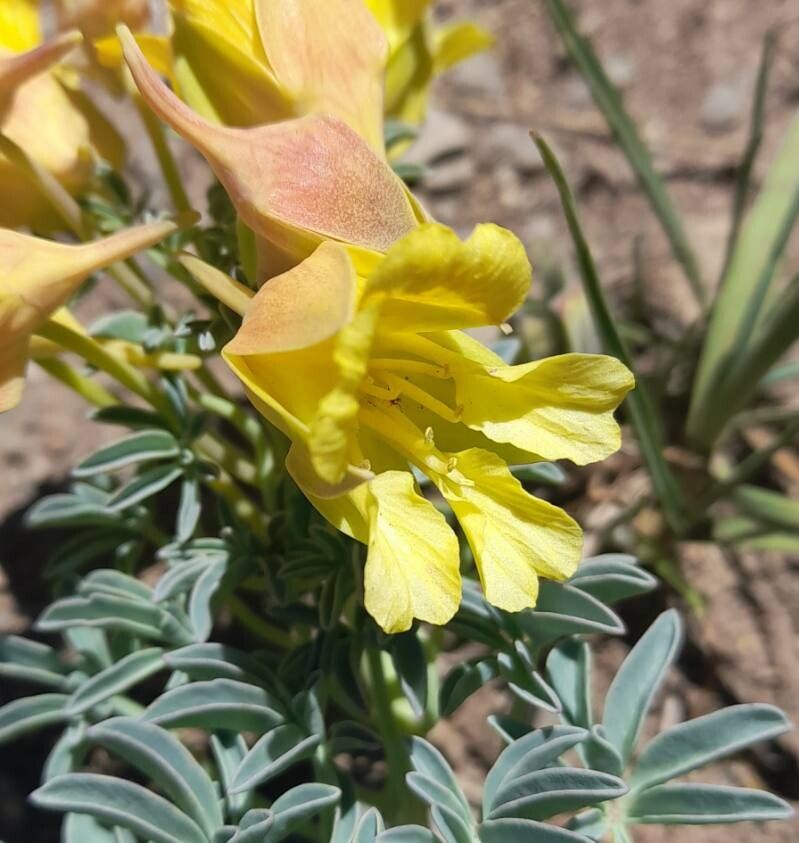
If you’re looking for a splash of vibrant color and a touch of wild charm in your garden, then you absolutely must get acquainted with Tropaeolum polyphyllum, also known as the many-leaved nasturtium. Its trailing habit and bright, cheerful flowers are a delight. And the best part? Propagating this beauty is absolutely doable, offering a wonderfully rewarding way to fill your garden or share those delightful blooms with friends. For beginners, I’d say it’s moderately easy – with a little patience and the right approach, you’ll be celebrating success!
The Best Time to Start
My personal favorite time to dive into propagating Tropaeolum polyphyllum is during its active growing season, which typically starts in late spring or early summer. This is when the plant is full of vigor and has plenty of healthy stems and leaves to work with. Waiting until after the main flush of flowering has passed, but before the plant starts to wind down for the season, also works well for divisions.
Supplies You’ll Need
Gathering your supplies beforehand makes the whole process smoother. Here’s what I always have on hand:
- Sharp pruning shears or a clean knife: For making clean cuts on your cuttings.
- Rooting hormone (optional but recommended for stem cuttings): Helps to encourage root development.
- Potting mix: A well-draining mix is crucial. I often use a blend of equal parts peat moss or coco coir, perlite, and a bit of compost. For divisions, a good quality potting soil will do.
- Small pots or propagation trays: With drainage holes, of course!
- Watering can or spray bottle: For gentle watering.
- Plastic bags or a propagation dome: To maintain humidity around your cuttings.
Propagation Methods
There are a couple of fantastic ways to get more Tropaeolum polyphyllum plants.
Stem Cuttings
This is my go-to method for creating new plants quickly.
- Select healthy stems: Look for non-flowering, semi-hardwood stems that are about 4-6 inches long. These are stems that are not too soft and leafy but not woody and old either.
- Make the cut: Using your sharp shears, make a clean cut just below a leaf node. The leaf node is where a leaf attaches to the stem – this is where roots are most likely to form.
- Prepare the cutting: Remove the lower leaves, leaving just two or three at the top. This prevents them from rotting in the potting mix.
- Apply rooting hormone: Dip the cut end into rooting hormone, if you’re using it. Tap off any excess.
- Pot them up: Insert the cuttings into your prepared, moist potting mix. Make a small hole with a pencil or your finger first to avoid rubbing off the rooting hormone. Press the soil gently around the base of each cutting.
- Create humidity: Water gently and then cover the pots with a plastic bag or place them in a propagation dome. This creates a mini greenhouse effect.
Division
If your plant is already established and you want to encourage bushier growth, dividing it is a great option.
- Gently remove from pot: Carefully take the plant out of its existing pot. If it’s in the ground, dig around it gently.
- Separate the root ball: Look for natural divisions in the root structure. Gently pull apart the root clumps. If they are stubborn, you might need to use a clean, sharp knife to make a cut through the roots, ensuring each section has roots and some shoots.
- Re-pot or plant: Pot up each division into its own pot with fresh potting soil, or replant them directly into the garden. Water them in well.
The “Secret Sauce” (Pro Tips)
Here are a few little tricks I’ve learned over the years that really boost success:
- For stem cuttings, dip the cut end in activated charcoal before the rooting hormone. This helps to prevent fungal infections, which is a common issue with cuttings sitting in damp soil.
- Bottom heat is your friend! Placing your pots on a heated propagation mat can significantly speed up root formation. It mimics the warmth of spring soil and encourages those roots to get going.
- When water propagating (if you choose to go that route, though soil is generally better for Tropaeolum), ensure no leaves are submerged in the water. They will quickly turn mushy and rot, and that rot can travel down the stem.
Aftercare & Troubleshooting
Once your cuttings have rooted (you’ll see new leaf growth appearing which is a good sign!), it’s time to give them a little extra TLC.
- Gradually acclimatize: If you’ve used a plastic bag or dome, slowly start to remove it for increasing periods each day. This helps the new plant adjust to the drier air outside the greenhouse.
- Watering: Keep the soil consistently moist, but not soggy. Allow the top inch of soil to dry out slightly between waterings.
- Light: Place your new plants in bright, indirect light. Avoid direct, scorching sun while they are still establishing.
The most common problem I see is rot. If a cutting turns black and mushy, it’s usually a sign of too much moisture and not enough air circulation. This is where that well-draining soil and the humidity dome become so important. If you see wilting without any signs of rot, it might mean the cutting isn’t getting enough moisture or hasn’t rooted yet.
A Little Patience Goes a Long Way
Don’t get discouraged if your first few attempts don’t go perfectly. Gardening is a journey, and propagating plants is part of that beautiful learning process. With a little patience and by following these steps, you’ll soon be enjoying your own homegrown Tropaeolum polyphyllum plants. Happy propagating!
Resource:
https://identify.plantnet.org/k-world-flora/species/Tropaeolum%20polyphyllum%20Cav./data