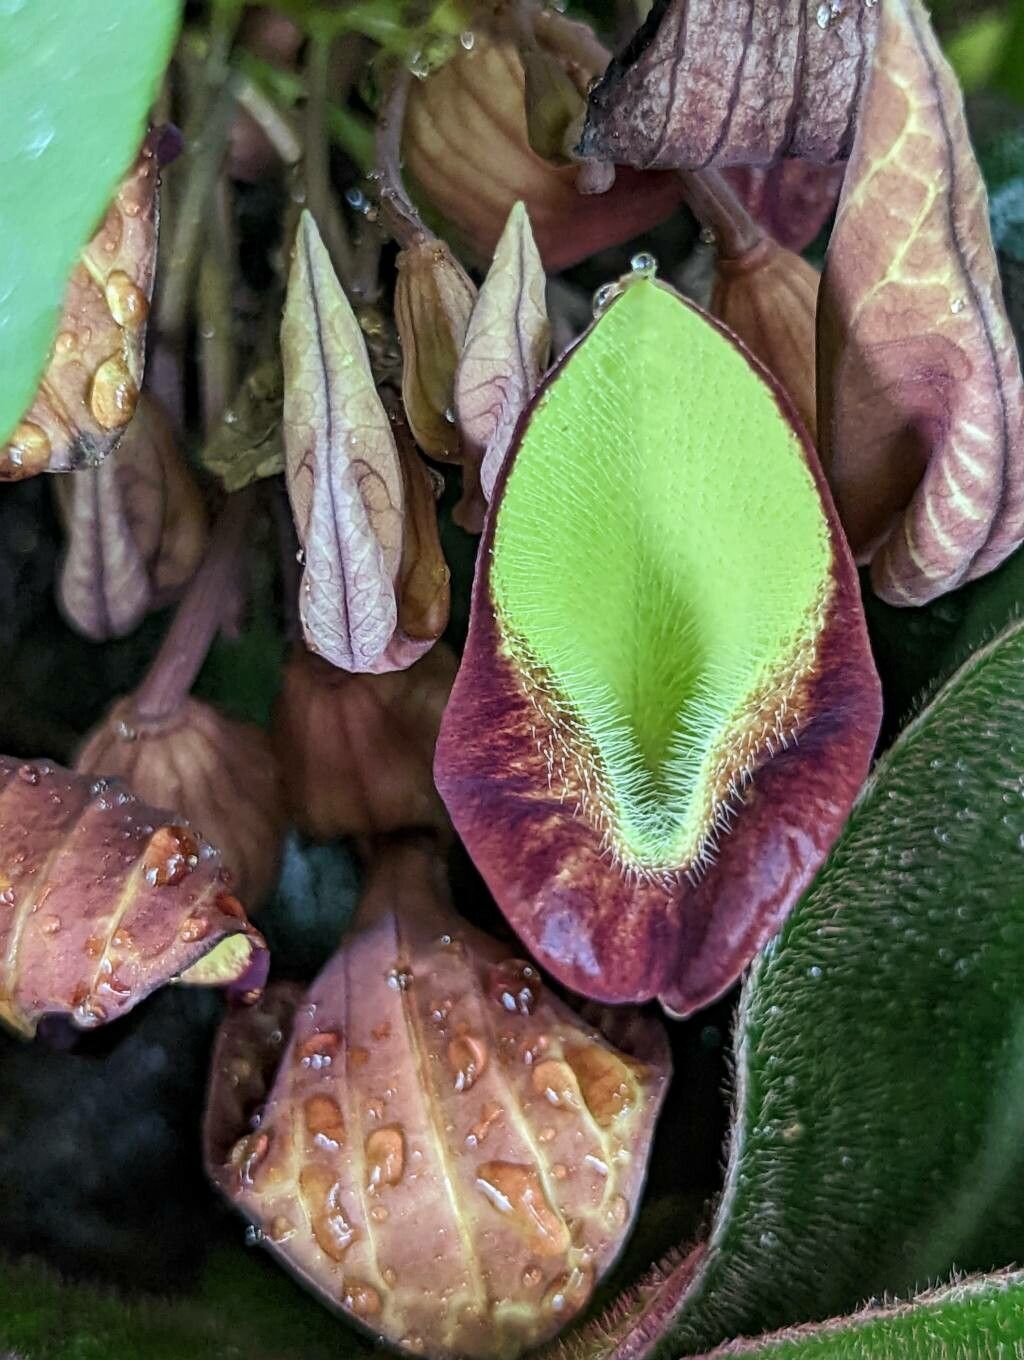
Well hello there, fellow green thumbs! I’m so glad you’ve found your way to this little corner of the internet. Today, we’re diving into the wonderful world of Aristolochia guentheri, a plant that truly captures the imagination. Those unique, often intricate blooms are such a delight, aren’t they? And the reward of coaxing a new life from a parent plant? Truly something special.
Now, if you’re wondering if Aristolochia guentheri is an easy beginner project, I’d say it leans towards the moderate side. It’s not quite as forgiving as a pothos, but with a little attention and the right approach, you absolutely can succeed!
The Best Time to Start
My favorite time to get busy propagating our Aristolochia guentheri is in the late spring or early summer. This is when the plant is in a strong growth spurt, full of vigor. The days are getting longer, the sun is warm, and the plant is just bursting with energy. This makes it much more receptive to taking root. You’ll want to look for stems that are semi-hardwood – not the brand new, floppy green shoots, and definitely not the old, woody mature stems. Think of a pencil that’s just started to become firm but still has a bit of give.
Supplies You’ll Need
Gathering your supplies before you begin is always a good strategy. It prevents interruptions and ensures you have everything at hand when inspiration strikes!
- Sharp Pruning Shears or Knife: Clean cuts heal better and reduce the risk of disease.
- Small Pots or Containers: About 4-6 inches in diameter is usually perfect. Make sure they have drainage holes!
- Well-Draining Potting Mix: I like to use a mix that’s about 50% perlite or pumice and 50% peat moss or coco coir. This ensures plenty of aeration for those roots.
- Rooting Hormone (Optional but Recommended): This gives your cuttings a nice boost. Look for one that contains indole-3-butyric acid (IBA).
- Plastic Bags or Humidity Domes: To keep humidity levels high around your cuttings.
- Water: For watering and, if you choose, for water propagation.
- Gloves: Some people find certain Aristolochia sap a bit irritating, so it’s always good to be safe.
Propagation Methods
Let’s get our hands dirty with the most common, and in my experience, the most successful methods!
Stem Cuttings
This is my go-to for Aristolochia guentheri.
- Take Your Cuttings: Using your clean shears, select a healthy, semi-hardwood stem. Make a cut just below a leaf node (the point where a leaf attaches to the stem). You want cuttings that are about 4-6 inches long.
- Prepare the Cuttings: Gently remove the lower leaves, leaving just two or three at the very top. This prevents them from rotting in the soil. If your top leaves are very large, you can even cut them in half horizontally to reduce water loss through transpiration.
- Apply Rooting Hormone (If Using): Dip the cut end of the stem into the rooting hormone powder or gel. Tap off any excess.
- Plant Your Cuttings: Fill your small pots with your prepared potting mix. Make a little hole in the center with your finger or a pencil. Gently insert the cutting into the hole, ensuring the nodes where you removed the leaves are buried. Firm the soil gently around the stem.
- Water Gently: Water the pot thoroughly until water drains from the bottom.
- Create a Humid Environment: Place the potted cutting inside a plastic bag or cover it with a clear humidity dome. This traps moisture around the leaves and helps prevent them from drying out before they can root. You can use a skewer or two to prop up the bag so it doesn’t touch the leaves.
Water Propagation
This method is incredibly rewarding to watch!
- Prepare the Cuttings: Follow steps 1 and 2 from the stem cutting method. You can even try water propagation with the same cuttings you’d use for soil.
- Place in Water: Find a clean glass or jar and fill it with lukewarm water. Place your prepared cuttings in the water, ensuring that the leaf nodes you removed the leaves from are submerged.
- Location: Place the container in a bright spot, but out of direct, harsh sunlight.
- Change Water Regularly: This is crucial! Change the water every 2-3 days to keep it fresh and prevent bacterial growth.
The “Secret Sauce” (Pro Tips)
Here are a few little tricks I’ve learned over the years that can make a big difference:
- Bottom Heat is Your Friend: For stem cuttings, placing your pots on a gentle seedling heat mat can significantly speed up root development. It mimics the warmth of spring soil and encourages those roots to emerge. Just a low setting is all you need!
- Don’t Let Leaves Touch the Water: If you’re doing water propagation, I cannot stress this enough: make sure no leaves are sitting in the water. Only the submerged stem nodes should be in contact with the water. Leaves submerged will rot, which can infect the cutting and lead to failure.
- Patience with Water Propagation: When you see those tiny white roots emerging in water, it’s SO tempting to pot them up. But I find it’s best to wait until those roots are at least an inch long. This gives them a much better chance of successfully transitioning to soil.
Aftercare & Troubleshooting
Once you see signs of life – new leaf growth or those beautiful white roots peeking through the drainage holes or developing in your water jar – hurray! It’s time for a little bit of gentle care.
For rooted cuttings in soil, gradually acclimate them to normal room humidity by opening the plastic bag for a few hours each day over a week. Continue to water them when the top inch of soil feels dry. For water-propagated cuttings, carefully plant them in pots with your well-draining mix. Water them in well, and keep the soil consistently moist but not soggy for the first couple of weeks.
Now, what if things don’t go as planned? The most common culprit for failure is rot. If your cutting turns black and mushy, or develops fuzzy white mold, it’s probably rotted. This is often due to too much moisture and poor air circulation. If you see any signs of rot, it’s usually best to discard that cutting and try again. Sometimes, a cutting will just shrivel up and die – that’s plant life for you! Don’t take it too personally. It happens to the best of us.
A Encouraging Closing
Propagating Aristolochia guentheri is a wonderfully rewarding journey. It requires a bit of patience and observation, but the thrill of seeing those first roots emerge and then watching your new plant flourish is an experience that never gets old. Be kind to yourself, enjoy the learning process, and happy propagating!
Resource:
https://identify.plantnet.org/k-world-flora/species/Aristolochia%20guentheri%20O.C.Schmidt/data