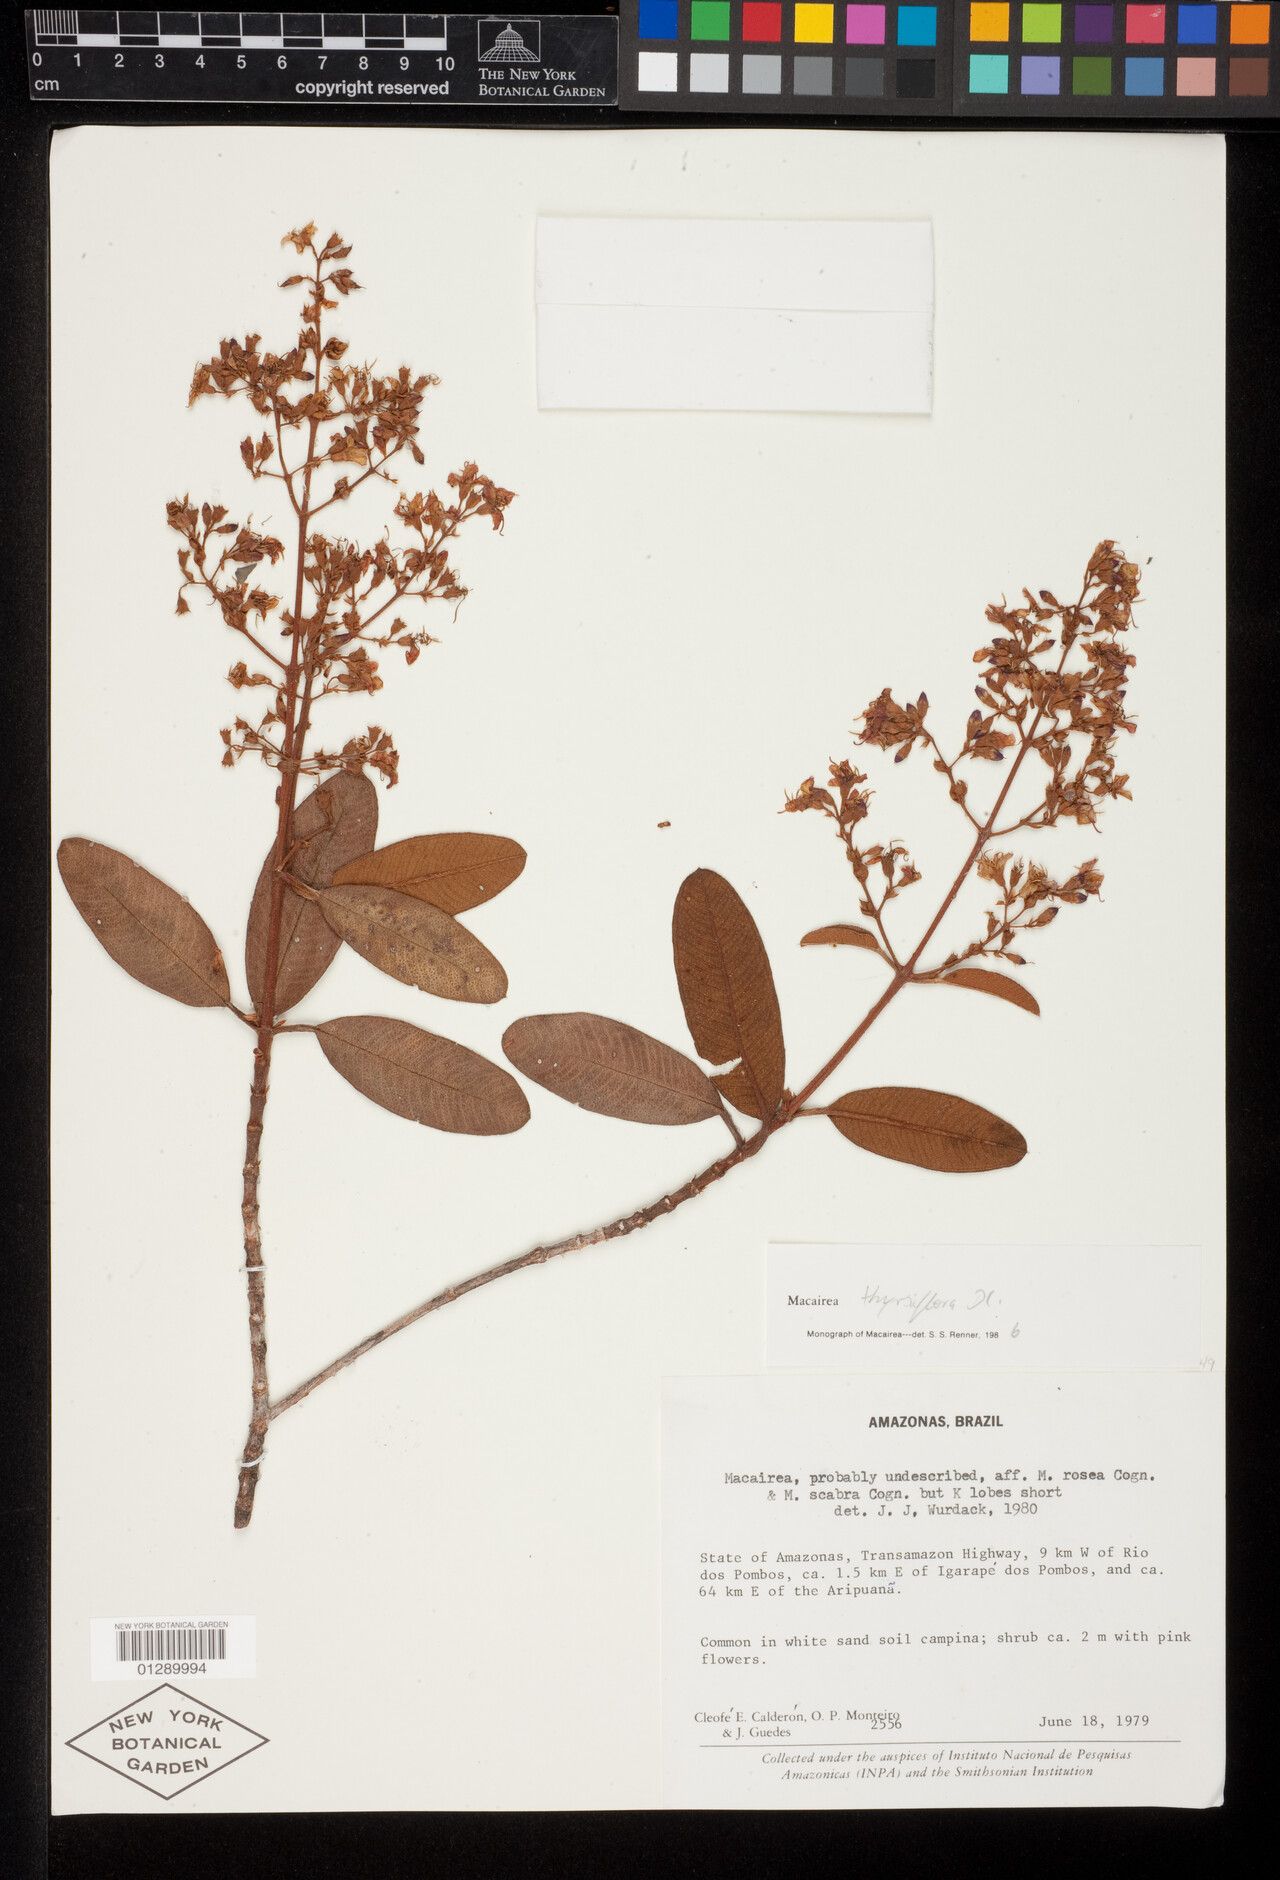
Ah, Macairea thyrsiflora! What a joy to talk about this beauty with you. Those vibrant blooms, like little bursts of sunshine, really do bring a smile to your face. And the best part? Learning to create more of them yourself. It’s a deeply satisfying feeling, watching a tiny cutting transform into a thriving plant. Now, I’ll be honest, Macairea thyrsiflora isn’t the absolute easiest plant for a first-time propagator. It likes a bit of specific attention, but that doesn’t mean you can’t master it. Think of it as a fun challenge for your green thumb!
The Best Time to Start Your Macairea Journey
For the highest chance of success, I always reach for my pruning shears in late spring or early summer. This is when the plant is actively growing and has plenty of energy to put into rooting. You want to look for stems that are firm but not woody, usually the newer growth. Avoid anything that’s flowering or looks stressed.
Supplies You’ll Need
Before we get our hands dirty, let’s gather our tools:
- Clean, sharp pruning shears or a sharp knife: For making clean cuts.
- Rooting hormone (powder or gel): This really gives your cuttings a boost.
- A well-draining potting mix: I like a blend of equal parts peat moss, perlite, and a little bit of compost. You can also find specific succulent or cactus mixes that work well.
- Small pots or seed trays: With drainage holes, of course!
- Clear plastic bags or a propagator lid: To create a humid environment.
- A spray bottle: For misting.
- Optional: A heat mat: This provides gentle bottom warmth, which can speed up rooting.
Propagation Methods: Bringing New Life
We’ll focus on stem cuttings; it’s the most reliable way for Macairea thyrsiflora.
Stem Cuttings
- Take the Cutting: Select a healthy, non-flowering stem. Using your clean shears, make a cut just below a leaf node (where a leaf attaches to the stem). You’re aiming for cuttings about 4-6 inches long.
- Prepare the Cutting: Gently remove the lower leaves from the bottom half of the cutting. It’s important to keep at least a few leaves at the top for photosynthesis.
- Apply Rooting Hormone: Dip the cut end of the stem into your rooting hormone, tapping off any excess. Don’t be shy; give it a good coating.
- Plant the Cutting: Moisten your potting mix slightly. Make a small hole in the center of the pot with your finger or a pencil. Insert the cut end of the stem into the hole, ensuring the leaf nodes are covered by the soil. Gently firm the soil around the stem to support it.
- Create Humidity: Water the potting mix gently until it’s evenly moist. Then, cover the entire pot with a clear plastic bag, securing it around the rim with a rubber band. Alternatively, use a propagator lid. This will create a mini-greenhouse and keep the humidity levels high, which cuttings absolutely adore.
- Placement: Place your potted cuttings in a bright spot with indirect sunlight. Avoid direct sun, as it can scorch the delicate leaves and overheat the propagator.
Water Propagation (Use with Caution!)
While some plants root beautifully in water, Macairea can be a bit more finicky. If you choose this method:
- Prepare the Cutting: Follow steps 1 and 2 above.
- Place in Water: Put the cutting in a small jar or glass of clean water, making sure the leaves do not touch the water. Submerged leaves will rot quickly.
- Change Water Regularly: Change the water every few days to keep it fresh and prevent bacterial growth.
- Wait for Roots: You might see roots eventually, but this method is generally less successful and more prone to rot for Macairea than soil propagation.
The “Secret Sauce” (Pro Tips)
Here’s what I’ve learned over the years that makes a real difference:
- Bottom Heat is Your Friend: If you have a heat mat, pop your cuttings on it. Warm soil temperatures signal to the plant that it’s time to root. About 70-75°F (21-24°C) is ideal.
- Don’t Overwater! This is probably the biggest pitfall. Cuttings seated in soil want to be kept consistently moist, but not soggy. If the soil feels like a wrung-out sponge, you’re on the right track. Soggy soil leads to rot, and no one wants that.
- Patience is Key: Macairea thyrsiflora can be a bit slow to root. Don’t despair if you don’t see new growth immediately. Check for roots by very gently tugging on the cutting. If you feel resistance, roots are forming! This can take anywhere from 4-8 weeks, sometimes longer.
Aftercare & Troubleshooting: Nurturing Your New Sprouts
Once you feel that resistance, congratulations! It’s time to begin acclimating your new plant.
- Acclimation: Gradually introduce your rooted cutting to the outside air. For the first week, remove the plastic bag for a few hours each day, slowly increasing the duration. This helps it adjust to lower humidity.
- Transplanting: Once it’s well-rooted and you’re confident it can handle a bit more air, you can transplant it into its own small pot, using the same well-draining mix. Water it gently.
- Signs of Trouble: The most common issue is rot. If your cutting turns black and mushy, it’s likely rotted. This usually stems from overwatering or poor air circulation. If you see signs of rot, try to salvage any healthy parts of the stem and start again, being more careful with watering. Yellowing leaves can sometimes indicate too much or too little water, or insufficient light, but often it’s just the plant shedding old leaves to make way for new growth.
A Gentle Wrap-Up
Growing new plants from cuttings is such a rewarding experience. It connects you to the natural world in a special way. Just remember to be kind to yourself, be patient, and enjoy the journey. Every gardener has had cuttings that didn’t make it – that’s just part of the learning process! Happy propagating, and soon you’ll have a whole collection of these cheerful Macairea thyrsiflora to enjoy.
Resource:
https://identify.plantnet.org/k-world-flora/species/Macairea%20thyrsiflora%20DC./data