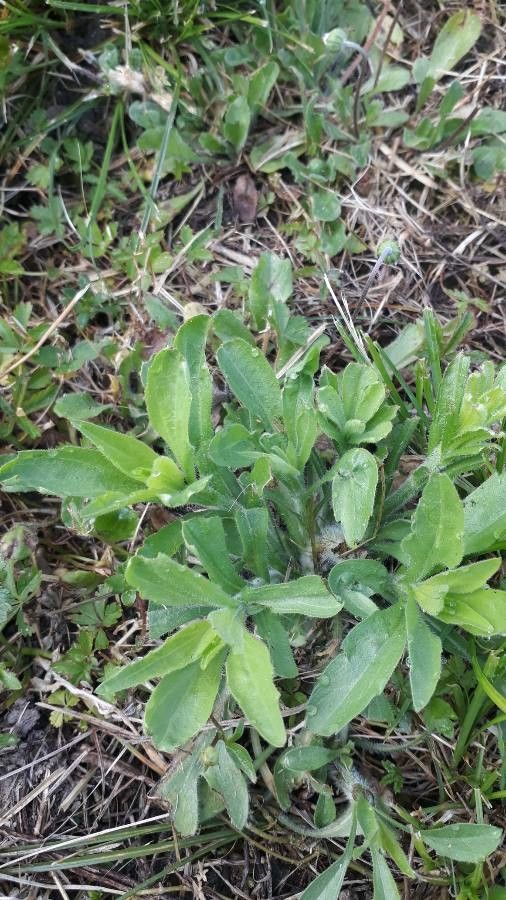
Oh, hello there! So glad you’ve stopped by my little corner of the internet. Today, we’re going to talk about a plant that has really captured my heart over the years: Plantago rhodosperma, or as some folks affectionately call it, the Red-Seeded Plantain. I just adore its ruffled, often burgundy-tinged leaves and those charming little spikes of tiny flowers. And the best part? It’s surprisingly rewarding to multiply these beauties and share them with friends, or just fill your own garden with more of them!
Now, if you’re just starting out with propagation, Plantago rhodosperma is a fantastic choice. It’s not one of those finicky divas that demand a PhD in botany to work with. Most of the time, it’s quite forgiving, which makes it a joy to experiment with. Seeing a tiny cutting transform into a healthy, established plant is truly one of gardening’s greatest pleasures.
The Best Time to Start
For Plantago rhodosperma, I find that late spring to early summer is your golden window. This is when the plant is in its most vigorous growth phase. You’ll have plenty of healthy new shoots to work with, and the warmer temperatures encourage faster root development. Starting earlier in spring is also an option, but give your parent plant a little time to wake up and really stretch its legs after winter.
Supplies You’ll Need
Gathering your tools makes the whole process smoother. You won’t need anything too specialized, thankfully!
- A sharp, clean pair of pruning shears or a razor blade. Cleanliness is key to preventing disease.
- Seedling trays or small pots (about 3-4 inches in diameter). Make sure they have good drainage holes.
- A well-draining potting mix. I like a blend of equal parts potting soil, perlite, and a touch of compost. For succulents or plants prone to rot, something even grittier is great.
- Rooting hormone (optional, but it can give an extra boost). I prefer the powder form for cuttings.
- A plastic bag or propagation dome to create a humid environment.
- A spray bottle filled with water.
- A watering can with a gentle rose.
Propagation Methods
Plantago rhodosperma is pretty adaptable, and I find success with a couple of main methods.
Stem Cuttings
This is my go-to for this plant. It’s straightforward and usually yields good results.
- Take a cutting: Look for a healthy, non-flowering stem that’s about 4-6 inches long. Use your clean shears to make a clean cut just below a leaf node (where a leaf attaches to the stem).
- Prepare the cutting: Gently remove the lower leaves. You want at least one or two leaf nodes completely bare so they can form roots. You can leave a few smaller leaves at the top to help with photosynthesis.
- Apply rooting hormone (optional): Dip the cut end of the stem into your rooting hormone. Just a light coating is needed. Tap off any excess.
- Plant the cutting: Fill your small pot with your prepared potting mix. Make a small hole in the center with your finger or a pencil. Insert about an inch of the cutting into the hole, ensuring the leaf nodes are below the soil surface. Gently firm the soil around the stem.
- Water lightly: Give the soil a gentle watering, just enough to moisten it.
- Create humidity: Place a plastic bag or propagation dome over the pot to trap moisture. You can use sticks to prop up the bag so it doesn’t touch the leaves. Place the pot in a bright spot, but out of direct sunlight.
Division
If you have a larger, established clump of Plantago rhodosperma, dividing it is an excellent way to get multiple plants.
- Gently remove the plant: Carefully lift the entire plant from its pot or the ground. You want to disturb the roots as little as possible.
- Identify natural divisions: Look for areas where the plant naturally splits into smaller sections. You can often see separate crowns.
- Separate the sections: Use your fingers or a clean trowel to gently separate the root ball into smaller pieces. If the roots are very intertwined, you might need to use a sharp knife or your clean pruning shears to carefully cut through them. Make sure each new division has a good portion of roots and at least one or two healthy shoots.
- Replant immediately: Pot up each division into its own pot with fresh potting mix, or replant them directly into your garden. Water them in well.
The “Secret Sauce” (Pro Tips)
I’ve learned a few little tricks over the years that make a big difference.
- Don’t overcrowd your cuttings: Give each cutting its own space. Overcrowding can lead to poor air circulation and increase the risk of fungal issues. I find one cutting per 3-4 inch pot is perfect.
- Bottom heat is your friend: If you can, place your pots on a propagation mat or a warm windowsill. This gentle warmth from below encourages roots to form much faster than waiting for ambient air temperature alone. It’s like giving those little root hairs a cozy place to grow.
- Watch, don’t poke: Resist the urge to constantly tug on your cuttings to check for roots. You can damage those fragile new beginnings! A gentle tug that gives resistance means roots have formed. If you’re really itching to check, do it very carefully after a few weeks.
Aftercare & Troubleshooting
Once you see glossy new leaves emerging or feel a gentle tug when you very carefully check, your cutting has rooted!
- Acclimatize slowly: Gradually remove the plastic bag or dome over a few days. Start by taking it off for an hour or two, then longer each day. This helps the new plant adjust to drier air without shock.
- Water consistently: Keep the soil lightly moist but not waterlogged. Overwatering is the most common killer of new cuttings. If the soil feels dry to the touch about an inch down, it’s time for a drink.
- Move to a brighter spot: Once acclimated, you can move your new plants to a location with brighter, indirect light.
Signs of Failure: If your cutting turns yellow, wilts and doesn’t perk up, or the stem starts to look mushy and brown at the soil line, it’s likely rot. This is usually caused by too much moisture and not enough air circulation. If you see signs of rot, unfortunately, it’s usually best to discard the cutting and start again, ensuring good drainage and airy conditions next time.
A Little Patience Goes a Long Way
Remember, propagation is a journey, not a race. Some plants are faster than others, and sometimes things just don’t work out, and that’s okay! The key is to keep trying, learn from each attempt, and most importantly, to enjoy the process. Be patient with your new little plants, give them good care, and before you know it, you’ll have a whole garden filled with your own Plantago rhodosperma success stories. Happy propagating!
Resource:
https://identify.plantnet.org/k-world-flora/species/Plantago%20rhodosperma%20Decne./data