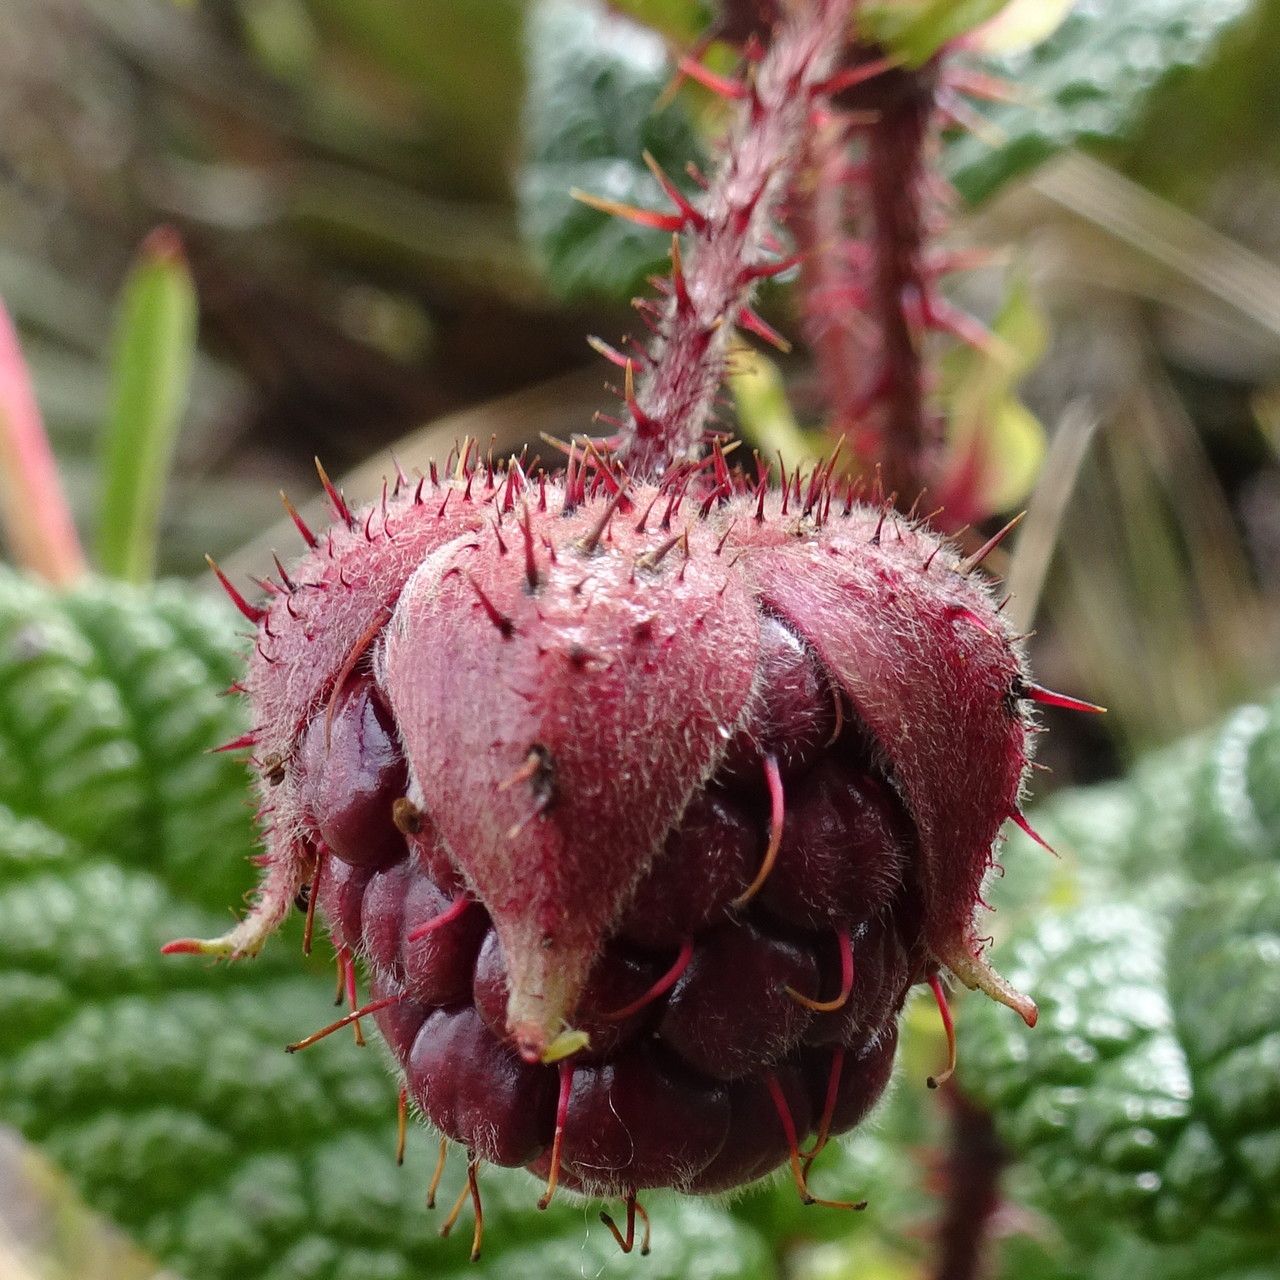
Oh, Rubus acanthophyllos! Isn’t it a charmer? That delicate foliage, the promise of delicious berries (or just the joy of a thriving, woody shrub, depending on your variety) – it truly makes any garden feel more alive. And the best part? You can easily bring more of that beauty into your own space by propagating it. It’s one of those little gardening victories that never gets old. For those of you just dipping your toes into the world of plant propagation, I’d say Rubus acanthophyllos is moderately easy. It’s not one of those finicky plants that throws a tantrum if you look at it wrong, but a little care and attention go a long way.
The Best Time to Start
Timing is everything when it comes to coaxing new life from a parent plant. For Rubus acanthophyllos, I find the late spring to early summer is generally the sweet spot. This is when the plant is actively growing, full of energy, and has plenty of healthy new stems to work with. You want to catch it at a stage where the stems are still somewhat flexible but have started to firm up a little – not brand new, wispy growth, but not old, woody stems either. Think of it as the “just right” stage of development.
Supplies You’ll Need
Before we get our hands dirty, let’s gather our tools. Having everything ready makes the process smooth sailing.
- Sharp Pruning Shears or a Knife: Clean cuts are crucial for preventing disease and encouraging rooting.
- Rooting Hormone (Optional but Recommended): This can give your cuttings a significant boost. Look for one containing IBA.
- Perlite: For excellent drainage, we’ll mix this with our potting medium.
- Peat Moss or Coconut Coir: These help retain moisture.
- Well-Draining Potting Mix: A good blend is usually 50% perlite and 50% peat moss or coco coir. You can also buy specific propagation mixes.
- Small Pots or Trays: With drainage holes, of course!
- Plastic Bags or a Propagator Lid: To create a humid environment.
- Watering Can or Spray Bottle: For gentle watering.
Propagation Methods
There are a couple of reliable ways to bring more Rubus acanthophyllos into your life. I’ll guide you through the ones I find most successful.
Stem Cuttings
This is my go-to method for most Rubus species.
- Select Your Stems: From your healthy parent plant, choose semi-hardwood cuttings. These are stems that have grown this year but are no longer soft and green. They should feel firm but still have a bit of flexibility. Look for stems that are about pencil thickness.
- Take Your Cuttings: Using your sharp pruning shears, cut lengths of stem that are about 4-6 inches long. Make your cuts just below a leaf node (where a leaf attaches to the stem).
- Prepare the Cuttings: At the bottom of each cutting, carefully remove any lower leaves. You want to leave about 2-3 leaves at the top. If the remaining leaves are very large, you can cut them in half to reduce water loss.
- Apply Rooting Hormone: Dip the cut end of each stem into your rooting hormone powder, tapping off any excess.
- Plant Your Cuttings: Fill your pots or trays with your prepared, moistened potting mix. Make a small hole in the center of each pot with a pencil or your finger. Insert the treated end of the cutting into the hole, ensuring the node where you removed the leaves is buried. Gently firm the soil around the stem.
- Create a Humid Environment: Water the pots gently. Now, cover each pot or the entire tray with a clear plastic bag or a propagator lid. This is crucial for maintaining humidity, which helps the cuttings from drying out before they can form roots.
Layering (Tip Layering)
This method takes advantage of the plant’s natural tendency to root.
- Find a Suitable Stem: Locate a long, flexible stem growing near the ground.
- Prepare the Stem: Gently bend this stem to the ground. In the spot where it will touch the soil, nick the underside of the stem with your knife. This wound will encourage rooting.
- Bury the Wound: Dig a shallow trench in the soil. Lay the wounded part of the stem in the trench, leaving the tip of the stem exposed and pointing upwards.
- Secure the Layer: Use a U-shaped wire pin or a heavy stone to hold the layer firmly in place in the soil.
- Wait and Water: Keep the soil around the layered stem consistently moist. In a few months, you should see roots forming at the wounded area. Once you see good root development, you can carefully cut the stem from the parent plant and transplant it to its own pot.
The “Secret Sauce” (Pro Tips)
Over the years, I’ve learned a few little tricks that really seem to make a difference.
- One thing I always do is use bottom heat. If you’re using pots, placing them on a heated propagator mat can speed up root development significantly. It mimics the warmth of spring soil and really encourages those roots to kick into gear.
- When you’re working with cuttings, never let the leaves touch the water if you’re doing water propagation (though I find stem cuttings in soil more reliable for Rubus acanthophyllos). Any submerged foliage will inevitably rot and can spread that rot to your cutting.
- Don’t be afraid to experiment with the type of wood. While semi-hardwood is ideal, I’ve had success with slightly younger, but not completely soft, green growth in a very humid environment. Just keep an eye on them.
Aftercare & Troubleshooting
Once your cuttings have shown signs of rooting – you might see tiny new leaves emerging or feel a gentle resistance when you tug on the stem – it’s time to transition them.
- Gradually Acclimate: Start by opening the plastic bag or propagator lid for short periods each day, slowly increasing the duration. This helps them adjust to drier air.
- Water Carefully: Continue to water them gently, keeping the soil moist but not waterlogged. Overwatering is the quickest way to invite rot.
- Watch for Rot: The most common sign of failure is wilting followed by darkening and mushiness of the stem. This is usually due to too much moisture, poor drainage, or fungal issues. If you see this, sadly, that cutting is likely lost. Remove it immediately to prevent it from affecting others.
- Patience is Key: Don’t get discouraged if not every cutting takes. It’s a numbers game, and some plants are just more cooperative than others!
A Little More Patience, A Lot More Plants
Propagating Rubus acanthophyllos is such a rewarding journey. It’s a quiet act of creation, watching a tiny piece of a plant transform into something new and independent. Be patient with yourself and with your little cuttings. Some will root quickly, others will take their sweet time, and some might just decide they’re happy where they are! Enjoy the process, learn from each one, and soon you’ll have more of these beautiful plants to share, plant elsewhere, or simply admire in your own garden. Happy propagating!
Resource:
https://identify.plantnet.org/k-world-flora/species/Rubus%20acanthophyllos%20Focke/data