Hey there, fellow plant lovers! It’s your garden friend, back with another little adventure into the green world. Today, we’re talking about a truly special plant: Mayapple, or Podophyllum peltatum if you’re feeling fancy.
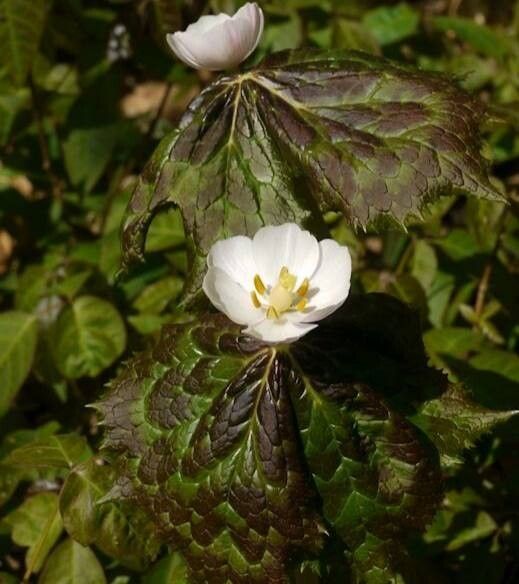
There’s something just so enchanting about Mayapple. Its large, umbrella-like leaves create this wonderfully cool, shady canopy, and when the single, delicate white flower appears nestled beneath them, it’s like uncovering a hidden treasure. Propagating these beauties is incredibly rewarding. While they aren’t the absolute easiest plant to start from scratch, they’re certainly not impossible for a beginner with a bit of patience and the right know-how. Think of it as a lovely challenge, a chance to really connect with this woodland wonder.
The Best Time to Start
For Mayapple, the golden rule is to propagate in the spring. This is when the plant is actively growing and has the most energy to put into developing new roots. Aim for right around when the new shoots are emerging from the ground, or just as the leaves are unfurling. This gives them the longest growing season to establish themselves before winter rolls around.
Supplies You’ll Need
Here’s what I like to have on hand when I’m diving into a propagation project like this:
- Sharp Pruning Shears or a Craft Knife: For clean cuts that heal well.
- Well-draining Potting Mix: A good blend for woodland plants is ideal. I often use a mix of peat moss, perlite, and some compost. You want it to be airy, not waterlogged.
- Small Pots or Trays: About 4-6 inches deep are perfect for starting.
- Rooting Hormone (Optional but Recommended): A powdered or liquid hormone can give young roots an extra boost, especially for division.
- Watering Can with a Fine Rose Attachment: To gently water without disturbing young plants.
- Labels and a Permanent Marker: Essential for keeping track of what you’ve planted and when!
Propagation Methods
Mayapple can be propagated in a couple of ways, but the most reliable and common method is through division.
Division: Your Mayapple Best Friend
Mayapple plants spread underground via rhizomes, which are essentially modified stems. You’re essentially dividing these rhizomes into smaller pieces, each with the potential to grow into a new plant.
- Dig Gently: In late spring, when the shoots are emerging, carefully dig around the base of a healthy Mayapple clump. You want to expose the network of rhizomes without damaging them too much. A garden fork can be helpful here, working slowly and from the outside of the clump inward.
- Locate the Rhizomes: You’ll see thick, fleshy, root-like structures spreading beneath the soil surface. These are your rhizomes. Look for sections that have new buds or growth points on them. These are crucial for new development.
- Divide with Care: Using your clean pruning shears or a sharp knife, carefully cut the rhizome into sections. Aim for sections that are at least a few inches long and have at least one bud. If you’re using a larger rhizome, you can often find natural divisions or gently tease them apart.
- Treat if Desired (Optional): If you’re feeling extra cautious, or if your rhizomes look a bit stressed, you can dip the cut ends into a rooting hormone powder. This is especially helpful if you’ve had to make a larger cut.
- Plant Your Divisions: Fill your small pots with your well-draining potting mix. Make a hole in the soil and place your rhizome division in it, ensuring the bud or growth point is facing upwards. Cover it lightly with about 1-2 inches of soil.
- Water Gently: Water the newly planted divisions thoroughly but gently. You want the soil to be consistently moist but not soggy.
The “Secret Sauce” (Pro Tips)
Now, for a couple of my little tricks that I’ve picked up over the years. These aren’t strictly necessary, but they can definitely tip the scales in your favor:
- Don’t Overcrowd Your Pots: When dividing, resist the urge to cram too many rhizome pieces into one pot. Each division needs a little space to stretch out and develop its own root system. Overcrowding leads to competition and can hinder growth.
- Mimic the Woodland Floor: Mayapples love a bit of dappled shade and consistently moist, but not waterlogged, soil. If you can, try to find a spot for your newly potted divisions that mimics this – perhaps under a larger shrub or in a bright, indirect light location. A touch of leaf litter or mulch on top of the soil can also help retain moisture and keep things cool for those developing rhizomes.
Aftercare & Troubleshooting
Once your rhizome divisions are planted, the key is consistent moisture. Don’t let the soil dry out completely, but also avoid letting them sit in a soup.
Watch for signs of new growth. This is your most visible indicator that things are going well! You’ll start to see tiny shoots emerging from the soil.
Now, what if things go wrong? The most common issue you’ll encounter is rot. This is usually a sign of overwatering. If you see your rhizome pieces looking mushy or discolored, they’re likely rotting. Unfortunately, there’s not much you can do once rot sets in, so prevention through proper watering is key. You might also see no growth at all. This can happen if your rhizome division wasn’t viable, didn’t have a good bud, or if conditions weren’t quite right. Don’t be discouraged! Sometimes it just takes a second attempt.
A Encouraging Closing
Mayapple propagation, like so many gardening endeavors, is a journey. It requires a bit of patience, a keen eye, and the willingness to learn from each little plant. Don’t be discouraged if not every single one takes off. Celebrate the successes, learn from the challenges, and most importantly, enjoy the beautiful process of coaxing new life from the earth. Happy gardening!
Resource:
https://identify.plantnet.org/k-world-flora/species/Podophyllum%20peltatum%20L./data