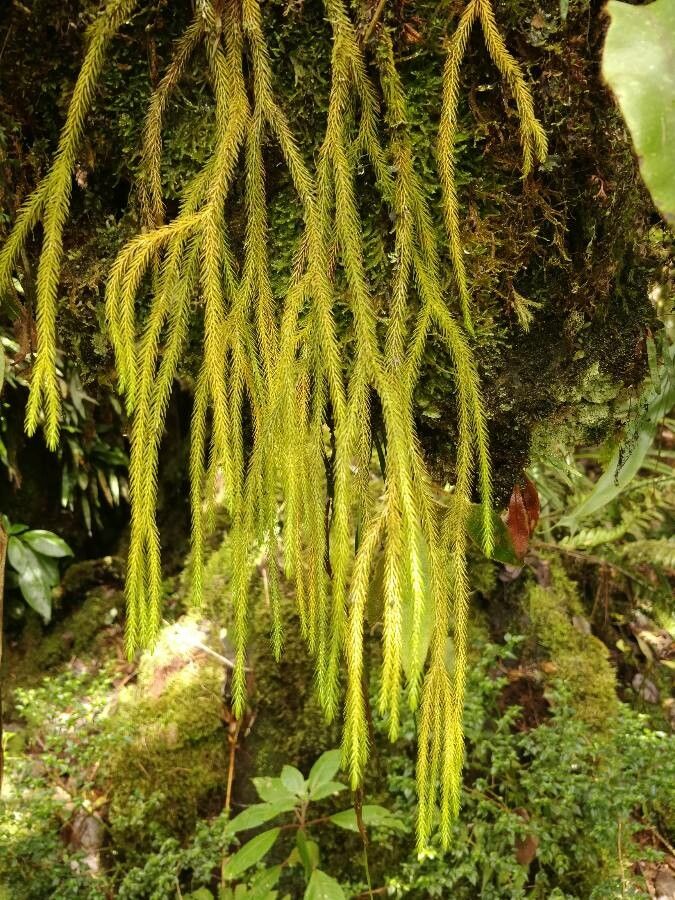
Hello fellow plant lovers! It’s so good to be chatting with you all again. Today, we’re diving into the wonderful world of Huperzia verticillata, sometimes called the climbing clubmoss or fir clubmoss. I’ve grown this gem for years, and let me tell you, its delicate, emerald-green foliage and unique architectural form bring such a touch of the wild to any space. The real joy, for me, is in being able to create more of these beauties from a single plant. Propagating Huperzia verticillata can be a bit of a thoughtful process, and while it’s not quite a “stick it in the ground and forget it” scenario, it’s incredibly rewarding once you get the hang of it. For beginners, I’d say it leans towards the “moderately challenging” side, but with a little care and the right approach, you’ll be successful.
The Best Time to Start
When it comes to coaxing new life from your Huperzia verticillata, spring is your best friend. This is when the plant is actively growing and has the most energy to dedicate to producing new roots and shoots. Look for new, bright green growth that’s firm but not yet woody. Avoid trying to propagate from very old, dried-out stems or during the plant’s dormant period in winter.
Supplies You’ll Need
Before we get our hands dirty, let’s gather our tools:
- Sharp Pruning Shears or a Clean Knife: For making clean cuts.
- Well-Draining Potting Mix: I often use a blend of equal parts peat moss, perlite, and orchid bark. This mimics their natural epiphytic or woodland habitat.
- Small Pots or Trays: Whatever you have on hand that can hold your cuttings.
- Rooting Hormone (Optional but recommended): A powdered or liquid hormone can give your cuttings a great head start.
- Clear Plastic Bag or Dome: To create a humid environment.
- Spray Bottle: For misting.
- Small Pebbles or Coarse Sand: For added drainage if you’re concerned about your mix being too dense.
Propagation Methods
Huperzia verticillata is primarily propagated through stem cuttings. It’s a straightforward process once you understand what these plants like.
-
Taking the Cuttings: Gently take your clean pruning shears or knife and select a healthy, actively growing stem. Look for a piece that’s about 3-4 inches long. Make a clean, angled cut just below a leaf node (where a leaf attaches to the stem). You can take several cuttings from one healthy plant. Remove the lower leaves from the cutting, leaving just two or three at the top.
-
Preparing for Rooting: If you’re using rooting hormone, dip the cut end of the stem into the hormone powder, tapping off any excess. If you’re using a liquid hormone, follow the product instructions.
-
Planting the Cuttings: Fill your small pots or trays with your prepared potting mix. Make a small hole in the center of the mix with your finger or a pencil. Gently insert the cut end of the Huperzia cutting into the hole, ensuring the leaf nodes are buried. Firm the mix gently around the stem.
-
Creating a Humid Environment: Water the potting mix gently until it’s evenly moist but not soggy. Then, cover the pot with a clear plastic bag or a propagation dome. This traps humidity, which is crucial for Huperzia. You can secure the bag with a rubber band around the pot.
-
Placement: Place your pots in a location with bright, indirect light. Avoid direct sunlight, which can scorch the delicate cuttings. A north-facing window or a spot a few feet away from a brighter window is ideal.
The “Secret Sauce” (Pro Tips)
Here are a few things I’ve learned over the years that really make a difference:
- Don’t Over-Water! This is probably the most critical point. Huperzia loves humidity, but it hates sitting in soggy soil. Root rot is the enemy here. The goal is consistently moist, not waterlogged. If you see water pooling at the bottom of the pot, back off a little.
- Bottom Heat is Your Friend: For an extra boost, especially if your home tends to be cooler, consider using a propagation mat. Placing your pots on a gentle heat source will warm the soil and encourage root development from below. It’s like a cozy blanket for your cuttings!
- Patience is Key (Really!): These aren’t the fastest propagators. Don’t be discouraged if you don’t see new growth immediately. It can take several weeks, sometimes even a couple of months, for roots to form and new shoots to appear. Resist the urge to constantly pull them up to check for roots!
Aftercare & Troubleshooting
Once you start seeing new growth, like tiny new fronds emerging from the base or the top of the cutting, you’re on your way! At this point, you can gradually start to acclimate your new plants to lower humidity. This means lifting the plastic bag for a few hours each day, slowly increasing the time until you can remove it entirely. Continue to keep them in bright, indirect light and water when the top inch of the soil feels dry.
The most common issue you’ll encounter is rot. If you notice your cuttings looking mushy, turning black, or smelling foul, it’s a sure sign of overwatering and rot. Unfortunately, there’s not much you can do once rot sets in, so prevention is key. Ensure good air circulation, and never let them sit in standing water. Another sign of trouble is if the cuttings simply shrivel up and die; this often means they’re too dry or getting too much direct sun.
A Encouraging Closing
Watching a new little Huperzia sprout and grow is such a fulfilling experience. It’s a testament to the resilience of nature and your own gardening touch. Be patient with the process, celebrate each tiny sign of progress, and don’t be afraid to experiment a little. Happy propagating, and may your new clubmoss babies thrive!
Resource:
https://identify.plantnet.org/k-world-flora/species/Huperzia%20verticillata%20(L.f.)%20Trevis./data