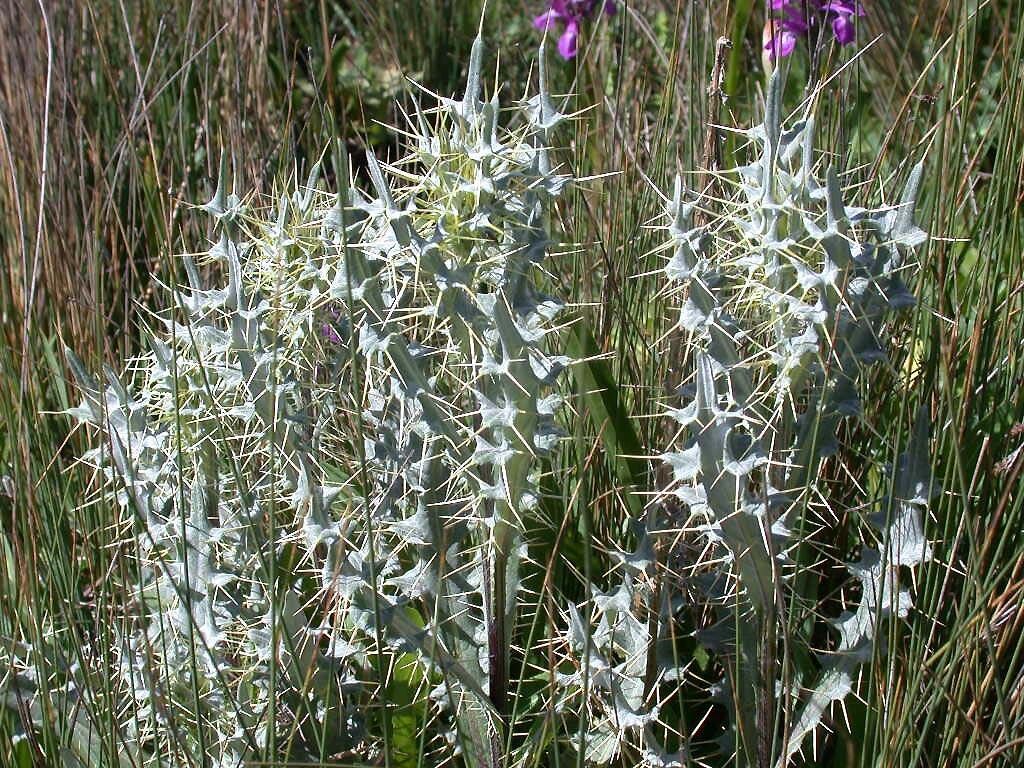
Oh, Cirsium dyris! Isn’t it a stunner? Those vibrant, thistle-like blooms bring such a pop of color and lovely texture to any garden. And the pollinators! They absolutely adore them. Propagating these beauties is incredibly rewarding. You get to multiply that garden magic and share it with friends, or simply fill in those empty spots you’ve been eyeing. For many gardeners, Cirsium dyris is quite forgiving, making it a great plant to try your hand at propagation. You’ll likely find more success than you expect!
The Best Time to Start
I’ve found the sweet spot for propagating Cirsium dyris is generally in late spring or early summer. This is when the plant is actively growing. You’re looking for stems that are firm but not yet woody or flowery. Picking slightly younger, more vigorous growth will give you the best chance of success.
Supplies You’ll Need
Here’s a little stash you’ll want to gather before we get our hands dirty:
- Sharp pruning shears or a clean, sharp knife. A clean cut is crucial!
- Small pots or propagation trays. Ensure they have good drainage holes.
- A well-draining potting mix. I like a blend of peat moss, perlite, and a little compost. You can also buy special seedling or propagation mixes.
- Rooting hormone (optional but recommended). This really gives your cuttings a boost.
- A spray bottle. For keeping things nicely humid.
- Plastic bags or a propagation dome. To create a mini-greenhouse effect.
- A trowel or Dibber. For making holes for your cuttings.
Propagation Methods
Let’s dive into how we’ll bring more Cirsium dyris into your life. I’ve had the most luck with taking stem cuttings.
- Select Your Cuttings: Head out to your Cirsium dyris and choose healthy, non-flowering stems. Look for stems that are about 4-6 inches long. Make a clean cut just below a leaf node. A leaf node is that little bump where leaves emerge from the stem. This is where the magic happens for root development!
- Prepare the Cuttings: Gently remove the lower leaves from the cutting, leaving at least two sets of leaves at the top. If your leaves are particularly large, you can even snip them in half to reduce water loss.
- Apply Rooting Hormone (If Using): Dip the cut end of the stem into your rooting hormone, tapping off any excess. This stuff is like a little cheerleader for roots!
- Plant Your Cuttings: Fill your pots or trays with your prepared potting mix. Use a trowel or dibber to make small holes where you want to place your cuttings. Carefully insert the cuttings into the holes, ensuring the nodes where you removed leaves are below the soil line. Gently firm the soil around the base of each cutting.
- Water Gently: Water your newly planted cuttings thoroughly but carefully, so you don’t dislodge them.
- Create a Humid Environment: Cover the pots or trays with a plastic bag or a propagation dome to maintain high humidity. You can prop the bag up with a few stakes so it doesn’t touch the leaves.
The “Secret Sauce”
Here are a couple of things I’ve learned over the years that make a real difference:
- Don’t let the leaves touch the water if you happen to be using water propagation (though I still lean towards soil for Cirsium dyris). Leaves submerged will quickly rot, inviting fungal issues. For stem cuttings in soil, this means keeping the soil level right and trimming back lower leaves.
- Consider bottom heat. If you have a propagation mat or can place your pots on top of a warm appliance (like a refrigerator or a gently warm computer monitor), this can significantly speed up root formation. Roots love warmth!
Aftercare & Troubleshooting
Once your cuttings are planted, it’s time for a little TLC. Keep the soil consistently moist but not waterlogged. A good test is to stick your finger about an inch into the soil; if it feels dry, it’s time to water. Mist the leaves every day or two, especially if you don’t have a dome.
You’ll know your cuttings are rooting when you see new leaf growth. This usually takes several weeks. Gently tug on a cutting; if there’s resistance, you’ve got roots! Once they’re well-rooted, you can begin to gradually acclimate them to normal humidity by opening the plastic bag or dome a bit more each day. Then, transplant them into individual pots.
The most common sign of trouble is wilting and browning, often a sign of rot if the soil is too wet. If you see this, it’s often best to discard the cutting. Ensure you’re using good drainage and not overwatering.
A Encouraging Closing
Propagating plants is all about patience and a little observation. Don’t get discouraged if not every single cutting takes; it’s part of the learning process! Celebrate the successes, learn from the failures, and most importantly, enjoy the journey of creating more of these wonderful Cirsium dyris for your garden. Happy planting!
Resource:
https://identify.plantnet.org/k-world-flora/species/Cirsium%20dyris%20Jahand.%20&%20Maire/data