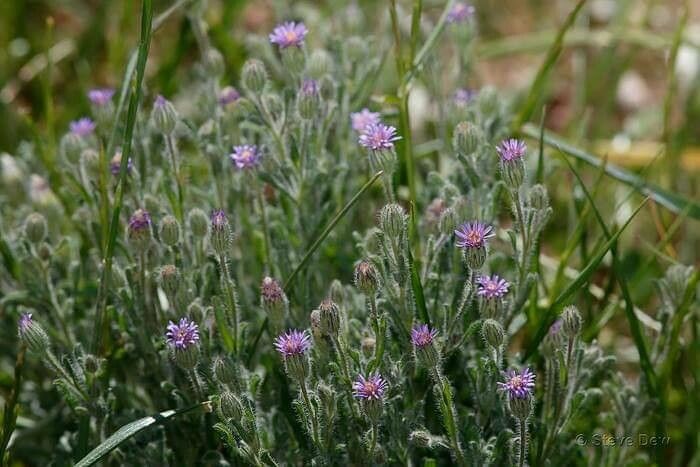
Oh, hello there! Pull up a chair and let’s chat about one of my absolute favorite little wildflowers. Today, we’re diving into the wonderful world of Vittadinia cuneata, also known as the Wedge-leafed Daisy. I’ve spent two decades with my hands in the soil, and I can tell you, bringing new life into existence from an existing plant is one of the most satisfying parts of gardening. And Vittadinia cuneata? It’s a real charmer. Its delicate daisy-like flowers and lovely foliage bring a touch of native beauty to any spot. The best part? Propagating it is surprisingly straightforward, making it a fantastic project for even those new to the gardening game.
The Best Time to Start
My experience tells me that late spring to early summer is your sweet spot for propagating Vittadinia cuneata. When the plant is in active growth, it has the best energy reserves to put into forming new roots. You’re looking for healthy, non-flowering stems. If you see a stem already sporting a bud, it’s probably best to leave it be for now and wait for a vegetative tip.
Supplies You’ll Need
Gathering your supplies beforehand makes the whole process much smoother. Here’s what I usually have on hand:
- Sharp, clean pruning shears or a craft knife: For making neat cuts.
- Rooting hormone (optional but recommended): Talcum-based ones are easy to use.
- A well-draining potting mix: I love a blend of 50% coir or peat moss and 50% perlite.
- Small pots or seed trays: With drainage holes, of course!
- Plastic bags or a propagator lid: To create a humid environment.
- Watering can or spray bottle: For gentle watering.
Propagation Methods
For Vittadinia cuneata, my go-to method is stem cuttings, as it’s reliable and gives great results.
Stem Cuttings
- Take your cuttings: In late spring or early summer, select a healthy stem from your mature plant. Using your clean pruners, take a cutting that’s about 10-15 cm long. Make a cut just below a leaf node. This is where the magic happens for root development.
- Prepare the cuttings: Gently remove the lower leaves, leaving only the top two or three sets. This prevents them from rotting in the soil and encourages the plant to focus its energy on rooting.
- Apply rooting hormone (optional): Dip the cut end of the stem into your rooting hormone, tapping off any excess.
- Plant your cuttings: Fill your small pots with your prepared potting mix. Make a small hole with your finger or a pencil. Insert the cut end of the stem into the hole, ensuring the leaf nodes you removed are below the soil surface. Gently firm the soil around the stem.
- Water gently: Water the soil thoroughly but gently. You don’t want to blast your cuttings all over the place.
- Create humidity: Cover the pot with a plastic bag or a propagator lid. This creates a mini-greenhouse effect, keeping the humidity high, which is crucial for cuttings to root. Make sure the plastic doesn’t touch the leaves too much – you can use stakes to prop it up.
- Place in bright, indirect light: Find a spot that gets plenty of light but is out of direct, scorching sun.
The “Secret Sauce” (Pro Tips)
Here are a few little tricks I’ve learned over the years that can really make a difference:
- Don’t let the leaves touch the water (if water propagating): Now, I’m primarily talking about stem cuttings here, but if you do decide to try water propagation (which is less reliable for this plant but possible), always ensure the leaves are above the water line. Submerged leaves will just rot and invite disease.
- Bottom heat is your friend: If you have a heat mat that gardeners use for seed starting, pop your pots of cuttings on it. A gentle warmth from below can significantly speed up root formation. Just make sure it’s not too hot – think lukewarm bathwater, not scalding!
- Mist lightly, don’t drench: While humidity is key, make sure your soil is consistently moist but not waterlogged. Overwatering is a quick way to invite rot. A light misting of the leaves every day or two can help keep them turgid while they wait for roots.
Aftercare & Troubleshooting
Once your cuttings have been planted, patience is your best virtue. It can take anywhere from 3 to 6 weeks for roots to develop. You’ll know they’re ready when you gently tug on the cutting and feel resistance – it means roots have anchored it.
- Acclimatize gently: Once roots have formed, slowly introduce your new plants to normal room conditions by gradually opening the plastic bag or propagator lid over a few days.
- Water and feed sparingly: Continue to water when the top inch of soil feels dry. You can start feeding with a half-strength liquid fertilizer once you see new growth appearing.
- Common problems: The biggest issue you’re likely to face is rot. This usually happens if the soil is too wet or the humidity is too high without enough air circulation. If you see stems turning black and mushy, it’s unfortunately a sign of rot, and that cutting is probably lost. Discard it and ensure the remaining cuttings have better airflow. Fungal gnats can also be an annoyance, but they’re usually harmless to established cuttings.
A Little Encouraging Wrap-Up
Watching those tiny roots emerge and then seeing your new Vittadinia cuneata take off is such a rewarding feeling. Don’t be discouraged if a few cuttings don’t make it – that’s just part of the learning curve for all of us gardeners. Be gentle, be patient, and enjoy the process of creating more of these beautiful plants. Happy propagating!
Resource:
https://identify.plantnet.org/k-world-flora/species/Vittadinia%20cuneata%20DC./data