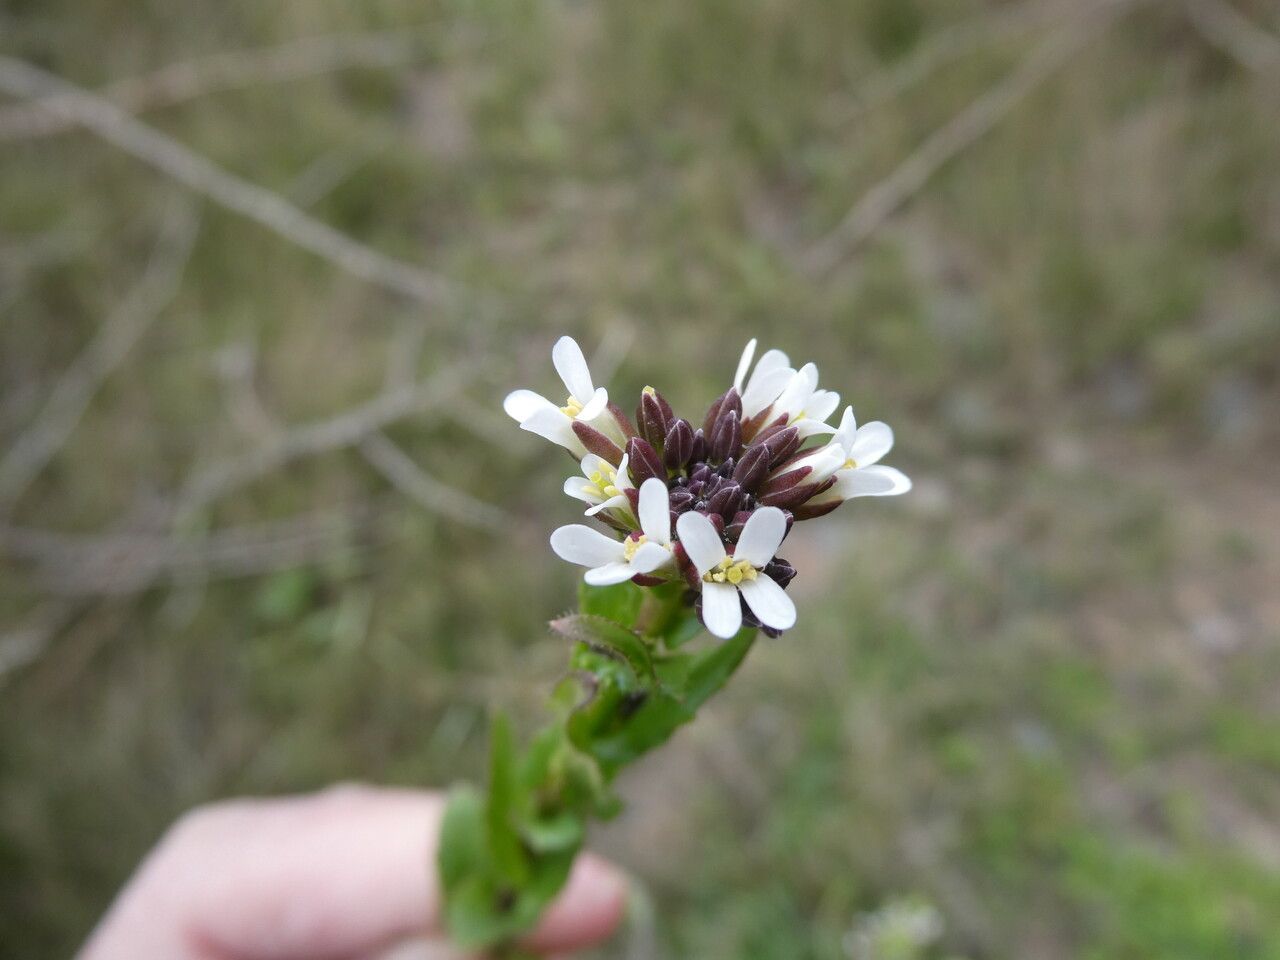
Hello fellow plant lovers! It’s so wonderful to have you join me today. I’m excited to talk about a plant that has brought so much delicate beauty to my garden beds: Arabis planisiliqua, often called spreading rock cress. With its mats of silvery foliage and cascades of charming white flowers in spring, it’s a real showstopper, especially spilling over rocks or lining pathway edges.
Now, if you’re wondering if this is a good plant for a beginner to try propagating, I’d say with a little guidance, yes! It’s not the most challenging plant to multiply, and the reward of seeing those tiny new plants thrive is incredibly satisfying.
The Best Time to Start
For Arabis planisiliqua, the sweet spot for propagation is generally late spring to early summer, right after the plant has finished its glorious flowering display. This is when the stems are actively growing but haven’t become too woody. You want to catch them at that perfect succulent stage, where they have plenty of energy for rooting.
Supplies You’ll Need
Here’s what you’ll want to gather before you get started:
- Sharp pruning shears or a knife: Cleanliness is key!
- Rooting hormone (optional but recommended): It gives cuttings a little boost.
- A well-draining potting mix: I like a blend of equal parts seed-starting mix and perlite. You can also use a cactus or succulent mix.
- Small pots or trays: Clean containers are a must.
- A spray bottle: For gentle misting.
- A plastic bag or clear dome: To create a humid environment.
- Gravel or small stones: For drainage if planting in the ground.
Propagation Methods
There are a couple of lovely ways to propagate Arabis planisiliqua. I usually lean towards one of these, as they are quite reliable.
Stem Cuttings: My Go-To Method
This is my favorite for a reason – it’s straightforward and usually gives fantastic results.
- Select your stems: Look for healthy, non-flowering shoots that are about 3-6 inches long. They should be pliable, not stiff and woody.
- Make the cut: Using your clean shears or knife, make a clean cut just below a leaf node. A leaf node is where a leaf grows from the stem. This is where the magic of root formation happens!
- Prepare the cutting: Gently remove the lower leaves from the cutting, leaving only a few at the very top. This prevents them from rotting when you place the cutting in soil or water.
- Apply rooting hormone (optional): Dip the cut end into rooting hormone, tapping off any excess.
- Plant your cuttings: Fill your small pots with your well-draining mix. Make a small hole in the center and insert the prepared cutting. Gently firm the soil around the stem to ensure good contact.
- Water gently: Water the pot lightly so the soil is moist but not soggy.
Water Propagation (for the impatient!)
If you’re eager to see root development, water propagation is a fun option.
- Prepare the cuttings: Follow steps 1-3 from the stem cuttings method.
- Place in water: Put the cuttings in a glass or jar of clean water. Make sure the leaf nodes where you removed the leaves are submerged, but crucially, don’t let the remaining leaves touch the water.
- Find a good spot: Place the jar in a bright location that receives indirect sunlight. Change the water every few days to keep it fresh.
The “Secret Sauce” (Pro Tips)
Here are a couple of things I’ve learned over the years that really help boost success.
- Bottom Heat is Your Friend: If you’re using stem cuttings and want to really speed things up, place your pots on a heating mat designed for plants. This gentle warmth encourages root development from below. It’s like giving them a cozy little incubator!
- Humidity is Key: After planting your stem cuttings, I like to cover the pot with a clear plastic bag or a propagation dome. This creates a mini-greenhouse effect, keeping the humidity high around the cuttings and preventing them from drying out before they can form roots. Just remember to open it for a few minutes each day to allow for air circulation and prevent mold.
Aftercare & Troubleshooting
Once you see those little roots starting to form – hooray!
- For Water Cuttings: When the roots are about an inch long, you can carefully transplant them into pots filled with your well-draining potting mix. Water them in gently and continue to mist occasionally.
- For Soil Cuttings: Don’t pull on the cutting to check for roots! Instead, look for signs of new growth – tiny leaves emerging. Once you see this, you can treat it like a small established plant: water when the top inch of soil feels dry and provide bright, indirect light.
- Troubleshooting: The most common issue you might encounter is rot. This usually happens from overwatering or poor drainage. If a cutting turns black and mushy, it’s usually a goner. If you see signs of mold, increase ventilation. If your cuttings seem to be wilting, it might be a sign they haven’t rooted yet and are drying out – ensure that humid environment is maintained.
A Little Patience Goes a Long Way
Propagating plants is a journey, and like all good things, it takes a bit of patience. Don’t be discouraged if your first attempt isn’t a runaway success. Each try is a learning experience. Enjoy the process of nurturing these tiny beginnings, and before you know it, you’ll have plenty of beautiful Arabis planisiliqua to share or to fill your garden with charm. Happy gardening!
Resource:
https://identify.plantnet.org/k-world-flora/species/Arabis%20planisiliqua%20(Pers.)%20Rchb./data