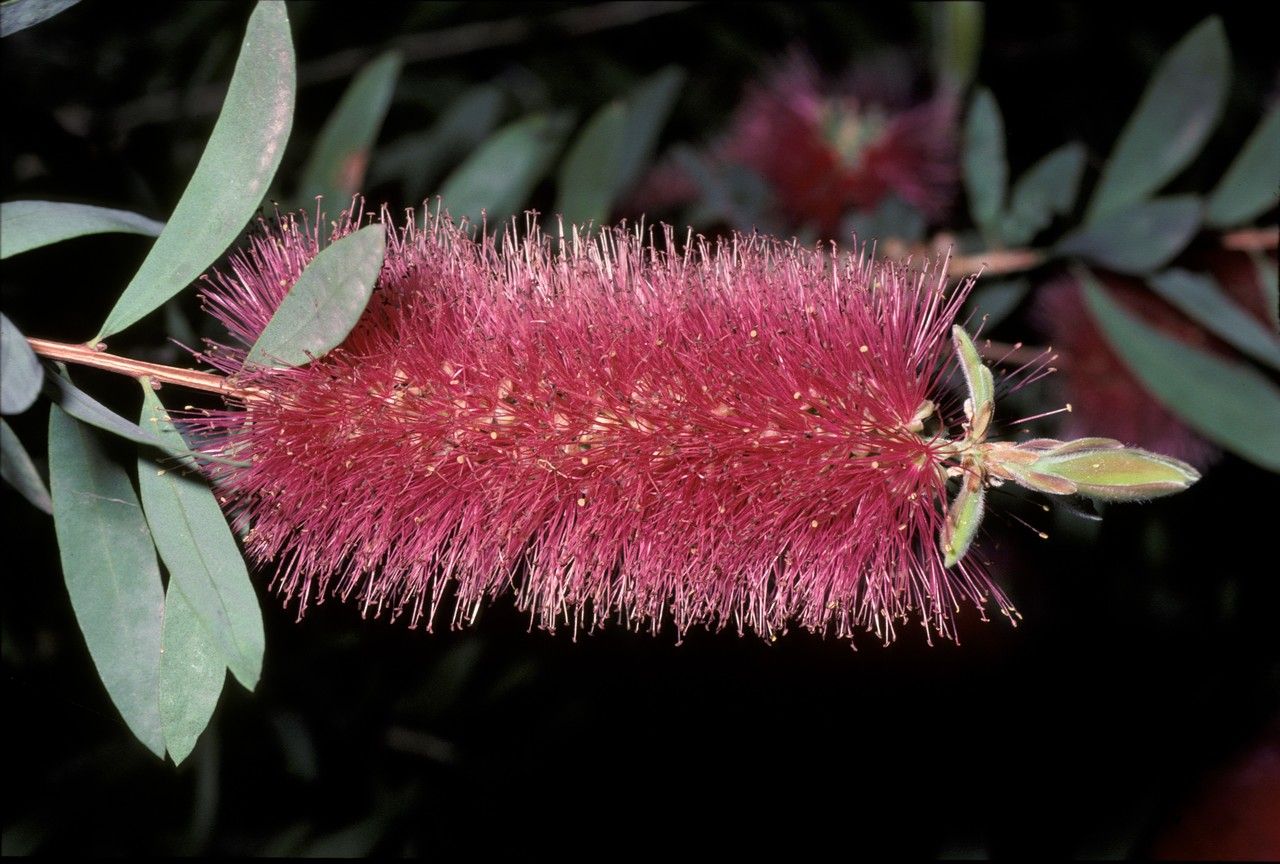
Oh, Melaleuca flammea! What a stunner. Those fiery red-orange bottlebrush blooms are an absolute showstopper, aren’t they? I remember the first time I saw one in full glory – it was like a vibrant fireworks display erupting in the garden. And the best part? You can bring that magic into your own little nursery.
Propagating Melaleuca flammea, or the Flame Bottlebrush as we often call it, can be a really rewarding experience. It’s not the absolute easiest plant for a complete beginner, but with a little patience and following these steps, you’ll be well on your way to success. Don’t let that deter you; think of it as a fun challenge!
The Best Time to Start
For cuttings, I’ve found the sweet spot is during the active growing season. That usually means late spring through summer. You want to take cuttings from healthy, non-flowering stems. If you try to take them when the plant is stressed or dormant, your chances of success drop significantly. Look for stems that are a bit firm – not brand new, bright green growth, but not woody and old either. Think somewhere in between.
Supplies You’ll Need
Gathering your supplies beforehand makes the whole process so much smoother. Here’s what I always have on hand:
- Sterile pruning shears or a sharp knife: Cleanliness is key to preventing disease.
- Rooting hormone: This is your best friend for encouraging strong root development. I prefer a powder, but liquid works too.
- Well-draining potting mix: A good sterile seed-starting mix or a blend of peat moss and perlite (about 50/50) is ideal. You can also add a bit of coarse sand.
- Small pots or propagation trays: Ensure they have drainage holes!
- Plastic bags or a clear plastic dome: To create a mini-greenhouse effect.
- Watering can with a fine rose attachment or a spray bottle: Gentle watering is essential.
- Perlite or coarse sand (optional): For the bottom of the pot to improve drainage if you’re particularly worried about waterlogging.
Propagation Methods
Let’s dive into the most reliable way to get those beautiful Melaleuca flammea plants going: stem cuttings.
- Select Your Cuttings: Find a healthy, mature stem that is pencil-thick and has recently finished flowering or has new growth developing. Avoid any stems that are too soft and floppy or too old and woody.
- Take the Cuttings: Using your sterilized pruning shears, cut a section of stem about 4 to 6 inches long. Make the cut just below a leaf node (where a leaf attaches to the stem). Remove any leaves from the bottom half of the cutting. If there are any flower buds, pinch those off too – we want the plant to focus its energy on roots, not flowers.
- Apply Rooting Hormone: Dip the cut end of the stem into rooting hormone powder. Tap off any excess. This step is crucial for boosting your success rate.
- Plant Your Cuttings: Fill your small pots or trays with your well-draining potting mix. Make a small hole in the center of the mix with your finger or a pencil. Gently insert the coated end of the cutting into the hole, ensuring the leaf nodes that will be buried are covered. Firm the soil gently around the base.
- Create a Humid Environment: Water the cuttings gently. Then, cover the pots with a clear plastic bag (making sure the leaves don’t touch the plastic if possible) or a propagation dome. This will trap humidity around the cuttings, which is vital for them to root. Place the pots in a bright spot but out of direct, harsh sunlight.
The “Secret Sauce” (Pro Tips)
Now, for a couple of tricks I’ve learned over the years that can really make a difference:
- Bottom Heat is Your Friend: If you have a heat mat designed for seedlings, placing your pots on it can significantly speed up root formation. It mimics the warmth of spring soil. Just make sure it’s not too hot; a gentle warmth is what we’re after.
- Don’t Be Afraid of a Mist: While the plastic bag or dome is important, I also like to give the cuttings a light mist of water every couple of days, especially if the air feels dry. This helps keep the leaves hydrated while they’re working on developing roots.
- Patience, Young Grasshopper: Seriously. Melaleuca flammea can be a bit slow to root initially. Don’t pull them up too soon to check for roots! I usually wait at least 4-6 weeks, sometimes longer.
Aftercare & Troubleshooting
Once you start seeing new leaf growth, that’s usually a good sign that roots have formed! You can gently test by giving a cutting a very light tug. If there’s resistance, you’ve got roots.
- Gradually Acclimate: Once you see roots, slowly start removing the plastic bag or dome. Do this over a few days, gradually increasing the time it’s off. This helps the new plant adjust to normal humidity levels.
- Watering: Keep the soil consistently moist but not waterlogged. Water when the top inch of soil feels dry.
- Transplanting: Once your cuttings have a decent root system and have been acclimated, you can carefully transplant them into slightly larger pots filled with your standard potting mix.
Troubleshooting: The most common problems are rot and drying out.
- Rot: This usually happens if the soil stays too wet or if the cutting wasn’t clean. If you see the stem turning mushy and black, sadly, it’s likely too far gone. Make sure your soil is excellent and you’re not overwatering.
- Drying Out: If the leaves start to wilt and turn brown, it likely hasn’t rooted and is drying out. Ensure you’re maintaining that humid environment and watering consistently.
A Encouraging Closing
So there you have it! Propagating Melaleuca flammea takes a bit of care, but the reward of seeing those tiny roots sprout and then watching your new plant grow is just incredible. Be patient, enjoy the process, and don’t get discouraged if a few don’t make it. That’s just part of the journey, and each attempt teaches you something new. Happy propagating, my friends!
Resource:
https://identify.plantnet.org/k-world-flora/species/Melaleuca%20flammea%20Craven/data