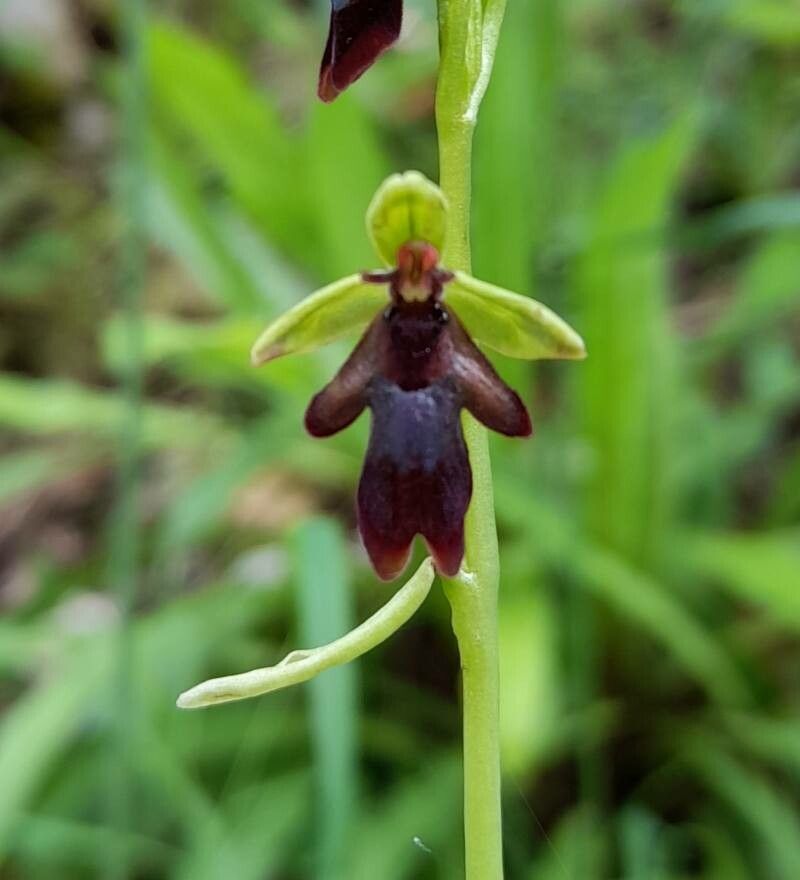
Hey there, fellow plant lovers! Today, we’re diving into something truly special: Ophrys insectifera, also known as the Fly Orchid. Isn’t that just a fascinating name? These beauties mimic insects, a clever evolutionary trick that draws pollinators. And let me tell you, coaxing one of these delicate wonders into existence from scratch is incredibly rewarding. Now, I’ll be honest, propagating Ophrys isn’t quite as straightforward as sticking a spider plant cutting in water. It requires a bit more patience and understanding of its unique needs. But don’t let that deter you! With a little know-how and a gentle touch, you can absolutely succeed.
The Best Time to Start
Timing is everything, and with the Fly Orchid, the sweet spot is late spring, just as the plant is finishing its flowering period. You’re looking for the time when the blooms have faded but the leaves are still vibrant and showing good energy. This is when the plant has stored up its reserves and is ready to put that energy into new growth.
Supplies You’ll Need
Before we get our hands dirty, let’s gather our tools:
- Well-draining potting mix: Think orchid bark mix or a blend of perlite, coco coir, and a small amount of compost. The key is aeration; these guys hate soggy feet.
- Sharp, sterile pruning shears or a clean knife: For making clean cuts.
- Small pots or propagation trays: With good drainage holes, of course.
- Perlite or horticultural grit: To improve drainage and aeration.
- A spray bottle: For gentle misting.
- Optional: A bottom heat mat: Can be a game-changer for encouraging root development.
- Optional: Mycorrhizal fungi inoculant: This is a fantastic little helper for orchids, as it forms a symbiotic relationship with the roots.
Propagation Methods
The most successful method for Ophrys insectifera is division, as it’s a tuberous plant. While other methods might be attempted by very experienced growers, division is your best bet for a smooth journey.
Division:
- Gentle Excavation: Carefully unpot your mature Ophrys plant. Try not to disturb the root system too much. Gently shake off excess soil to reveal the tubers.
- Identify the Divisions: You’ll be looking for distinct tubers or sections that have their own healthy roots and at least one visible bud or growing point. Sometimes, a mature tuber will have older, smaller tubers attached.
- The Clean Cut: Using your sterile pruning shears or knife, make a clean cut to separate the divisions. Ensure each division has a decent root system. If a tuber has very little root, you can still try it, but its chances are slimmer.
- Dry the Cut (Optional but Recommended): Let the cut surfaces of the divisions air dry for a few hours, or even a day, in a cool, dry place. This helps to callous over the wound and prevent rot.
- Potting Up: Plant each division in its own small pot filled with your well-draining orchid mix. Ensure the tuber is planted at the same depth it was previously or just slightly covered. Don’t pack the soil too tightly.
- Initial Watering: Water lightly, just enough to settle the mix around the tubers.
The “Secret Sauce” (Pro Tips)
Here are a couple of things I’ve learned over the years that make a real difference:
- Mimic Their Natural Habitat: Ophrys thrive in lean, well-drained soils. Think of those wild, windswept meadows. Adding plenty of perlite or horticultural grit to your mix is crucial for replicating that drainage.
- Patience with the Water: When you do water, water thoroughly but allow the potting mix to dry out significantly between waterings. Overwatering is the quickest way to lose a young Ophrys. Let them breathe between drinks!
Aftercare & Troubleshooting
Once your divisions are potted, place them in a bright spot that receives indirect sunlight. Avoid intense, direct sun, which can scorch delicate new growth. Keep the atmosphere slightly humid – a light misting with your spray bottle now and then can be beneficial, but remember, avoid letting water sit on the leaves.
The most common sign of trouble you’ll encounter is rot. If you see mushy, discolored areas on your tuber or stem, it’s a clear indicator of too much moisture. In this case, carefully remove the affected part with your sterile tool, and try to let the remaining section dry out more thoroughly. If rot is extensive, unfortunately, the division may not recover. Keep a close eye out for new leaf growth – that’s your sign of success!
A Encouraging Closing
Propagating Ophrys insectifera is a journey that requires a mindful approach and a good dose of patience. It’s not about instant gratification, but about coaxing life into being with care and understanding. Don’t be discouraged if your first attempt isn’t perfect. Each plant, like each gardener, is on its own learning curve. Enjoy the process, and celebrate every tiny sprout of new growth. Happy growing!
Resource:
https://identify.plantnet.org/k-world-flora/species/Ophrys%20insectifera%20L./data