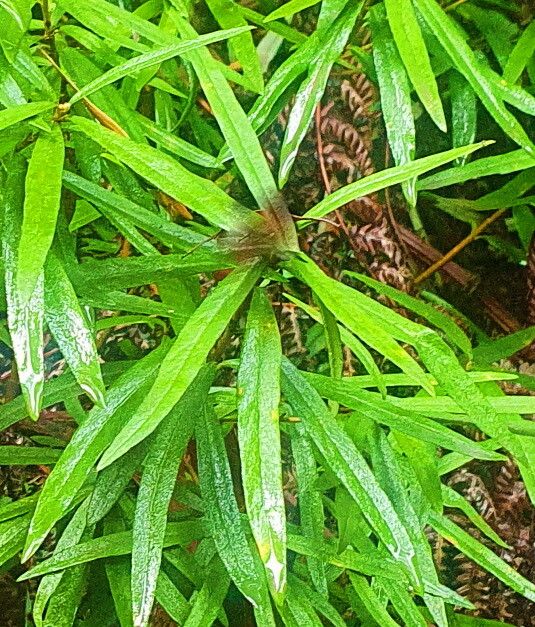
Hello fellow garden lovers! It’s so wonderful to connect with you again. Today, we’re diving into the lovely world of Pittosporum bicolor, also known as our charming native “Poison Berry.” Now, I know that name can sound a little alarming, but don’t let it fool you! This delightful plant offers delicate, glossy leaves and a wonderfully subtle fragrance, making it a gorgeous addition to any garden. And the best part? Seeing a tiny slip of a plant you nurtured yourself grow into something truly special is an incredibly rewarding experience. While Pittosporum bicolor can be a tad fussy, it’s definitely achievable for beginners willing to be a little patient.
When to Get Your Hands Dirty
For the best chance of success with Pittosporum bicolor cuttings, I always recommend heading out in late spring to early summer. This is when the plant is actively growing, and the stems are nice and pliable yet starting to semi-harden. You’re looking for growth that snaps cleanly when bent, not something that feels floppy or is still very soft.
What You’ll Need to Gather
Before we begin, let’s make sure you have your toolkit ready. You won’t need anything too fancy; most of these are staples in my garden shed:
- Sharp pruning shears or a clean, sharp knife: For making clean cuts.
- Rooting hormone (powder or gel): This is a game-changer for encouraging new root growth.
- Potting mix: A good quality, well-draining seedling mix is ideal. Some gardeners like to add a little perlite or coarse sand for extra drainage.
- Small pots or seedling trays: Make sure they have drainage holes!
- Plastic bags or a propagator: To create a humid environment for your cuttings.
- Watering can or spray bottle: For gentle watering.
- Labels: To keep track of what you’ve planted!
Bringing New Plants to Life: Stem Cuttings
This is, hands down, my favorite and most reliable method for propagating Pittosporum bicolor. Here’s how I do it:
- Take Your Cuttings: Using your clean shears or knife, select healthy stems from your established Pittosporum bicolor. Cut lengths of about 10-15 cm (4-6 inches). Make the cut just below a leaf node, which is where the stem naturally wants to produce roots.
- Prepare the Cuttings: Gently remove the lower leaves from your cuttings. You want to strip away anything that will end up below the soil line. You can also pinch off the very tip of the stem if it’s still very soft.
- Apply Rooting Hormone: Dip the cut end of each stem into the rooting hormone, ensuring it’s coated. Tap off any excess. This step really helps kickstart the rooting process.
- Pot Them Up: Fill your small pots or trays with your potting mix. Make a small hole in the center of the mix with your finger or a pencil.
- Insert the Cuttings: Gently place each prepared cutting into the hole, firming the potting mix gently around the stem to ensure good contact.
- Water Gently: Water your newly potted cuttings thoroughly but gently. You don’t want to disturb the soil too much.
- Create a Humid Environment: This is crucial! You can cover the pots with a clear plastic bag, creating a mini-greenhouse effect. Make sure the bag doesn’t touch the leaves too much – you can use small stakes if needed. Alternatively, use a propagator with a lid. Place them in a spot with bright, indirect light.
My Garden Secrets (The “Secret Sauce”)
After years of trial and error, I’ve learned a few tricks that consistently boost my propagation success.
- Bottom Heat is Your Friend: If you can, place your pots on a heated propagator mat. This gentle warmth from below encourages root development much faster than just ambient room temperature. It’s like giving your cuttings a cozy little foot bath.
- Mist, Don’t Drench: Regularly mist the leaves of your cuttings with water, especially if you’re not using a fully enclosed propagator. This keeps them turgid and happy while they’re waiting for roots to form. Avoid letting the soil become waterlogged, though!
- Patience is Key (Especially with Pittosporum!): These little guys can take their sweet time to show signs of rooting. Don’t be tempted to pull them out and check too often. Wait at least six to eight weeks before gently tugging on a cutting to see if it feels secure.
Keeping Your New Sprouts Happy & What to Watch For
Once you see a little bit of resistance when you gently tug, or you spot new growth emerging, congratulations! Roots are forming!
- Gradual Acclimatization: Slowly start removing the plastic bag or propagator lid for increasing periods each day. This helps the new plant adjust to the drier air of your home.
- Continue Bright, Indirect Light: Keep them in a well-lit spot, away from direct hot sun, which can scorch delicate new growth.
- Watering: Water when the top inch of soil feels dry to the touch.
- Troubleshooting: The most common issue is rot. If you notice stems turning black and mushy, or leaves dropping off without explanation, it’s usually a sign of too much moisture and not enough air circulation. Unfortunately, this is often a sign that the cutting won’t make it. Ensure your potting mix is free-draining and don’t overwater.
Go Forth and Propagate!
Don’t be discouraged if your first few attempts aren’t a roaring success. Gardening is a journey, and propagation is a skill that gets better with practice. Enjoy the process of nurturing these new lives, and soon enough, you’ll have a whole little army of your own beautiful Pittosporum bicolor to share or plant out! Happy gardening!
Resource:
https://identify.plantnet.org/k-world-flora/species/Pittosporum%20bicolor%20Hook./data