Oh, hello there! Come on in, have a seat. I’ve got a fresh pot of coffee brewing, and I’ve been just itching to chat about one of my favorite little succulents – Phemeranthus brevifolius.
Growing Your Own Patch of Phemeranthus brevifolius
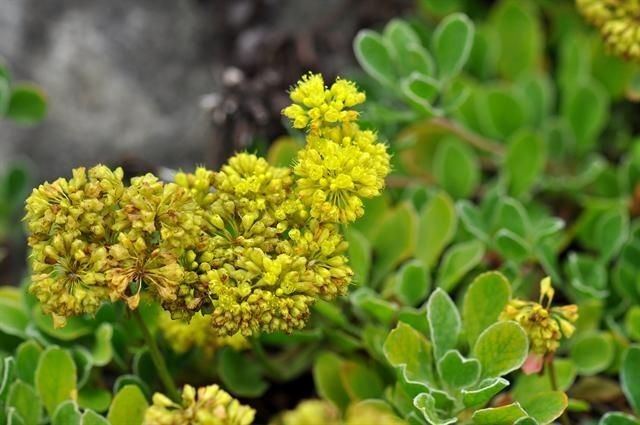
There’s something so wonderfully satisfying about coaxing a new plant into existence from just a tiny piece of its parent. Phemeranthus brevifolius, with its charming, almost jewel-like foliage, is a wonderful candidate for this kind of gardening magic. It’s a succulent that really gleams, especially when it’s happy. If you’re looking for a rewarding plant to propagate, you’ve found a good one! Don’t worry if you’re new to this; while it has a few quirks, I find it to be quite forgiving, making it a great choice for beginners looking to expand their succulent collection.
When to Get Your Hands Dirty
The absolute best time to start propagating Phemeranthus brevifolius is during its active growing season. For most of us, this means late spring through early summer. You’ll see the plant really putting on new growth then – lovely, plump leaves and stems. That’s when it has the most energy and resources to dedicate to making roots. Trying to propagate when the plant is dormant, usually in winter, is like asking someone to build a house when they’re fast asleep – it’s just not going to go well!
What You’ll Need for the Job
Gathering your supplies beforehand makes the whole process much smoother. Here’s what I always have on hand:
- Sharp, Clean Pruning Shears or a Craft Knife: For making clean cuts.
- A Well-Draining Soil Mix: I like to use a blend of half potting soil and half perlite or coarse sand. This is crucial for succulents!
- Small Pots or Seedling Trays: Whatever you have available. Terra cotta pots are my preference for succulents as they breathe well.
- Rooting Hormone (Optional but Recommended): A little dip can give your cuttings a boost, though Phemeranthus brevifolius often roots without it.
- Watering Can with a Fine Rose or Mister: For gentle watering.
- Labels and a Marker: To keep track of what you’ve planted and when.
Unlocking New Plants: Propagation Methods
Phemeranthus brevifolius is quite adaptable, and I’ve had great success with a couple of different methods.
Stem Cuttings: My Go-To Approach
This is probably the most common and effective way to multiply your Phemeranthus plants.
- Select a Healthy Stem: Look for a mature, healthy stem that has at least a few sets of leaves.
- Make the Cut: Using your clean shears or knife, make a clean cut just below a leaf node (where the leaves attach to the stem). You want to take a cutting that’s about 2-4 inches long.
- Allow to Callus: This is vital! Lay your cuttings on a dry tray or paper towel in a bright spot, but out of direct sun, for 2-3 days. You want the cut end to dry out and form a callous. This prevents rot when you plant it.
- Plant the Cutting: Once calloused, you can dip the cut end in rooting hormone if you’re using it. Then, gently insert the calloused end into your pre-moistened, well-draining soil mix. Don’t bury it too deeply – just enough so it stands upright.
Leaf Cuttings: A bit more patience required
While less common for this particular plant, you can sometimes get a new plant from a single leaf.
- Gently Remove a Leaf: Twist or snip off a healthy, mature leaf from the parent plant.
- Let it Callus: Similar to stem cuttings, let the leaf sit for a day or two until the cut end forms a dry callus.
- Set on Soil: Place the callused end of the leaf on top of your well-draining potting mix. You don’t need to bury it at all.
- Wait and Watch: This method takes longer, and not every leaf will be successful, but sometimes you’ll see a tiny new plantlet emerge from the cut end.
The “Secret Sauce” to Success!
Here are a couple of little tricks I’ve learned over the years that really make a difference:
- Don’t Overwater the Cuttings: This is the biggest killer of succulent cuttings! Once planted, I only water when the soil is completely dry. A light misting is usually enough initially, more like keeping the surface barely moist than drenching it. You’re trying to encourage those roots to seek out water, not rot from sitting in it.
- Bottom Heat is Your Friend: If you can, place your pots on a gentle heating mat. This bottom warmth mimics the sun-warmed soil and can significantly speed up root development. It’s like giving your cuttings a cozy little greenhouse environment.
Aftercare and What to Watch For
Once you see signs of growth – perhaps a tiny new leaf emerging, or the cutting feels more firmly rooted when you give it a gentle tug – you’re on your way!
Transition to a slightly more routine watering schedule, always allowing the soil to dry out completely between waterings. Continue to keep them in bright, indirect light.
The most common issue you’ll encounter is rot. If a cutting turns mushy, black, or wilts dramatically and doesn’t firm up, it’s likely succumbed to rot from too much moisture. Don’t be discouraged if this happens; it’s part of the learning process! Just discard the affected cutting and try again. Sometimes, a plant might simply fail to root. This is also normal!
Keep Digging In!
Propagating plants like Phemeranthus brevifolius is a journey. There will be successes, and there might be a few fumbles along the way. The most important thing is to enjoy the process, observe your plants, and learn from each step. Be patient, celebrate those tiny victories, and before you know it, you’ll have a whole new collection of these lovely little succulents! Happy gardening!
Resource: