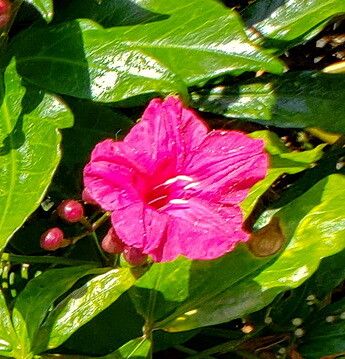
Hello, fellow plant lovers! Today, we’re diving into something truly special: propagating Ipomoea horsfalliae. If you’ve ever swooned over its showy, fuchsia-pink trumpet blooms, you know why this tropical vine is a garden showstopper. It’s a real stunner, and the joy of creating more of these beauties from just a cutting or two is incredibly rewarding. Now, a word of encouragement: while Ipomoea horsfalliae can be a bit particular, it’s definitely achievable for the eager gardener with a little patience and know-how. It’s a wonderful plant to practice your propagation skills on!
The Best Time to Start
For the highest success rates, spring or early summer is your prime time. This is when your parent plant is actively growing and has plenty of energy to put into new baby plants. You want to take cuttings from healthy, vigorous stems that are not currently flowering. Look for stems that are firm but have a bit of flexibility – not too woody, not too floppy.
Supplies You’ll Need
Gathering your tools beforehand makes the whole process so much smoother. Here’s what I always have on hand:
- Clean, sharp pruning shears or a sharp knife: For making clean cuts.
- Rooting hormone (optional, but recommended): A powder or gel to help encourage root development.
- A well-draining potting mix: I like a blend of peat moss, perlite, and a bit of compost. Or, a commercial seed-starting mix works wonders.
- Small pots or containers: 4-inch pots are usually a good size. Make sure they have drainage holes!
- Plastic bags or a propagation dome: To keep humidity levels high.
- Water: For misting and watering.
- A tray or saucer: To catch excess water.
Propagation Methods
Let’s get our hands dirty! For Ipomoea horsfalliae, stem cuttings are my go-to method. It’s reliable and gives you a fantastic chance of success.
- Take Your Cuttings: On a healthy, non-flowering stem, make a clean cut just below a leaf node (that little bump where a leaf emerges). Aim for cuttings that are about 4-6 inches long. Ensure each cutting has at least two or three leaf nodes.
- Prepare the Cuttings: Gently remove the leaves from the bottom node, leaving at least two leaves at the top. This just helps prevent rot and encourages the plant to put energy into root production.
- Apply Rooting Hormone (Optional): If you’re using rooting hormone, dip the cut end of the stem into the powder or gel. Tap off any excess – you don’t need a thick coating.
- Plant Your Cuttings: Fill your small pots with your moistened, well-draining potting mix. Make a small hole in the center of the soil with your finger or a pencil. Insert the cut end of the stem into the hole, making sure at least one leaf node is buried. Firm the soil gently around the stem.
- Create a Humid Environment: Water the soil gently. Then, cover the pot with a clear plastic bag or place it under a propagation dome. You want to create a mini-greenhouse effect to keep humidity high. You can secure the bag around the pot with a twist tie or rubber band.
- Provide Light and Warmth: Place the pots in a bright spot with indirect sunlight. Avoid direct sun, which can scorch the delicate cuttings. If you have it, placing the pots on a heat mat can significantly speed up the rooting process.
The “Secret Sauce” (Pro Tips)
Here are a couple of tricks I’ve learned over the years that make a world of difference:
- Don’t let the leaves touch the water if you’re also misting: If your plastic bag is touching the leaves or you’re misting the foliage, it can encourage fungal diseases, especially if the air isn’t circulating well. Aim for just misting the soil and the inside of the bag.
- Patience is key with these beauties: Ipomoea horsfalliae can take its sweet time to root. Don’t be discouraged if you don’t see much activity for a few weeks. Some of my most successful cuttings took over a month to show solid root growth. Just keep the soil consistently moist (but not soggy) and the environment humid.
Aftercare & Troubleshooting
Once you start to see new leaf growth or feel some resistance when you gently tug on the cutting, it’s a good sign that roots are forming!
- Gradually Acclimatize: Begin by removing the plastic bag for short periods each day, gradually increasing the time until the cutting is fully exposed to normal room humidity.
- Watering: Water when the top inch of soil feels dry.
- Troubleshooting: The most common issue is rot. If your cutting looks mushy, smells unpleasant, or the leaves turn yellow and drop off quickly, it’s likely rot. This usually happens from overwatering and poor air circulation. If you see early signs, try removing the affected part, allowing the soil to dry out a bit more, and improving ventilation. Sometimes, it’s simply a case of the cutting not being viable, and that’s okay! Don’t be afraid to try again.
A Little Patience Goes a Long Way
Propagating Ipomoea horsfalliae is a journey, and like any good journey, it requires patience and a willingness to learn. Seeing those first tiny roots emerge and then watching your new plant unfurl its first true leaves is pure gardening magic. So, grab your shears, get your pots ready, and enjoy the process of creating more of this spectacular vine to share and cherish. Happy propagating!
Resource:
https://identify.plantnet.org/k-world-flora/species/Ipomoea%20horsfalliae%20Hook./data