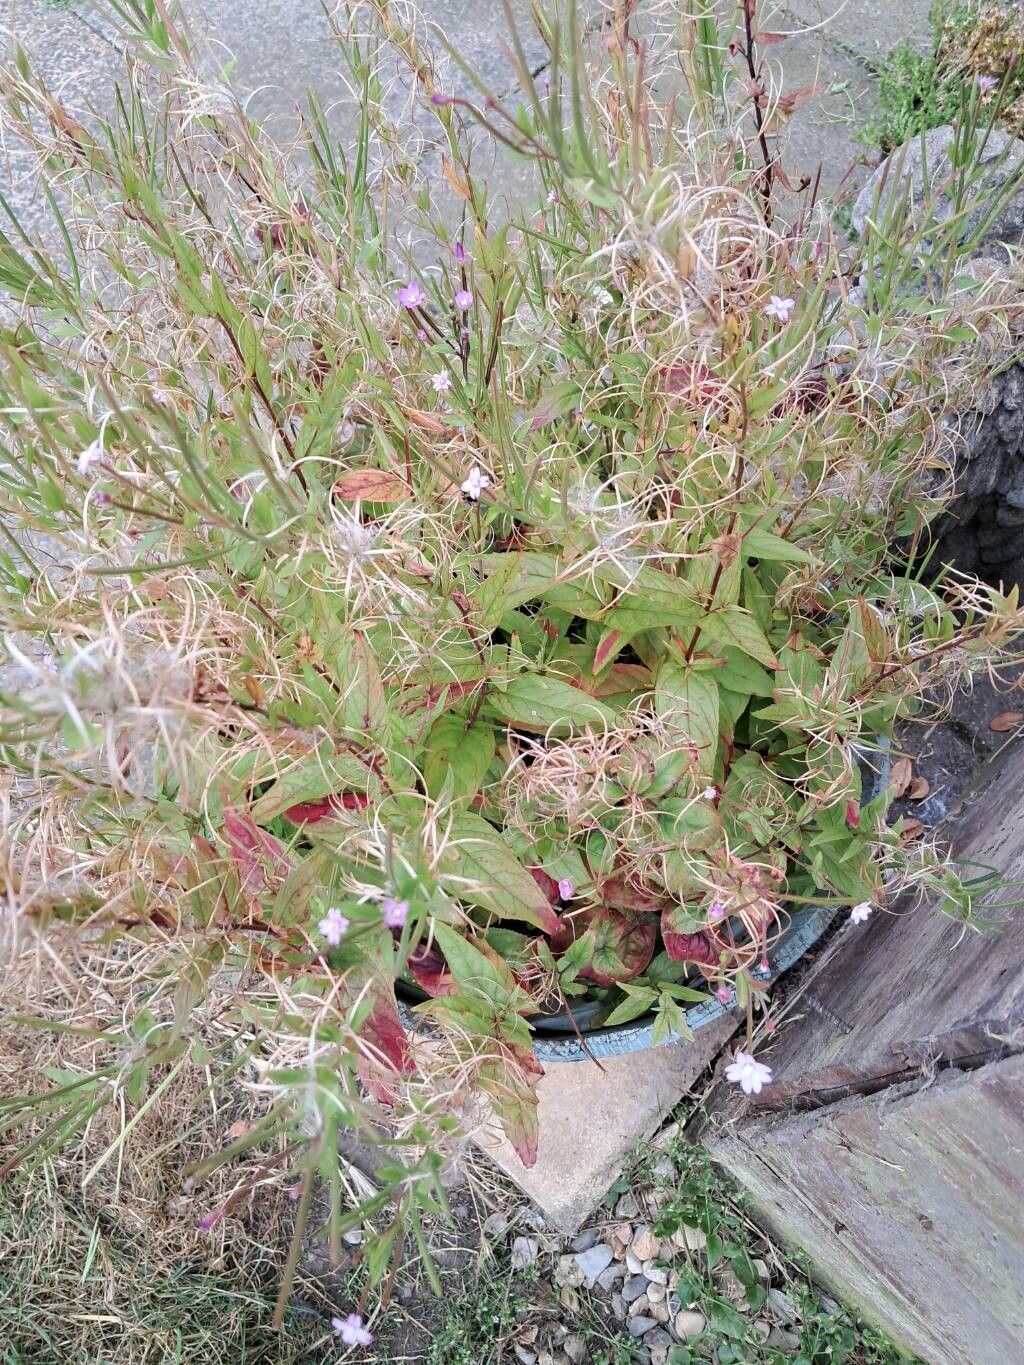
Hello there, fellow plant enthusiasts! Today, I want to chat about a real charmer that often gets overlooked: Epilobium ciliatum, also known as fringed willowherb. Now, I’ve been digging in the dirt for two decades, and let me tell you, this little plant has a quiet elegance that’s hard to resist. With its delicate, often pinkish-purple flowers that bloom for a good stretch, it brings a lovely touch to the garden, especially in more naturalized settings. And the best part? Propagating it is surprisingly rewarding, and I’d say it’s a great option for beginners looking to expand their plant collection without much fuss.
The Best Time to Start
When it comes to getting new Epilobium ciliatum plants going, spring is your best friend. Aim for late spring or early summer, after the last frost has passed and things are really starting to wake up. This is when the plant is actively growing and has plenty of energy to put into developing new roots. You can also have some success with stem cuttings later in the summer, but spring gives you the biggest head start.
Supplies You’ll Need
Gathering your supplies beforehand makes the whole process much smoother. Here’s what I usually have on hand:
- Sharp pruning shears or a clean knife: For taking clean cuts.
- A good quality seed-starting mix or a blend of peat moss and perlite: This provides excellent drainage and aeration.
- Small pots or seed trays: Clean ones are important to prevent disease.
- Rooting hormone (optional but helpful): Especially for stem cuttings.
- A watering can with a fine rose attachment: For gentle watering.
- Plastic bags or a propagator lid: To keep humidity high.
Propagation Methods
Let’s get our hands dirty with how to grow more of these beauties!
From Seed
This is often the most straightforward way to start.
- Collect seeds: Wait until the seed pods mature on the plant, typically in late summer or fall. The pods will start to dry and split open, revealing fluffy seeds attached to white down.
- Sow thinly: Fill your pots or trays with the seed-starting mix. Sow the seeds directly on the surface, giving them plenty of space. They don’t need to be buried deeply, just gently pressed into the soil.
- Water gently: Mist the surface with your watering can until the soil is evenly moist.
- Provide warmth and light: Place your pots in a bright spot, but avoid direct, harsh sunlight. A windowsill that gets indirect light is perfect. Keep the soil consistently moist.
- Be patient: Germination can take anywhere from two to four weeks. Once seedlings appear, thin them to about 2-3 inches apart if they are too crowded.
From Stem Cuttings
This method is excellent for getting plants that are genetically identical to the parent plant.
- Take cuttings: In late spring or early summer, select healthy, non-flowering stems from a mature plant. Using your sharp shears, cut pieces about 4-6 inches long. Make the cut just below a leaf node (where a leaf attaches to the stem).
- Prepare the cuttings: Remove the lower leaves from the cutting, leaving just a couple of leaves at the top. If you’re using rooting hormone, dip the cut end into it now.
- Pot them up: Fill your small pots with your prepared soil mix. Make a hole in the center with your finger or a pencil.
- Insert the cuttings: Gently push the prepared cuttings into the holes, ensuring the leaf nodes are buried in the soil. Firm the soil around them.
- Water and cover: Water the soil gently. Cover the pots with a plastic bag or a propagator lid to create a humid environment.
- Place in indirect light: Keep the pots in a bright location that receives indirect sunlight. Mist the soil occasionally to keep it moist.
- Check for roots: After 3-6 weeks, you should start to see new growth, which indicates successful rooting. You can gently tug on a cutting; if there’s resistance, it has rooted.
The “Secret Sauce” (Pro Tips)
Here are a few little tricks I’ve learned over the years that can really boost your success:
- Don’t overcrowd your seeds or cuttings. This is a common mistake! Giving them space from the get-go reduces competition for light and nutrients and also helps prevent fungal issues. I always err on the side of too much space.
- Bottom heat is your friend for cuttings. If you have a heat mat designed for propagation, placing your pots on it can significantly speed up root development. It mimics the warmth of spring soil nicely.
- Cleanliness is crucial. Always make sure your tools and pots are clean. A quick wipe down with a diluted bleach solution or rubbing alcohol can prevent dreaded fungal diseases from taking hold of your precious new plantlets.
Aftercare & Troubleshooting
Once your seeds have germinated or your cuttings have rooted, it’s time to start treating them like small, but growing, plants.
- Gradual acclimatization: If you used a plastic bag or propagator, slowly start to remove the cover over a few days to let the new plants get used to normal humidity levels.
- Light and water: Continue to provide bright, indirect light. Water when the top inch of soil feels dry to the touch. Avoid letting them sit in soggy soil, as this is a prime candidate for root rot.
- Potting up: Once your seedlings are a few inches tall and have a good root system, they can be transplanted into their own small pots with a good quality potting mix.
- Signs of trouble: The most common issue you’ll encounter is rot, which usually manifests as a mushy, brown stem at the soil line. This is almost always due to overwatering or poor drainage. If you see this, sadly, it’s usually best to discard the affected plant to prevent it from spreading. Another sign is wilting that doesn’t perk up after watering; this can also indicate rot or simply inadequate moisture.
A Little Patience Goes a Long Way
Watching a tiny seed sprout or a humble cutting transform into a thriving plant is one of the most satisfying parts of gardening. It’s a process that requires a bit of observation and care, but the rewards are immense. So, give Epilobium ciliatum propagation a try. Enjoy the journey, celebrate each little success, and soon you’ll have an abundance of these lovely blossoms to share! Happy growing!
Resource:
https://identify.plantnet.org/k-world-flora/species/Epilobium%20ciliatum%20Raf./data