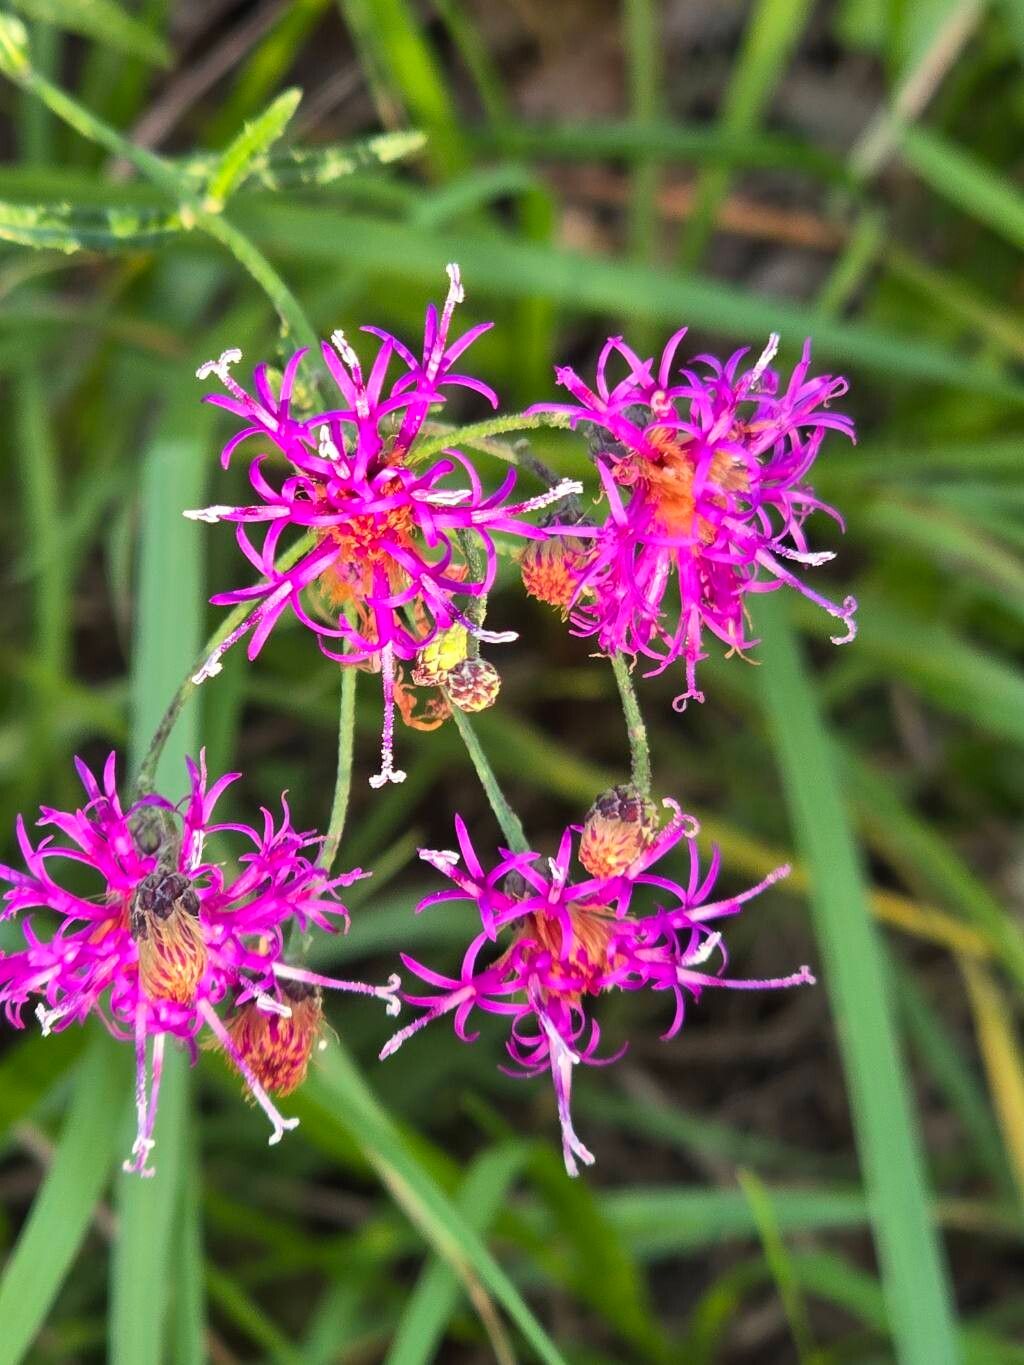
Ah, Vernonia texana! If you haven’t met this beauty yet, you’re in for a treat. Often called Texas Ironweed, it’s a real stunner with its vibrant, fuzzy purple flower clusters that bloom from late summer into fall. It’s a magnet for pollinators, a true scene-stealer in any garden, and honestly, it just brings a smile to my face every time I see it. The best part? Propagating it is incredibly rewarding, and while it might seem a tad intimidating at first, it’s actually quite doable, even for those of you just dipping your toes into the world of plant propagation. I’d say it’s a beginner-friendly project with a little patience and know-how.
The Best Time to Start
For the highest success rate, I always reach for my pruning shears in late spring or early summer. This is when the plant is actively growing, and the new shoots are tender and full of life. They haven’t hardened off yet, which makes them much more receptive to rooting. Waiting until after the plant has put on a good spurt of growth ensures you have plenty of healthy material to work with.
Supplies You’ll Need
Before we get our hands dirty, let’s gather our tools. Having everything at the ready makes the whole process smoother.
- Sharp Pruning Shears or a Clean Knife: For making clean cuts.
- Rooting Hormone (Optional but Recommended): A good rooting powder or gel can really boost your success.
- Small Pots or Trays: Clean containers are key to preventing disease. 4-inch pots are usually a good size.
- Well-Draining Potting Mix: I personally love a mix of equal parts peat moss or coco coir, perlite, and a bit of compost. You want it to hold moisture but not become waterlogged.
- Watering Can with a Fine Rose: For gentle watering.
- Plastic Bags or a Clear Dome: To create a humid environment for your cuttings.
- Labels or Plant Markers: To keep track of what you’ve planted and when!
Propagation Methods
Vernonia texana is a plant that loves to share its genes! Here are a couple of my go-to methods.
Stem Cuttings
This is my absolute favorite and often the most successful way to propagate Texas Ironweed.
- Take Cuttings: With your sharp shears, select healthy, non-flowering stems from your mature plant. Look for stems that are about 3-6 inches long. Make a clean cut just below a leaf node (where a leaf attaches to the stem).
- Prepare the Cuttings: Gently remove the lower leaves from the cutting, leaving just the top two or three leaves. This prevents them from rotting in the soil. If your leaves are quite large, you can even snip them in half to reduce water loss.
- Apply Rooting Hormone: Dip the cut end of each stem into your rooting hormone powder or gel. Tap off any excess.
- Plant the Cuttings: Fill your clean pots with your prepared potting mix. Make a small hole in the center of the soil with your finger or a pencil. Insert the cut end of the stem into the hole, making sure the leaf nodes are buried. Gently firm the soil around the cutting.
- Water and Cover: Water the soil thoroughly but gently. Then, cover the pot with a plastic bag or place it under a clear dome. This creates a mini-greenhouse, keeping the humidity high, which is crucial for cutting success.
Division
If your established Vernonia texana is looking a bit crowded or you want a quick way to get more plants, division is a great option.
- Dig Up the Plant: In early spring, before new growth really takes off, carefully dig up the entire plant. It’s best to do this when the soil is slightly moist.
- Separate the Roots: Gently shake off excess soil. You should be able to see natural divisions in the root ball. You can use your hands for smaller divisions, or a clean spade or knife to carefully cut through thicker roots. Aim for divisions that have a good amount of roots and at least one or two healthy shoots.
- Replant: Immediately replant the divisions into their new spots in the garden or into pots with fresh potting mix. Water them in well.
The “Secret Sauce” (Pro Tips)
These little tricks are things I’ve learned through trial and error over the years that just seem to make a difference.
- Bottom Heat is Your Friend: If you’re serious about rooting cuttings, popping your pots on a heat mat designed for seedlings can dramatically speed up root formation. It mimics the warmth of spring soil and gives those little roots a real kickstart. Just make sure the temperature doesn’t get too hot – around 70-75°F (21-24°C) is perfect.
- Don’t Overwater! This is a tough one for many gardeners, myself included sometimes. Overwatering is the fastest way to invite rot, especially for cuttings. Let the surface of the soil dry out slightly between waterings. It’s better to underwater slightly for a little while than to drown your precious new plants.
- Mist, Don’t Drench: For cuttings under a dome or bag, a light misting of water every few days is usually enough to maintain humidity. If you see condensation dripping heavily, your humidity might be too high, and you could even open the bag or dome for a few hours to let them air out a bit.
Aftercare & Troubleshooting
Once your cuttings have developed roots (you can gently tug on them – if there’s resistance, they’ve rooted!), it’s time to give them a bit more freedom.
- Gradual Acclimation: Slowly remove the plastic bag or dome over a few days to help the new plants adjust to normal humidity levels.
- Watering: Water them whenever the top inch of soil feels dry.
- Fertilizing (Lightly): Once they’ve established themselves and are showing new growth, you can start feeding them with a diluted liquid fertilizer about once a month.
- Repotting: When they outgrow their initial pots, you can move them into larger ones.
Now, what about when things go sideways? The most common enemy is rot. If your cutting turns mushy, black, or develops fuzzy mold, it’s likely a sign of too much moisture or poor air circulation. If you spot this early, remove the affected cutting immediately to prevent it from spreading. Sometimes, even with the best intentions, some cuttings won’t make it. Don’t get discouraged! Nature has a way of testing us, and every failed attempt is a learning opportunity.
A Encouraging Closing
Seeing those tiny roots form and a new plant emerge from what was just a snippet of stem is one of gardening’s purest joys. Be patient with your Vernonia texana cuttings. They take their time, and that’s perfectly okay. Enjoy the process, observe your little charges, and soon you’ll have more of this beautiful Texas Ironweed to share with friends or to fill your own garden with that gorgeous purple hue. Happy propagating!
Resource:
https://identify.plantnet.org/k-world-flora/species/Vernonia%20texana%20(A.Gray)%20Small/data