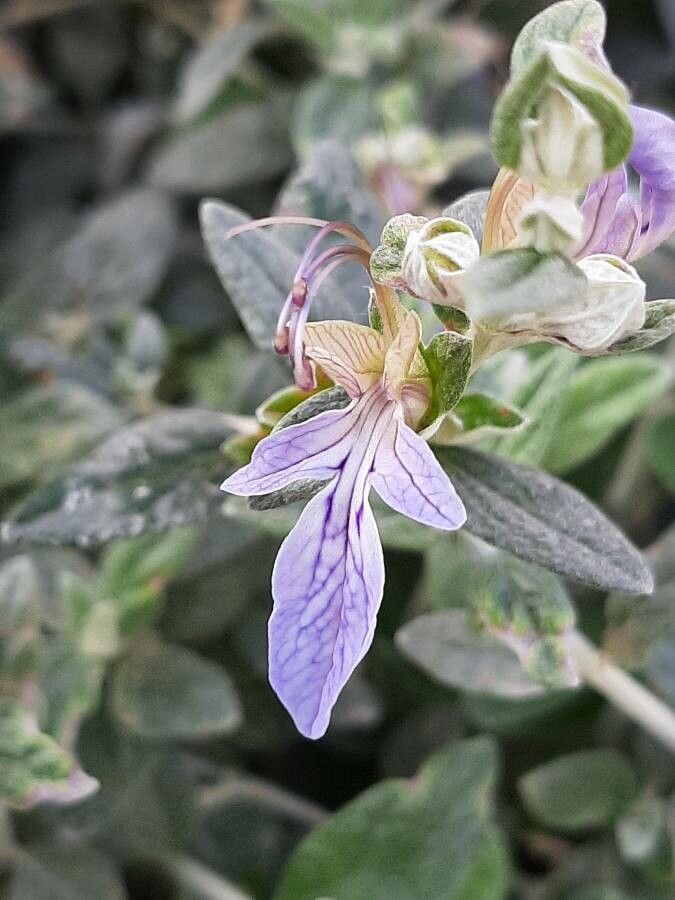
Oh, hello there! Grab a mug of your favorite brew, and let’s talk about one of my absolute garden darlings: Teucrium fruticans, or as we often call it, germander. You know, that gorgeous shrub with the silvery-blue foliage and delicate lavender-blue flowers? It’s a Mediterranean beauty that brings such a wonderful texture and subtle color to any garden. And the best part? It’s incredibly rewarding to propagate. If you’re new to plant propagation, this is a fantastic one to start with. It’s quite forgiving, which is always a good sign for beginner gardeners like yourselves!
The Best Time to Start
For germander, I find the sweet spot for taking cuttings is during its active growth period. Late spring through to early summer is usually when I have the most success. The plant is energized, with nice, pliable new growth that’s more inclined to root. You can also try a bit in early autumn, but you might find the rooting process takes a little longer.
Supplies You’ll Need
Here’s what you’ll want to have on hand before we get started:
- Sharp, clean pruning shears or a sharp knife: Essential for making clean cuts.
- Rooting hormone powder or gel: While germander can root without it, this really gives your cuttings a boost.
- A bright, well-draining potting mix: I like a blend of equal parts peat moss or coco coir and perlite. Avoid heavy garden soil!
- Small pots or seed trays with drainage holes: Cleanliness is key here.
- A plastic bag or propagation dome: To create that humid environment cuttings love.
- A watering can or spray bottle: For gentle watering.
Propagation Methods
The most straightforward way to get more germander is through stem cuttings. It’s reliable and gives you loads of new plants.
- Select Your Cuttings: Look for healthy, non-flowering stems from your established plant. You want stems that are semi-hardwood. This means they’re not brand new, floppy green growth, but also not totally old and woody. About a pencil’s thickness is usually ideal.
- Make the Cut: Using your clean shears, cut lengths of about 4-6 inches. Make your cut just below a leaf node (where a leaf grows from the stem).
- Prepare the Cuttings: Gently strip off the leaves from the bottom half of the cutting. You only want to leave a couple of leaves at the very top. This reduces water loss and allows the plant to focus its energy on rooting.
- Dip in Rooting Hormone: Dip the cut end of each stem into your rooting hormone. Tap off any excess. This step is really quite helpful.
- Plant Your Cuttings: Fill your pots or trays with your prepared potting mix. Make a small hole with a pencil or dibber. Gently insert the cutting into the hole, ensuring the bottom leaves are above the soil line. Firm the soil gently around it.
- Water and Cover: Water the pots gently so the soil is moist but not soggy. Now, here’s the crucial part for humidity: cover the pots with a clear plastic bag or a propagation dome. Make sure the plastic doesn’t touch the leaves too much.
The “Secret Sauce” (Pro Tips)
Now, for a couple of things I’ve learned over the years that make a real difference:
- Bottom Heat is Your Friend: If you can, place your pots on a gentle heat mat. This little bit of warmth from below encourages root development much faster. It’s like giving the roots a cozy blanket!
- Air Circulation is Key: Even though we want humidity, you don’t want stagnant, damp air, which can lead to rot. About once a day, lift the plastic bag or open the dome for a few minutes to let in fresh air. It’s a balancing act, but it’s worth it.
- Don’t Rush the “Water Test”: When you think your cuttings might be rooted, don’t yank on them to see if they’re holding on! Instead, give them a very gentle tug. If you feel any resistance at all, that’s a good sign roots have formed.
Aftercare & Troubleshooting
Once you see new growth emerging, that’s a fantastic sign your cuttings are rooting! At this point, you can gradually acclimate them to drier air by slowly opening the plastic cover over a few days. Continue to keep the soil moist.
The most common problem you’ll encounter is rot. If you see your cuttings turning mushy or blackening at the base, it’s usually a sign of too much moisture and not enough air circulation. Don’t be discouraged if a few don’t make it; it happens to all of us! Just remove the affected cuttings and try to adjust your watering and ventilation.
A Little Encouragement
Propagating germander is such a satisfying process. You’re essentially multiplying your garden’s beauty with your own two hands! Be patient, keep an eye on your little ones, and enjoy watching them grow. Happy propagating!
Resource:
https://identify.plantnet.org/k-world-flora/species/Teucrium%20fruticans%20L./data