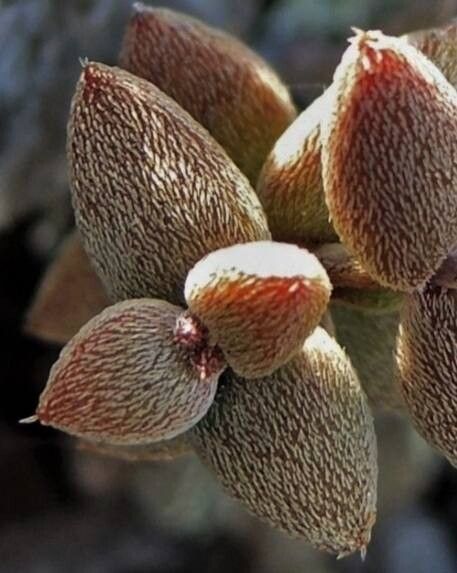
Oh, Crassula ammophila! Isn’t it just a delight? With its fuzzy, grey-green leaves, often tinged with a lovely reddish hue, it brings such a soft, tactile texture to any sunny spot. And the best part? It’s incredibly rewarding to multiply these beauties. You’ll feel like a plant wizard, I promise! And for you beginners out there, this one is wonderfully forgiving. You’re in for a treat!
The Best Time to Start
For Crassula ammophila, the happiest time to propagate is during its active growing season. Think spring and summer. This is when the plant is full of energy, ready to push out new roots and shoots with gusto. Starting when the weather is warm and sunny will give your cuttings the best chance to establish themselves quickly.
Supplies You’ll Need
Don’t worry, it’s not an overwhelming list! Here’s what I always have on hand:
- Sharp pruning shears or a clean knife: For clean cuts.
- Well-draining potting mix: I like a blend of succulent/cactus mix with a bit of perlite or coarse sand to ensure excellent drainage.
- Small pots or trays: With drainage holes, of course!
- Rooting hormone (optional but helpful): This can give your cuttings a little boost.
- Watering can or spray bottle: For gentle watering.
- Gloves (optional): Some folks prefer them, especially with fuzzy plants.
Propagation Methods
Crassula ammophila is a champion of propagation, and you’ve got a couple of surefire ways to make more of it.
Stem Cuttings
This is my absolute go-to method for this plant. It’s so straightforward!
- Find a healthy stem. Look for a stem that’s at least a few inches long and looks vigorous.
- Make a clean cut. Using your sharp shears or knife, cut the stem just above a leaf node (where a leaf attaches to the stem).
- Remove lower leaves. Gently pull off the bottom 1-2 sets of leaves from the cut stem. This exposes the node, which is where roots will emerge.
- Callus over. This is crucial! Let the cut end of the stem sit for a day or two in a dry, shaded spot. You want to see a dry, callused tip. This prevents rot when you plant it.
- Dip (optional). If you’re using rooting hormone, dip the callused end into it now.
- Plant it. Insert the callused end into your prepared well-draining potting mix, about an inch deep. I like to gently firm the soil around it.
- Water sparingly. Give it a light watering, then wait until the soil is mostly dry before watering again.
Water Propagation (for Stems)
This method is a bit more visual and can be very exciting to watch.
- Prepare your cutting. Follow steps 1-3 above. You’ll want to remove enough leaves so that the nodes are exposed above the water line.
- Place in water. Fill a small jar or glass with clean water. Crucially, make sure the cut end of the stem is submerged, but no leaves are touching the water. If leaves sit in the water, they tend to rot.
- Find a bright spot. Place the container in a bright location, but out of direct, scorching sunlight.
- Change water regularly. Refresh the water every few days to keep it clean and oxygenated.
- Watch for roots! You should start to see little white roots emerging from the nodes within a couple of weeks.
- Pot it up. Once the roots are about an inch long, carefully transplant the cutting into your well-draining potting mix. Water lightly.
The “Secret Sauce” (Pro Tips)
Now, for those little nuggets of wisdom I’ve picked up over the years.
- Patience with the Callus: Seriously, don’t skip the callusing step! It’s the difference between a thriving new plant and a soggy mess. A good, dry callus is your best friend.
- Bottom Heat is a Game-Changer: If you can, place your pots on a seedling heat mat during propagation. This gentle warmth from below encourages root development so much faster. It’s like giving your cuttings a cozy spa treatment.
- Don’t Overcrowd: When planting multiple stem cuttings in one pot, give them a little space. This improves air circulation and reduces the risk of spreading any issues.
Aftercare & Troubleshooting
Once you see those first signs of new growth or roots poking out, congratulations! You’re on your way.
- Gradual Transition: If you propagated in water, don’t plunge your new plant into full sun immediately. Gradually introduce it to brighter light over a week or two.
- Water Wisely: Continue to water only when the soil is dry to the touch. Overwatering is the quickest way to invite root rot. The leaves might look a little plump and firm when it’s happy.
- Trouble Signs: The most common villain is rot. If your cutting turns mushy or black, it’s likely rotted. This usually happens from insufficient callusing or too much moisture. If you see this, sadly, it’s best to discard it and start again. Sometimes, a cutting might just shrivel up – this can happen if it dries out too much before rooting, or if it just doesn’t have enough stored energy to get going.
A Encouraging Closing
Propagating Crassula ammophila is such a joy. It’s a wonderful way to learn about plant life cycles and to fill your home and garden with these delightful succulents without breaking the bank. Be patient, trust the process, and soon you’ll have an abundance of fuzzy green treasures to share. Happy propagating!
Resource:
https://identify.plantnet.org/k-world-flora/species/Crassula%20ammophila%20Toelken/data