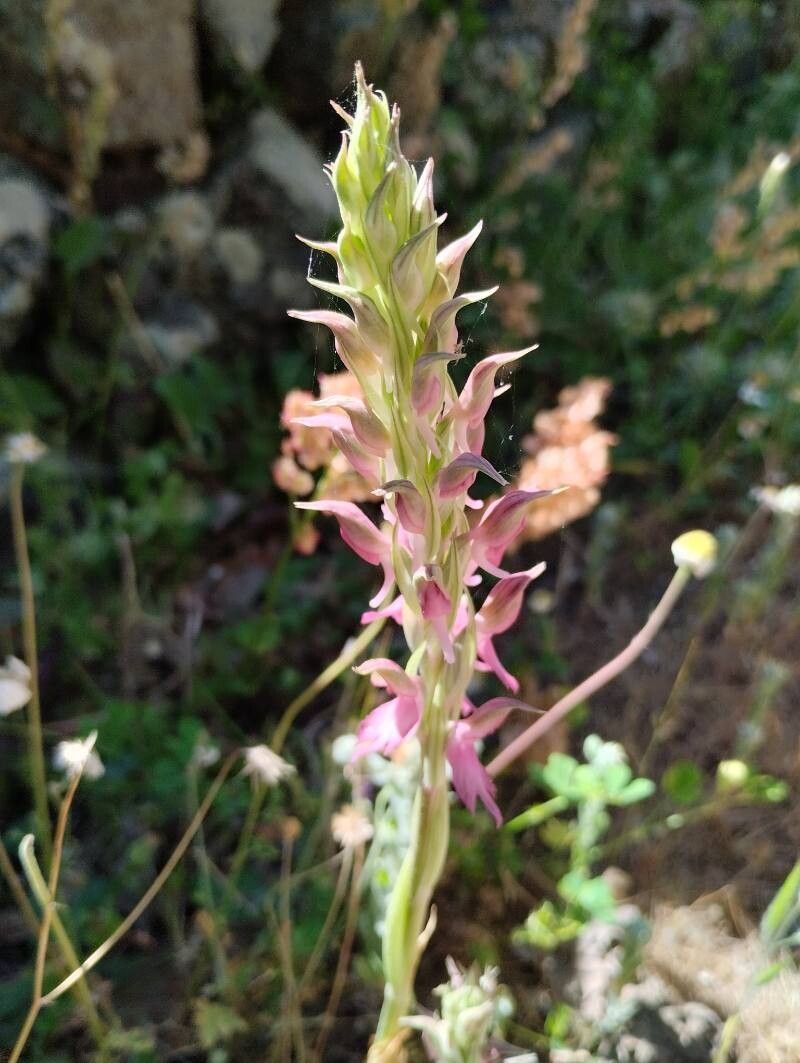
Oh, hello there! Come on in, grab a mug. I’ve been waiting to chat with you about a truly special orchid: Anacamptis sancta, or the Holy Orchid. It’s got these delightful, often sweetly fragrant flowers, usually in lovely shades of pink or purple, and blooming them yourself brings such a unique sense of accomplishment.
Now, I’ll be honest, Anacamptis sancta isn’t quite as straightforward to propagate as, say, a spider plant. It’s a bit more of a specialist, and for beginners, it might feel like a fun challenge rather than a walk in the park. But don’t let that deter you! With a little care and the right approach, you absolutely can multiply these beauties.
The Best Time to Start
For Anacamptis sancta, the sweet spot is definitely late spring or early summer. This is when the plant is actively growing after its flowering period. You’ll see new shoots emerging, which are perfect candidates for taking cuttings. Trying to propagate when the plant is dormant or stressed is just setting yourself up for disappointment, so timing is key here.
Supplies You’ll Need
Let’s get our toolkit ready. Here’s what I always have on hand:
- Sharp, sterile pruning shears or a razor blade: Cleanliness is paramount to prevent disease.
- A well-draining potting mix: I often use a mix of orchid bark, perlite, and a bit of coco coir. Something that allows for good air circulation.
- Small pots or trays: With drainage holes, of course!
- Rooting hormone (optional, but helpful): A powder or liquid blend can give new cuttings a good start.
- A spray bottle: For misting.
- Clear plastic bags or a mini greenhouse: To create a humid environment.
- Labels and a marker: So you don’t forget what you’ve potted!
Propagation Methods
Anacamptis sancta is most commonly propagated through division, especially when repotting. This is the gentlest method and usually yields the best results for home gardeners.
Division Method:
- Assess your plant: When your Anacamptis sancta has finished blooming and you’re ready to repot (typically every 1-2 years), gently remove it from its current pot.
- Inspect the roots: Carefully tease away some of the old potting medium to examine the root system. You’re looking for distinct sections of the plant where new pseudobulbs (the swollen stem bases) have formed and are attached to the main plant. You want divisions that have at least two or three healthy pseudobulbs and good root growth.
- Make the cut: Using your sterilized pruning shears, carefully cut between the divisions. Ensure each piece you separate has sufficient roots. If the roots are tangled, you might need to gently untangle them or make a clean cut through them if necessary. It’s better to have fewer roots on a healthy division than to damage the whole plant.
- Pot up the divisions: Pot each new division into its own small pot with your fresh, well-draining mix. Make sure the pseudobulbs are at or just slightly above the soil surface.
- Water lightly: Water very sparingly at first. Just enough to moisten the media.
The “Secret Sauce” (Pro Tips)
Here are a few little tricks I’ve picked up along the way that really make a difference.
- Don’t overwater new divisions! This is probably the biggest mistake people make. They think the divisions need a lot of moisture, but they often rot before they can establish roots. Water lightly and let the medium dry out a bit between waterings.
- A touch of rooting hormone can be magical. Even on divisions, dipping the cut ends (if you had to make any significant ones) into rooting hormone powder can encourage faster and stronger root development.
- Bottom heat is your friend. If you’re feeling a bit more adventurous or if your propagation area is on the cooler side, placing your pots on a propagation mat set to a gentle warmth (around 70-75°F / 21-24°C) can significantly speed up root formation.
Aftercare & Troubleshooting
Once your Anacamptis sancta divisions are potted, keep them in a bright location with indirect light. Avoid direct sun, which can scorch the new growth.
Maintain humidity by lightly misting the foliage occasionally, or by placing the pots in a tray with pebbles and water (making sure the pot isn’t sitting directly in the water).
The most common issue you’ll face is rot. If you see a pseudobulb turning dark and mushy, it’s usually a sign of too much moisture. Sadly, once rot sets in, it’s very difficult to save the affected part. Don’t panic if a division doesn’t make it; learn from it and try again with better watering practices. Look for signs of new growth or roots emerging from the base as an indicator of success.
A Little Encouragement
Growing plants is a journey, and propagating orchids like Anacamptis sancta is a wonderfully rewarding part of that journey. Be patient, observe your plants closely, and don’t be afraid to experiment a little. Each tiny new plant is a testament to your care and a promise of more beauty to come. Happy growing!
Resource: