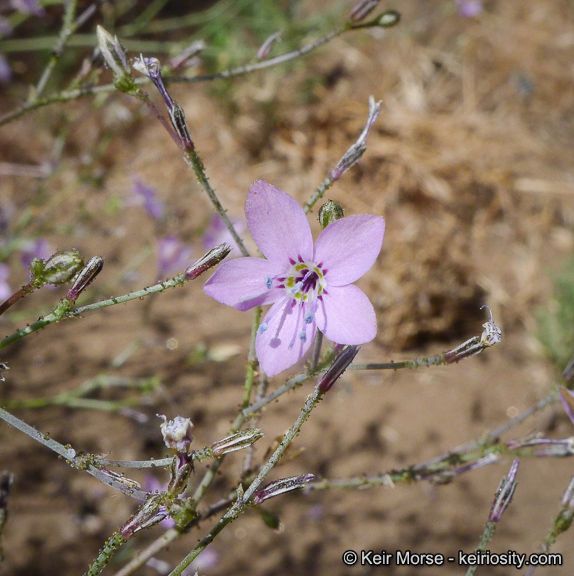
Hello there, fellow plant lovers! It’s so lovely to have you join me today. We’re going to dive into the wonderful world of propagating Saltugilia caruifolia, a plant that I’ve found brings such a unique charm to any garden. With its delicate, aromatic foliage and lovely little flowers, it’s a real gem. And the best part? Getting more of these beauties is incredibly satisfying. If you’re just starting out, don’t be intimidated; propagating this one is surprisingly manageable, and I’m here to guide you every step of the way.
The Best Time to Start
For Saltugilia caruifolia, the sweet spot for propagation is during its active growing season, which usually means late spring or early summer. You’re looking for new, healthy growth that’s not yet woody. This tender new material has the best chance of rooting successfully. Think of it as taking a cutting from a plant that’s bursting with life – it’s ready to take on the world!
Supplies You’ll Need
To give your cuttings the best start, make sure you have these handy:
- Sharp Pruning Shears or a Clean Knife: For making clean cuts. This is crucial to prevent disease.
- Rooting Hormone (Optional but Recommended): Look for a powder or gel. It really gives your cuttings a boost!
- Well-Draining Potting Mix: A good blend of peat moss, perlite, and a bit of compost works wonders. You want something that won’t hold too much moisture.
- Small Pots or Seedling Trays: Clean and with drainage holes.
- Plastic Bags or a Propagator Lid: To create a humid environment for your cuttings.
- Watering Can or Mister: For gentle watering.
Propagation Methods
I’ve found two main methods work best for Saltugilia caruifolia: stem cuttings and division.
Stem Cuttings
This is my go-to for increasing my numbers. It’s like giving your plant a little haircut and getting new plants in return!
- Select Your Cuttings: Choose healthy stems that are about 4-6 inches long. Look for stems with plenty of leaves, and make your cut just below a leaf node (where a leaf attaches to the stem).
- Prepare the Cuttings: Gently remove the lower leaves from the cutting. You want to expose at least one or two nodes where roots will form.
- Apply Rooting Hormone: Dip the cut end of the stem into your rooting hormone, tapping off any excess.
- Plant Them Up: Fill your pots with the well-draining potting mix. Make a small hole with your finger or a pencil, and insert the cutting. Firm the soil gently around the base to ensure good contact.
- Create a Humid Environment: Water the soil lightly. Then, cover the pots with a clear plastic bag, or use a propagator lid. This traps moisture and keeps the humidity high, which is essential for cuttings to root. Place them in a bright spot that doesn’t get direct sun.
Division
If you have a mature, established clump, division is a fantastic way to get multiple plants and also help the parent plant thrive.
- Gently Unearth: Dig up the entire plant, taking care to disturb the root ball as little as possible. A garden fork can be helpful here.
- Separate the Clumps: You’ll likely see distinct sections or crowns. You can often gently tease these apart by hand. If they’re more stubborn, use clean secateurs or a trowel to divide them into smaller sections, ensuring each section has some roots and at least one growing point.
- Replant Immediately: Plant the divisions into their new spots in the garden or in prepared pots. Water them in well.
The “Secret Sauce” (Pro Tips)
Here are a few things I’ve learned over the years that really make a difference:
- Don’t Let the Leaves Touch the Water (for water propagation, if you try it): While stem cuttings are best in soil for Saltugilia, if you do opt for water propagation (which I find less reliable for this particular plant), make sure the leaves aren’t submerged. Rot is the enemy! Only the stem needs to be in the water.
- Bottom Heat is Your Friend: If you have a heat mat, placing your pots on it can significantly speed up root development. It mimics the warmth of spring and tells those cuttings, “It’s time to grow!”
- Cleanliness is Key: Always use clean tools and pots. This might sound basic, but it’s the number one way to prevent fungal diseases that can kill your precious cuttings before they even have a chance.
Aftercare & Troubleshooting
Once your cuttings’ roots have established – you’ll see new growth popping up, or you can give them a very gentle tug and feel resistance – it’s time to treat them like little individuals. Gradually remove the plastic cover over a few days to acclimate them to lower humidity. Water them when the top inch of soil feels dry.
If you notice your cuttings turning yellow and wilting, or developing mushy, dark spots, it’s usually a sign of overwatering or rot. Don’t despair! Sometimes, you can salvage a cutting by trimming away the rotten parts and repotting it in fresh, dry soil. If the whole thing is affected, it’s sadly time to start again. Patience is your best tool here.
A Little Bit of Patience Goes a Long Way
Taking cuttings and coaxing new life from them is one of the most rewarding aspects of gardening. It requires a bit of faith and, of course, that touch of green-thumb magic we all strive for. Don’t be discouraged if your first attempt isn’t perfect. Each plant you successfully propagate is a victory, and you’ll learn so much along the way. Happy propagating, and enjoy watching your Saltugilia caruifolia family grow!
Resource: