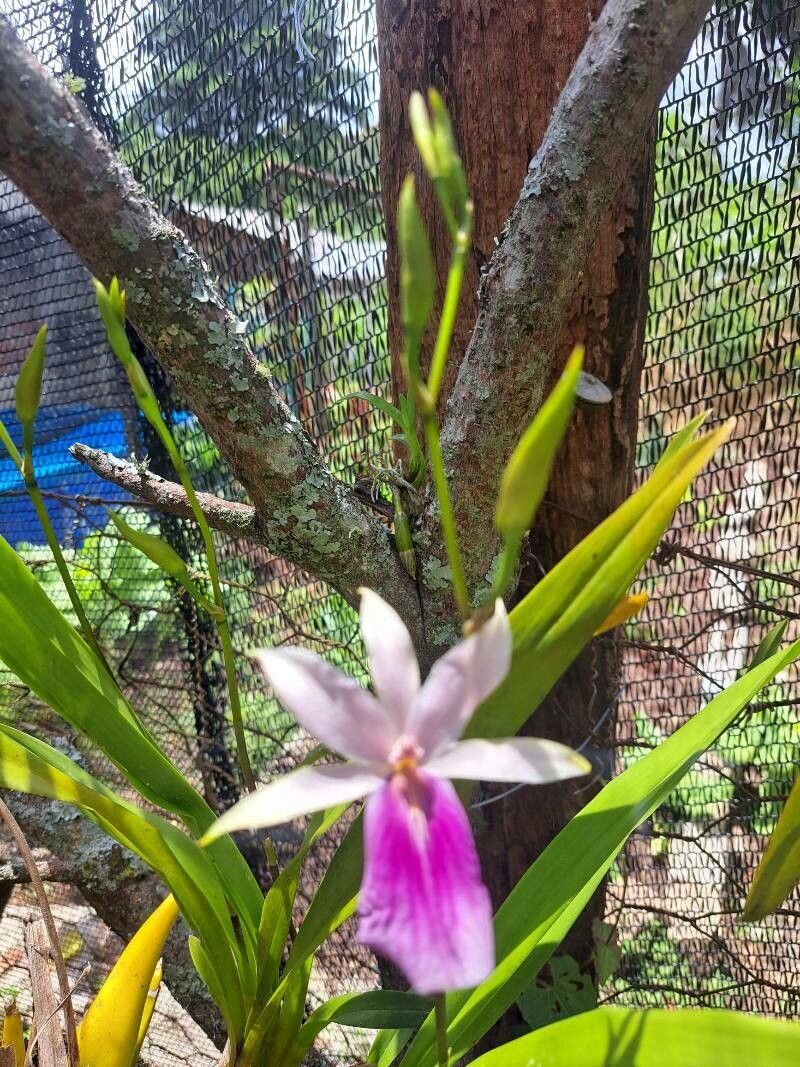
Hey there, fellow plant lovers! I’m thrilled you’ve found your way to my little corner of the internet. Today, we’re diving into the delightful world of Miltonia regnellii, also known as the Pansy Orchid. If you’ve ever admired these beauties with their delicate, face-like blooms, you’re not alone! Their charm is undeniable, and there’s a special kind of joy in coaxing a new plant to life from an existing one. Now, is it beginner-friendly? Honestly, it’s a bit of a mixed bag. While not the most difficult orchid out there, it does appreciate a bit of know-how. But don’t worry, with a little guidance, you’ll be well on your way to success!
The Best Time to Start
For our Pansy Orchid, the sweet spot for propagation is after it finishes blooming. This typically happens in late spring or early summer. The plant is then entering a period of active growth, meaning it has the energy reserves it needs to put towards developing new roots and shoots. Trying to divide or take cuttings when it’s in full bloom or actively growing new leaves will stress it out. We want happy, healthy parent plants to ensure the best start for our new babies.
Supplies You’ll Need
Gathering your tools beforehand makes everything so much smoother. Here’s what I usually have on hand:
- Sharp, sterile pruning shears or a clean knife: For clean cuts that prevent disease.
- Orchid bark mix (fine to medium grade): A well-draining medium is crucial. I often add a bit of charcoal and perlite for extra aeration.
- Small pots or containers: Orchid pots with good drainage are ideal.
- Sphagnum moss: Can be used for some methods or to add moisture retention when needed.
- Rooting hormone (optional but recommended for division): For encouraging faster root development.
- Spray bottle: For misting.
- Labels and a permanent marker: To keep track of your new plants.
Propagation Methods
The most reliable way to propagate Miltonia regnellii is through division. This is when you separate a mature plant into smaller sections, each with its own roots and pseudobulbs (those swollen structures at the base of the leaves).
Here’s how I tackle it:
- Gently unpot your orchid. Carefully turn the pot upside down, supporting the plant. You might need to gently coax it out.
- Inspect the root ball. You’re looking for natural divisions. These are areas where new growth, or “leads,” are emerging from the main mass of older pseudobulbs. Ideally, each division should have at least two to three healthy pseudobulbs and a decent root system.
- Using your sterile shears or knife, make a clean cut. Work slowly and deliberately. If a section is particularly stubborn, you might need to carefully tease apart the roots. Don’t be afraid to sacrifice a few older roots if it means preserving the health of the leas.
- Trim away any dead or damaged roots or leaves. This helps prevent rot and encourages the plant to focus its energy on new growth.
- (Optional) Apply rooting hormone. Dip the cut ends of the pseudobulbs and any exposed roots into your rooting hormone.
- Pot up your divisions. Place each section into its own pot filled with your orchid bark mix. Ensure the pseudobulbs are sitting at or slightly above the surface of the mix. Water lightly.
The “Secret Sauce” (Pro Tips)
Over the years, I’ve learned a few tricks that make a big difference. Here are a couple of my go-to tips:
- Don’t overwater newly divided plants. This is a major pitfall! Your divisions are establishing themselves and don’t need to be sitting in soggy conditions. Water thoroughly when the potting mix just starts to feel dry, and ensure there’s absolutely no water sitting in trays.
- Consider a little bottom heat. For the first few weeks after dividing, placing your pots on a gentle heat mat (the kind used for seedlings) can really encourage root development. Just a little bit of warmth helps spur things along.
Aftercare & Troubleshooting
Once your new divisions are potted up, place them in a location with bright, indirect light. Avoid direct sun, which can scorch their delicate leaves. Maintain good air circulation. Initially, mist them lightly every few days, especially if your environment is dry.
The most common issue you’ll face is rot. This usually happens from overwatering or poor drainage. You’ll see mushy, brown, or black tissue on the pseudobulbs or roots. If caught early, you can try repotting into fresh, dry mix. If it’s extensive, sadly, the division might not recover. Another sign things aren’t going well is when the pseudobulbs start to shrivel significantly and don’t plump back up with watering. This could also indicate a lack of roots or excessive drying.
A Encouraging Closing
Propagating orchids can feel a bit daunting at first, but trust me, the reward of seeing those new roots emerge and eventually a new bloom is absolutely worth it. Be patient with your new Miltonia regnellii babies, give them a little TLC, and learn from each step of the process. Happy growing!
Resource:
https://identify.plantnet.org/k-world-flora/species/Miltonia%20regnellii%20Rchb.f./data