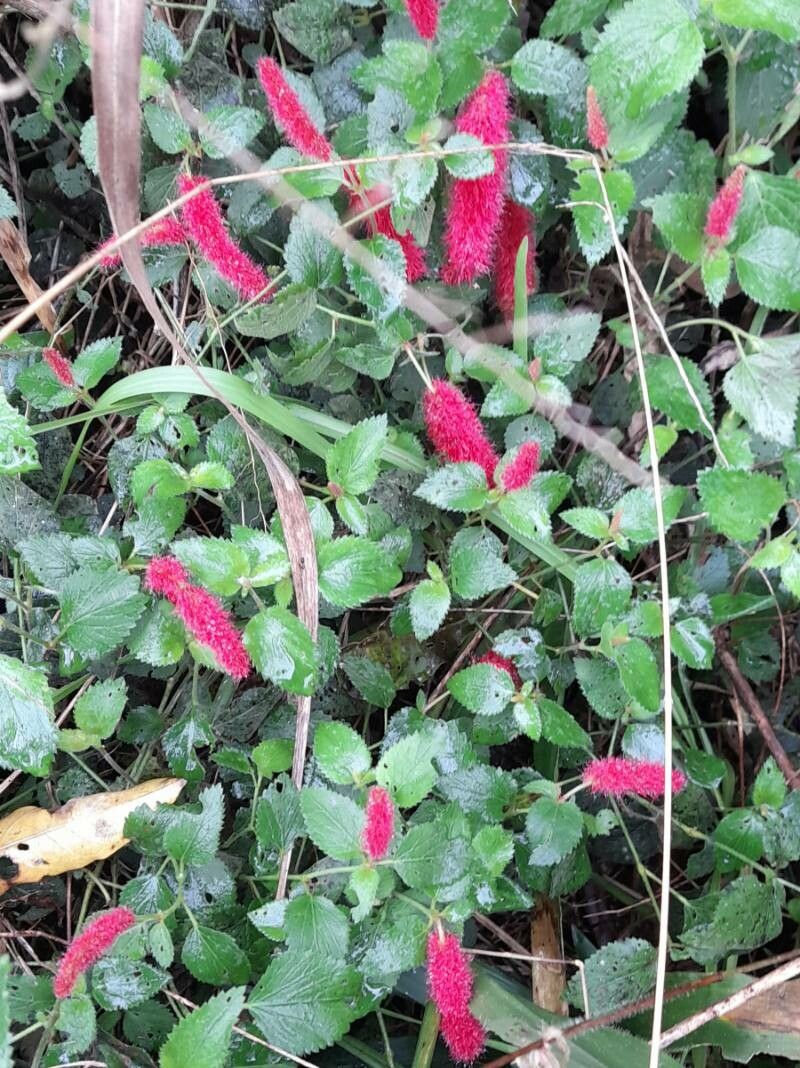
Hey there, fellow plant lovers! It’s your friend here, ready to chat about another one of my garden crushes: Acalypha herzogiana. You’ve probably seen this beauty with its striking, colorful foliage – those vibrant reds, pinks, and coppers really make a statement, don’t they? Growing these from cuttings is incredibly satisfying. You get to witness that magic of new life springing forth, and soon you’ll have more of these show-stoppers to share or plant out.
Now, I’ll be straight with you. While many Acalyphas are fairly straightforward to propagate, herzogiana can sometimes be a little fussier than others. But don’t let that deter you! With a bit of attention and these tips, you’ll be well on your way. It’s a rewarding challenge, and the result is always worth it.
The Best Time to Start
My favorite time to take cuttings of Acalypha herzogiana is in the spring or early summer. This is when the plant is actively growing and has plenty of energy. You want to be snipping off pieces that are new, pliable growth, often called “softwood” or “semi-hardwood.” Avoid taking cuttings from old, woody stems – they’re much less likely to root.
Supplies You’ll Need
Here’s a little list to get you prepped:
- Sharp Pruning Shears or a Clean Knife: For making clean cuts.
- Rooting Hormone: A powder or gel form works wonderfully. It really gives your cuttings a head start.
- Well-Draining Potting Mix: I like a blend of equal parts peat moss, perlite, and a good quality potting soil. You can also buy specific cutting and seed starting mixes.
- Small Pots or Seedling Trays: Clean ones, please!
- Plastic Bags or a Clear Dome: To create a mini-greenhouse effect.
- Patience! (This is the most important one.)
Propagation Methods: Stem Cuttings
This is my go-to method for Acalypha herzogiana. It’s reliable and yields great results.
- Select Your Mother Plant: Find a healthy, vigorous Acalypha herzogiana. Look for stems with bright, sturdy leaves.
- Take Your Cuttings: Using your clean shears, snip off a section of stem that’s about 4-6 inches long. Try to make the cut just below a leaf node (where a leaf emerges from the stem). This is where the magic happens for root formation.
- Prepare the Cuttings: Gently remove the lower leaves from your cutting. You want to leave just a few leaves at the top. This reduces water loss while the cutting tries to establish roots. If your leaves are very large, you can even cut them in half horizontally.
- Dip in Rooting Hormone: Moisten the cut end of your stem, then dip it into the rooting hormone, tapping off any excess. This stuff really helps encourage root development.
- Plant Your Cuttings: Fill your small pots with your prepared potting mix. Make a small hole in the center with your finger or a pencil. Carefully insert the cutting into the hole, ensuring the leaf nodes that you removed are buried. Gently firm the soil around the stem.
- Water Them In: Water the soil lightly. You want it moist, but not soggy.
- Create Humidity: Place your pots into a clear plastic bag or cover them with a clear plastic dome. This traps moisture and keeps your cuttings from drying out. Make sure the plastic doesn’t touch the leaves too much – it can cause rot.
The “Secret Sauce” (Pro Tips)
Here are a few things I’ve learned over the years that can make a big difference:
- Bottom Heat is Your Friend: If you can, place your pots on a heat mat designed for seedlings. Acalypha herzogiana just loves a little warmth from below. It really speeds up the rooting process.
- Don’t Overwater! This is crucial. Soggy soil is the quickest way to rot your cuttings. Let the surface of the soil dry out slightly between waterings. It’s better to be a little dry than too wet.
- Good Air Circulation: While you want humidity, you also don’t want stagnant air. If you’re using a plastic bag, open it up for a few minutes each day to let fresh air in. This helps prevent fungal issues.
Aftercare & Troubleshooting
Once your cuttings have been in their mini-greenhouse for a few weeks, start checking for roots. You can gently tug on a cutting – if there’s resistance, you’ve got roots! You can also look for new leaf growth, which is a sure sign of success.
When roots appear, gradually acclimate your new plants to normal conditions. Remove the plastic bag or dome for longer periods each day over a week. Continue to keep the soil consistently moist but not waterlogged. You can move them to a brighter spot, but avoid direct, scorching sun initially.
The most common problem you’ll encounter is rot. If a cutting turns black and mushy, sadly, it’s likely lost. This is usually a sign of too much moisture and not enough air circulation. If you see any leaves yellowing or wilting excessively, check the soil moisture and ensure it’s not too dry or too wet.
A Little Encouragement
Propagating plants is such a rewarding journey. There will be times when things don’t quite work out, and that’s perfectly okay. Every gardener has cuttings that fail. Don’t get discouraged! Learn from it, try again, and celebrate those successes. The incredible color and vibrancy of a well-rooted Acalypha herzogiana is truly a joy to behold. Happy propagating!
Resource:
https://identify.plantnet.org/k-world-flora/species/Acalypha%20herzogiana%20Pax%20&%20K.Hoffm./data