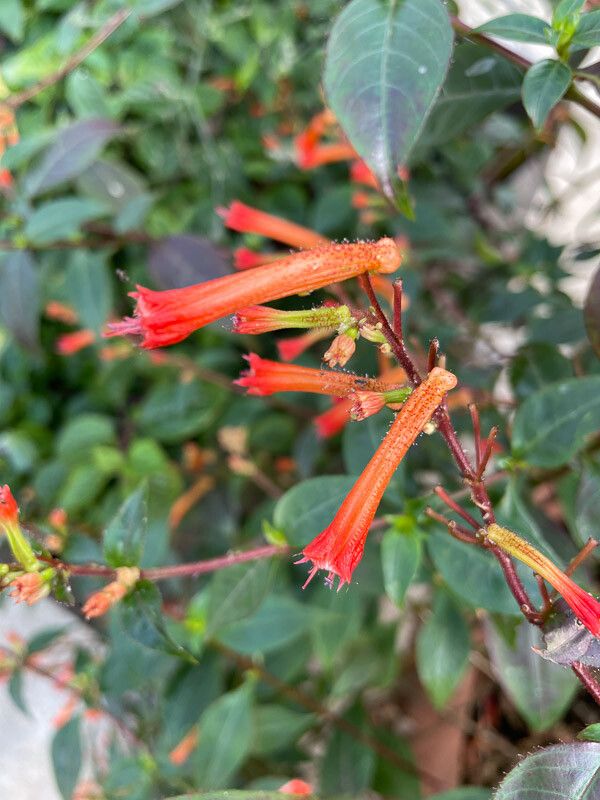
Hey there, fellow plant enthusiasts! It’s so lovely to have you join me today. We’re going to talk about a little gem that’s really captured my heart over the years: Cuphea subuligera. If you haven’t had the pleasure, imagine delicate, tubular blooms in shades of vibrant pink or deep purple, attracting hummingbirds and butterflies to your garden like a magnet. They offer such a long season of color, making them a real standout. And the best part? They’re surprisingly easy to grow from cuttings, which is fantastic news for all of us who love to multiply our plant collections!
The Best Time to Start
For Cuphea subuligera, I find the sweet spot for propagation is during its active growing season. Think late spring or early summer. The plant is full of vigor then, and the cuttings have a fantastic chance of taking root quickly. You want to take your cuttings from healthy, non-flowering stems. If you try too early in the spring when it’s still waking up, or later in the fall when it’s winding down, your success rate might dip a bit.
Supplies You’ll Need
Gathering your tools is half the fun, isn’t it? Here’s what I always have on hand when I’m propagating Cuphea subuligera:
- Clean, sharp pruning shears or a sharp knife: For making clean cuts.
- Rooting hormone powder or gel: This gives your cuttings a helpful boost.
- A well-draining potting mix: I like a blend of peat moss and perlite, or a good quality seed-starting mix.
- Small pots or trays: Clean ones are key!
- A clear plastic bag or propagation dome: This helps maintain humidity.
- Watering can or spray bottle: For gentle watering.
Propagation Methods
My go-to method for Cuphea subuligera is stem cuttings. It’s reliable and gives you plenty of opportunities to create new plants.
- Select Your Stems: Look for healthy, semi-hardwood stems. These are stems that are starting to firm up but aren’t woody yet. You’re aiming for pieces about 4-6 inches long.
- Make the Cut: Use your clean shears or knife to take a cutting just below a leaf node (where a leaf attaches to the stem). This is where the plant is most likely to form roots.
- Prepare the Cutting: Gently remove the lower leaves from the cutting, leaving just a few at the top. This prevents them from rotting when planted.
- Apply Rooting Hormone: Dip the cut end of the stem into your rooting hormone, ensuring it’s coated. Tap off any excess.
- Plant Your Cuttings: Make a hole in your prepared potting mix with a pencil or your finger. Gently insert the cutting into the hole and firm the soil around it.
- Provide Humidity: Water the soil gently. Then, cover the pot with a clear plastic bag or place it under a propagation dome. This creates a mini-greenhouse effect.
- Find a Cozy Spot: Place your cuttings in a bright location out of direct sunlight. They like warmth, so somewhere on a windowsill that gets indirect light is perfect.
Another option, though I find cuttings more consistently successful for this particular plant, is water propagation. Just place your prepared cuttings (again, remove lower leaves) in a jar of clean water, ensuring the nodes where you removed the leaves are submerged. Change the water every few days to keep it fresh. Once you see roots starting to form, you can transplant them into potting mix.
The “Secret Sauce” (Pro Tips)
Here are a couple of things I’ve learned over the years that really make a difference:
- Don’t Overdo the Hormone: While rooting hormone is helpful, too much can actually hinder root development. A light dusting is all you need.
- Bottom Heat is Your Friend: For even faster rooting, consider using a heating mat designed for seedlings. This gentle warmth from below encourages root growth significantly. You’ll see them developing roots much quicker!
Aftercare & Troubleshooting
Once you see signs of new growth, or if you gently tug on a cutting and feel resistance (meaning roots have formed!), you’re in great shape!
- Gradually Acclimate: Slowly remove the plastic bag or dome over a few days to get your new plant used to drier air.
- Watering: Water when the top inch of soil feels dry. Avoid overwatering, as this is the quickest way to invite problems.
- Troubleshooting: The most common issue you’ll encounter is rot. If you see your cuttings looking brown, mushy, or collapsing, it’s usually a sign of too much moisture or not enough air circulation. Sometimes, you can salvage a cutting if you catch it early enough by removing the rotten part and trying to reroot it in fresh, slightly drier mix. If it’s widespread, it might be time to start again with fresh cuttings and adjust your watering.
So, there you have it! Propagating Cuphea subuligera is a wonderfully satisfying way to expand your garden and share these cheerful plants with friends. Be patient, observe your cuttings, and don’t be afraid to experiment. Happy gardening, and may your new Cuphea flourish!
Resource:
https://identify.plantnet.org/k-world-flora/species/Cuphea%20subuligera%20Koehne/data