Hey there, fellow plant enthusiasts! I’m so excited to chat with you today about a real gem in the orchid world: Coelogyne nervosa. If you’re looking for an orchid that offers delicate beauty and a wonderfully rewarding propagation journey, you’ve come to the right place.
Why Coelogyne nervosa is Worth Getting to Know
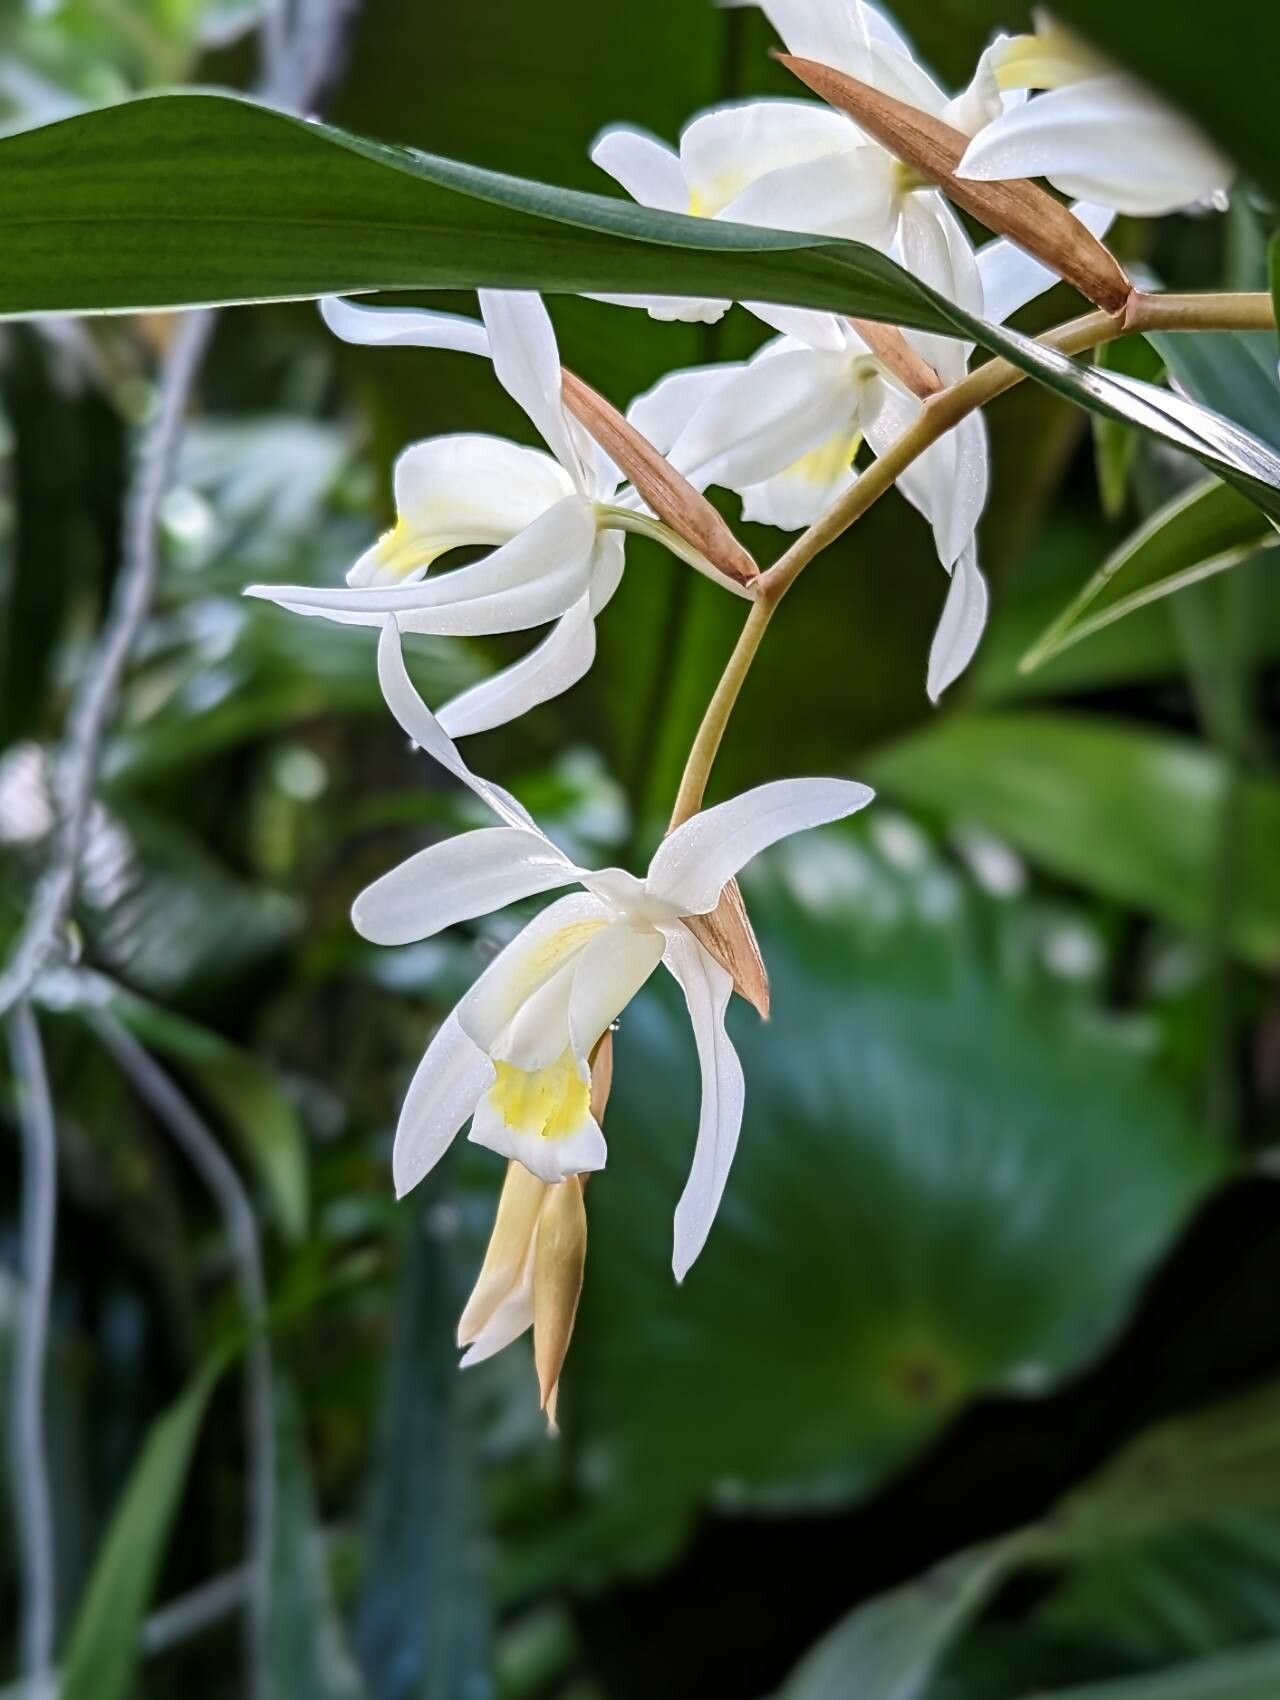
This species is just lovely. Its gracefully arching spikes of pure white blooms, with their subtle fragrance, truly brighten any space. And the satisfaction of watching a tiny piece of your beloved plant grow into a new, stunning specimen? Priceless! Now, Coelogyne nervosa isn’t always the first orchid folks suggest for absolute beginners who’ve never touched a peat moss ball. But if you’ve dabbled a bit and are ready for a gentle challenge, I think you’ll find it quite manageable and incredibly fulfilling.
When the Magic Happens: The Best Time to Start
For Coelogyne nervosa, the absolute best time to think about propagation is after it has finished blooming and is entering its active growth phase. This typically falls in the late spring or early summer. This is when the plant has stored up enough energy to put towards developing new growth and roots, giving your propagated pieces the best chance to thrive. Trying to do it when the plant is dormant or stressed is just asking for disappointment.
Your Propagation Toolkit
Gathering your supplies before you start makes the whole process so much smoother. Here’s what I always have on hand:
- Sharp, Sterile Pruning Shears or a Clean Knife: For making clean cuts. Sterilize them with rubbing alcohol between uses!
- Fine-Grade Orchid Bark Mix: A standard, well-draining potting medium is key. Some growers like to add a bit of perlite for extra aeration.
- Sphagnum Moss: High-quality, long-fibered sphagnum moss is excellent for retaining moisture.
- Small Pots or Seedling Trays: Clean, good-sized pots for your new divisions.
- Rooting Hormone (Optional but Recommended): A powdered hormone can give your cuttings a helpful boost.
- Clear Plastic Bags or a Small Greenhouse/Humidity Dome: To create a mini greenhouse effect.
- Newspaper or Soft Cloth: For protecting your working surface and gentle handling.
Let’s Get Propagating: Methods That Work
For Coelogyne nervosa, division is the most common and successful method. These orchids naturally grow in a clumping fashion, and teasing them apart is quite straightforward.
Method: Division
- Gently Remove from Pot: Carefully unpot your Coelogyne nervosa. You might need to gently loosen any circling roots with your fingers or a blunt tool.
- Clean Off Old Medium: Gently tease away as much of the old potting mix as you can, especially around the base of the pseudobulbs. This helps you clearly see where the rhizome connects the different growths.
- Identify Divisions: Look for natural breaks in the rhizome. You want to divide the plant into sections, each having at least two to three healthy pseudobulbs and ideally, a bit of active root growth.
- Make the Cut: Using your sharp, sterile pruning shears or knife, carefully cut through the rhizome. Go slowly and deliberately. If you’re having trouble, you can gently work a skewer or a small probe into the rhizome to help create a clean separation.
- Inspect and Prepare: Examine each division. Trim away any mushy or dead roots. If you’re using rooting hormone, a light dusting on the cut surfaces can be beneficial.
- Potting Up: Place each division into its own clean pot. Position it so the base of the pseudobulbs is at the same level as they were before, or just slightly higher. Fill the pot with your fresh orchid bark mix, gently firming it around the roots.
My Little “Secret Sauce”
Over the years, I’ve learned a few things that can make a big difference.
- The Power of Patience with Roots: Don’t be tempted to repot a division just because you don’t see much happening on top. Sometimes, the plant is busy developing roots beneath the surface. Give it a minimum of 4-6 weeks before you start worrying.
- Mimic the Tropics (Humidity is Key!): After potting, I always place my divisions into a mini greenhouse or cover them with a clear plastic bag – making sure there’s some airflow, of course! This high humidity is crucial for encouraging new root and leaf development. I usually prop the bag open a bit with a few skewers.
- Bottom Heat is Your Friend: If you have a seedling heat mat, placing your pots on it gently can significantly speed up root development. Just make sure the mat isn’t too hot; you want warmth, not a bake!
Nurturing Your New Arrivals & What to Watch For
Once your divisions are potted, treat them gently. Keep them in bright, indirect light and maintain that high humidity from the greenhouse setup. Water when the potting mix is just starting to dry out, but don’t let them sit in soggy conditions.
The most common issue you might encounter is rot. If you see pseudobulbs turning mushy and black, it’s a sign of too much moisture and not enough airflow. Act quickly: remove the affected part with a sterile tool and try to improve ventilation. Sometimes, a division just doesn’t establish. Don’t take it personally; it happens to all of us sometimes! It just means the plant wasn’t quite ready or was too stressed.
Happy Growing, and Don’t Forget to Savor It!
Propagating Coelogyne nervosa is a wonderful way to expand your collection and deepen your connection with these beautiful plants. Be patient, keep a close eye on them, and celebrate every new leaf and root. You’ve got this, and the joy of watching your efforts bloom is absolutely worth it!
Resource:
https://identify.plantnet.org/k-world-flora/species/Coelogyne%20nervosa%20A.Rich./data