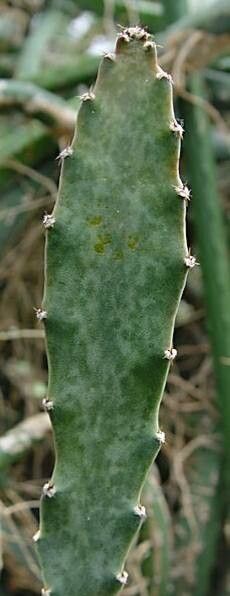
Hello there, fellow plant enthusiasts! It’s so lovely to connect with you today. I’m thrilled to be delving into the wonderful world of Acanthocereus maculatus, also known as the spotted cactus. If you’ve ever admired its striking, architectural form and those intriguing dotted patterns, you’re not alone! Propagating these beauties is a truly rewarding process, allowing you to fill your home with more of their unique charm. And guess what? While it might seem intimidating at first glance, I find Acanthocereus maculatus to be quite forgiving and relatively easy to propagate, even for those just starting their journey with succulents.
The Best Time to Start
For the highest success rate, the sweet spot for propagating Acanthocereus maculatus is during its active growing season. This typically runs from late spring through early to mid-summer. You’ll know your plant is ready when you see noticeable new growth. Starting during this vibrant period gives the cuttings the best chance to establish quickly and avoid sitting for too long in cool, damp conditions that can encourage rot.
Supplies You’ll Need
Gathering your tools beforehand makes the whole process smoother! Here’s what I always have on hand:
- Sharp, clean pruning shears or a knife: Crucial for making clean cuts that heal well. Sterilize them with rubbing alcohol between each cut.
- Rooting hormone (optional but recommended): A little bit can make a big difference in encouraging strong root development.
- Well-draining potting mix: A good cactus or succulent mix is ideal. You can also create your own by mixing equal parts potting soil, perlite, and coarse sand.
- Terra cotta or plastic pots: Ensure they have drainage holes! Terra cotta breathes well, which is a bonus.
- A spray bottle: For gently misting the soil.
- Newspaper or paper towels: To let cuttings callus.
- A sunny spot: Bright, indirect light is perfect.
Propagation Methods
Let’s get our hands dirty! I’ve found the most reliable method for Acanthocereus maculatus is through stem cuttings.
- Take Your Cuttings: Select a healthy, mature stem. Using your sterilized sharp tool, make a clean cut, removing a section that’s at least 3-4 inches long. Ideally, choose a piece with a few segments or “arms.”
- Let Them Callus: This is a critical step often overlooked! Lay your cuttings on newspaper or paper towels in a dry, well-ventilated area for several days to a week. You want the cut end to dry out and form a callus. This prevents rot when you plant them.
- Prepare for Planting: Once callused, you can dip the cut end into rooting hormone if you’re using it. This is like giving your cutting a little boost!
- Plant Your Cuttings: Fill your chosen pots with your well-draining potting mix. Make a small hole in the center with your finger or a pencil.
- Insert the Cuttings: Gently insert the callused end of the cutting into the hole, about an inch or so deep. You want the cutting to be stable, so you might need to prop it up with a pebble or two if it’s wobbly.
- Initial Watering: Resist the urge to water immediately. Wait a day or two after planting. Then, give the soil a light mist with your spray bottle. You want the soil to be barely moist, not wet.
The “Secret Sauce” (Pro Tips)
Here are a few things I’ve learned over the years that really help:
- Don’t Overwater, Ever! This is the golden rule for succulents. I’m talking about barely moistening the soil when you first plant. Think a gentle mist. The plant has stored water in its stems, so it’s much more likely to rot from too much moisture than from thirst at this stage.
- Bottom Heat is Your Friend: If you have a seedling heat mat, placing your pots on it can significantly speed up rooting. It creates a warmer environment for the roots to develop. It’s not strictly necessary, but it’s a real game-changer!
Aftercare & Troubleshooting
Once your cuttings have been planted, patience is key! Keep them in a spot with bright, indirect light. Water only when the soil has completely dried out, which might be every week or two initially, depending on your environment. You’re looking for signs of root development, which can take anywhere from a few weeks to a couple of months. You might see a little bit of new growth on the cutting itself, which is a good indicator that roots are forming.
The most common issue you’ll encounter is rot. If you notice a cutting turning mushy, black, or developing soft spots, it’s likely succumbing to rot. Act quickly! You might be able to salvage a part of the stem by making another clean cut above the rotted area and letting that new piece callus and try again. Ensuring excellent drainage and resisting the urge to overwater are your best defenses against this.
A Encouraging Closing
Watching a new plant emerge from a simple cutting is one of the most magical parts of gardening. Be patient with your Acanthocereus maculatus cuttings. They have their own rhythm. Enjoy the process of nurturing and observing, and soon you’ll have even more of these fascinating spotted cacti to admire and share. Happy propagating!
Resource: