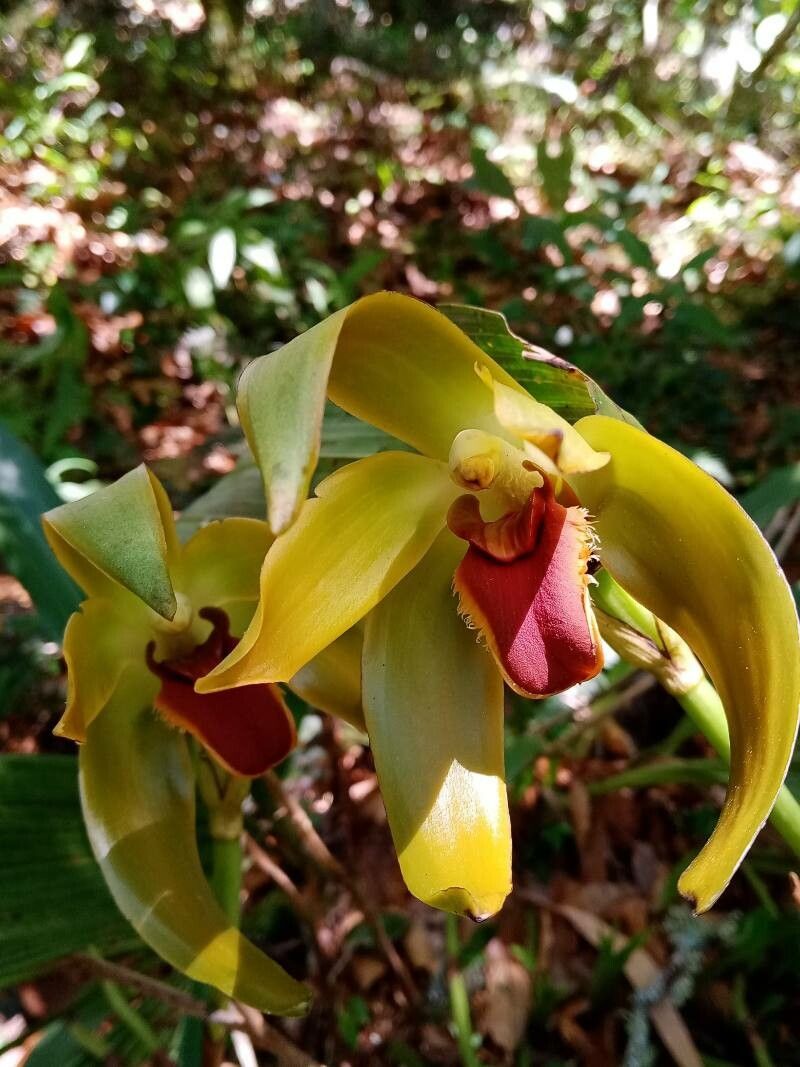
Hello there, fellow plant lovers! Today, I want to chat about a real gem in the plant world: Ida heynderycxii. If you’ve ever seen this striking beauty in a friend’s home or a nursery, you know its appeal. With its unique foliage and graceful presence, it truly is a showstopper. And the best part? You can absolutely bring more of this magic into your own space by propagating it!
Now, if you’re just starting your plant-parent journey, don’t be intimidated. While some plants can be fussy, Ida heynderycxii is remarkably forgiving. I’d say it’s a wonderfully rewarding plant for beginners and seasoned propagators alike. Watching a tiny cutting transform into a thriving new plant is one of the most satisfying feelings a gardener can experience.
The Best Time to Start
For the highest success rate, I always aim to propagate Ida heynderycxii in late spring or early summer. This is when the plant is actively growing and has plenty of energy to put into developing new roots. You’re essentially tapping into the plant’s natural growth spurt. Late spring, when the days are getting longer and warmer, is just perfect.
Supplies You’ll Need
Before we dive in, let’s gather our tools. Having everything ready will make the process so much smoother!
- Sharp, clean pruning shears or a sharp knife: For making clean cuts.
- Rooting hormone (optional but helpful): A powder or gel to encourage root development.
- A well-draining potting mix: I like a blend of peat moss, perlite, and a bit of compost.
- Small pots or containers: For your cuttings. Make sure they have drainage holes.
- Clear plastic bags or a propagation dome: To create a humid environment.
- Water: For the water propagation method.
- A clean tray: To place your pots on.
Propagation Methods
There are a couple of ways we can go about this, and both are quite effective.
Stem Cuttings
This is my go-to method for Ida heynderycxii.
- Find a healthy stem: Look for a relatively firm, mature stem that’s not actively flowering. You want a section that’s a good few inches long.
- Make your cut: Using your clean shears or knife, make a clean cut just below a leaf node. A leaf node is where a leaf emerges from the stem. This is where new roots will form.
- Prepare the cutting: Gently remove the lower leaves from the stem, leaving just a couple of leaves at the top. This helps the plant focus its energy on rooting.
- Apply rooting hormone (optional): If you’re using rooting hormone, dip the cut end of the stem into the powder or gel. Tap off any excess.
- Plant the cutting: Make a small hole in your prepared potting mix, and gently insert the cut end of the stem, making sure the lowest leaf node is at or just below the soil surface. The soil should be lightly moist.
- Create humidity: Water the soil gently, then cover the pot with a clear plastic bag or pop it under a propagation dome. This keeps the humidity high, which is crucial for cuttings. Place it in a spot with bright, indirect light.
Water Propagation
This is a wonderfully visual method!
- Select and cut: Just like with stem cuttings, choose a healthy stem and make a clean cut below a leaf node. Remove the lower leaves.
- Place in water: Put the cutting in a clean jar or vase filled with room-temperature water. Make sure those lower leaf nodes are submerged, but don’t let any leaves touch the water.
- Find the right spot: Place the jar in a location with bright, indirect light. Change the water every few days to keep it fresh and prevent bacterial growth. You’ll be able to watch as tiny roots start to form!
The “Secret Sauce” (Pro Tips)
After years of getting my hands dirty, I’ve picked up a few little tricks that can really make a difference.
- Bottom Heat is Your Friend: If you’re using stem cuttings and they seem to be taking their sweet time, consider placing the pot on a heat mat. This gentle warmth from below mimics ideal soil temperatures for root development and can significantly speed things up, especially if your room is on the cooler side.
- Don’t Overwater the Soil: It’s tempting to drench the soil when you plant your cuttings, but this is a rookie mistake! Lightly moist soil is key for stem cuttings. Too much water can lead to rot before roots even have a chance to form. Think of it as giving them a gentle drink, not a bath.
- Be Patient with Leaf Drop: Sometimes, a cutting will drop a leaf or two. Don’t panic! This is often the plant’s way of conserving energy. As long as the stem itself looks healthy and isn’t mushy, it’s likely still working on roots.
Aftercare & Troubleshooting
Once you see those lovely roots emerging – either from the drainage holes of your pot or clearly visible in the water – congratulations! You’re well on your way.
- For Water Cuttings: Once the roots are about an inch or two long, gently transplant them into a small pot filled with your well-draining potting mix. Water them in well, then keep the soil consistently moist but not waterlogged for the first week or two.
- For Soil Cuttings: Once you see new leaf growth or gently tugging on the cutting reveals resistance (meaning roots have formed), you can treat it as a young plant. Water when the top inch of soil feels dry.
- Troubleshooting Rot: The most common enemy is rot. If you notice your cutting turning black and mushy, or smelling unpleasant, it’s likely rotted. This is often due to overwatering or poor air circulation. If it’s a stem cutting, sometimes you can salvage a healthy section from higher up and try again. If it’s a water cutting, the whole thing has probably succumbed. Don’t get discouraged; just start fresh!
A Little Encouragement
Propagating plants like Ida heynderycxii is a journey. There might be a few bumps along the road, and not every attempt will be a roaring success. But that’s all part of the learning process! Embrace the patience it requires, celebrate the small victories (like tiny roots!), and most importantly, enjoy the fulfilling experience of growing your own plant family. Happy propagating!
Resource: