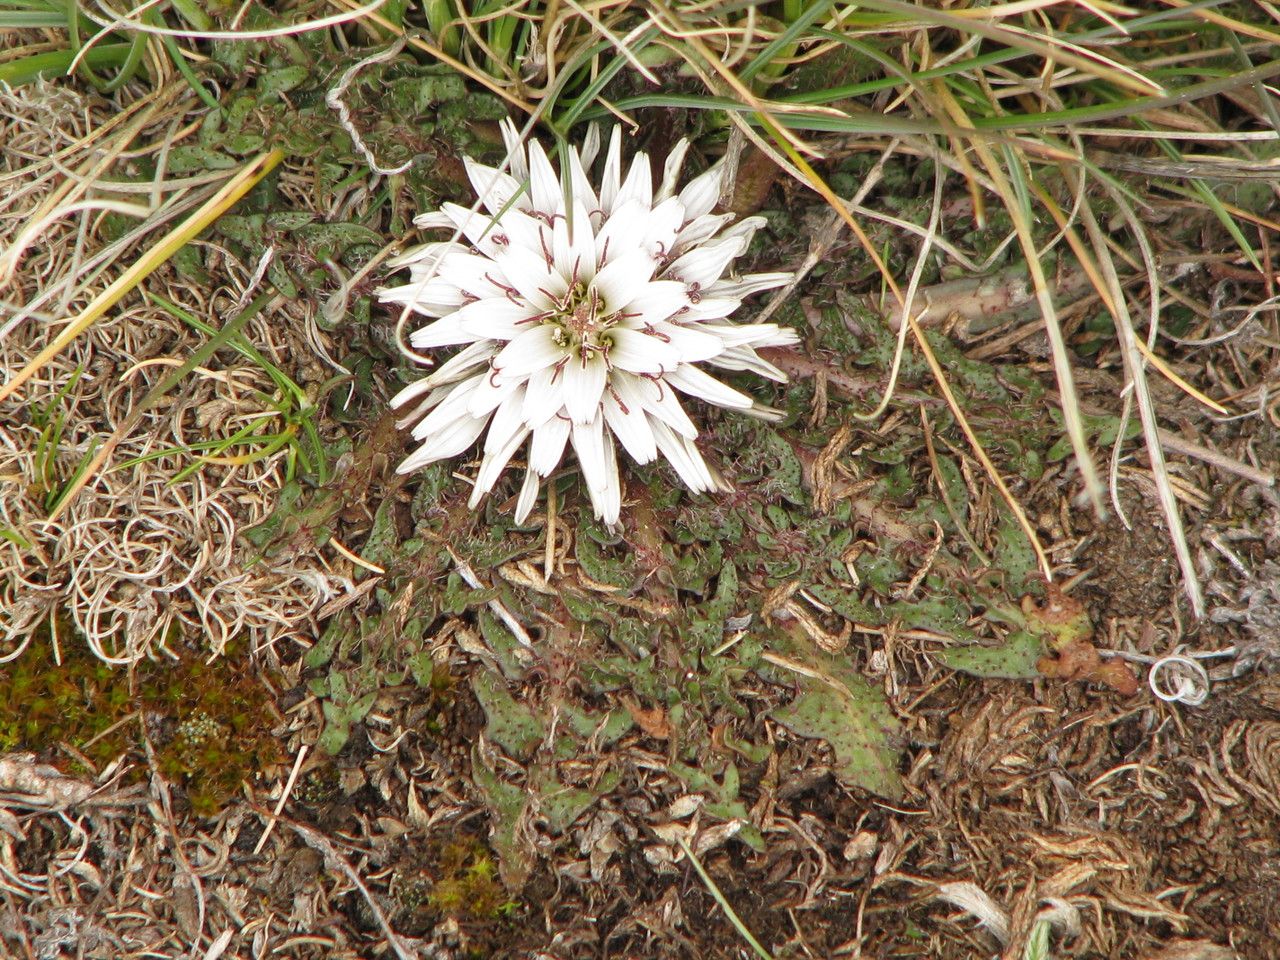
Oh, hello there! I’ve been so excited to chat with you about Hypochaeris echegarayi. If you haven’t encountered this gem yet, imagine a plant that’s just bursting with personality! Its unique foliage – often a lovely rosette of, well, meaty leaves, sometimes with a silvery sheen – makes it a real stunner in any succulent collection. And when it sends up those cheerful, daisy-like flowers? Pure joy! Propagating it is incredibly satisfying. You get to multiply that beauty, and trust me, it’s a truly rewarding experience for seasoned gardeners and beginners alike. Don’t be intimidated; this one’s quite forgiving!
When to Get Your Hands Dirty
For the best chance of success with Hypochaeris echegarayi, I find that spring is absolutely the sweet spot. That’s when the plants are naturally gearing up for active growth after their winter rest. You’ll want to start when the plant is healthily growing, meaning it’s not stressed from drought or extreme temperatures. Think of it as catching them in their most energetic phase – they’re more receptive to taking root and flourishing.
Your Propagation Toolkit
Gathering your supplies beforehand makes the whole process a breeze. Here’s what you’ll want to have on hand:
- Sharp, clean pruning shears or a sharp knife: For taking clean cuts. Sterilize them with rubbing alcohol to prevent disease.
- Potting mix: A well-draining succulent or cactus mix is crucial. You can also make your own by combining potting soil with perlite and coarse sand in a 1:1:1 ratio.
- Small pots or trays: Terracotta pots are great because they breathe.
- Rooting hormone (optional, but recommended for faster results): Available at most garden centers.
- Watering can or spray bottle: For gentle watering.
- A warm spot: Think bright, indirect light.
- Labels and a marker: To keep track of what you’ve planted!
Bringing New Life – Propagation Methods
Hypochaeris echegarayi is wonderfully versatile, and you can have great luck with a couple of common methods.
1. Leaf Cuttings – The Most Popular Route
This is my personal favorite for this plant. It’s so satisfying to see a whole new plant emerge from a single leaf!
- Select Healthy Leaves: Look for plump, healthy leaves on your parent plant. Gently twist or cut a leaf from the stem, making sure to get a clean break.
- Callus Over: This is a vital step! Place the leaves on a dry surface in a bright spot, out of direct sunlight, for 2-3 days. You want the cut end to dry and form a callus. This prevents rot.
- Prepare Your Pots: Fill your small pots with your well-draining succulent mix.
- Planting the Leaves: Lightly dust the callused end of the leaf with rooting hormone (if using). Then, gently insert the callused end into the potting mix, about ¼ to ½ inch deep. You can also lay the leaf on top of the soil, with the callused end just touching the surface.
- Wait and Watch: Place the pots in a warm location with bright, indirect light. Do not water them yet. Wait a week or two, then mist the soil lightly. You’re aiming for slightly moist, not wet, soil.
2. Stem Cuttings – For a Quick Start
If you have a more mature plant with some longer stems, this is a fantastic way to get going.
- Take the Cuttings: Using your sterilized shears, cut pieces of stem about 3-4 inches long. Make sure each cutting has at least a couple of leaves.
- Callus: Just like with the leaf cuttings, allow the cut ends to callus over for 2-3 days.
- Rooting Hormone (Optional): Dip the callused ends in rooting hormone.
- Planting: Insert the callused end of the stem cuttings into your prepared succulent mix. You can plant several cuttings in one pot, giving them a little space.
- Watering: After planting, give the soil a light watering.
The “Secret Sauce” – Insider Tips
You asked for my best tips, so here they are!
- The “No Water” Rule for Callusing: Seriously, resist the urge to water those cuttings right away. That dry period is their insurance policy against rot. It’s counterintuitive, I know, but it works wonders!
- Embrace Bottom Heat: If you’re propagation in a cooler environment, a gentle bottom heat mat designed for seedlings can significantly speed up root development for both leaf and stem cuttings. It mimics the warmth of spring soil.
Aftercare and When Things Go Wrong
Once you see tiny roots peeking out or new growth emerging from your cuttings, it’s time for slightly more dedicated care.
- Gentle Watering: Continue to water sparingly. Allow the soil to dry out almost completely between waterings. Overwatering is the number one killer of succulent propagations.
- Gradual Acclimation: As your new plants grow stronger, you can gradually introduce them to a bit more direct sunlight, but always watch for signs of scorching.
- Transplanting: Once your propagations have a good root system and are a decent size, you can transplant them into their own individual pots.
Troubleshooting: The most common issue you’ll face is rot. If you see leaves turning mushy or black, or a stem cutting becoming limp and translucent, it’s usually a sign of too much moisture or a pathogen. Sadly, these are often beyond saving. The key is prevention – good air circulation and proper watering are your best defense.
Happy Growing!
See? Not so scary, is it? Propagating Hypochaeris echegarayi is a wonderfully accessible way to expand your collection and share the love of these gorgeous plants with friends. Be patient with yourself and with your little green sprouts. Nature works on its own timeline, and the joy of watching something grow from a tiny leaf or stem is an experience you won’t forget. Happy propagating!
Resource:
https://identify.plantnet.org/k-world-flora/species/Hypochaeris%20echegarayi%20Hieron./data