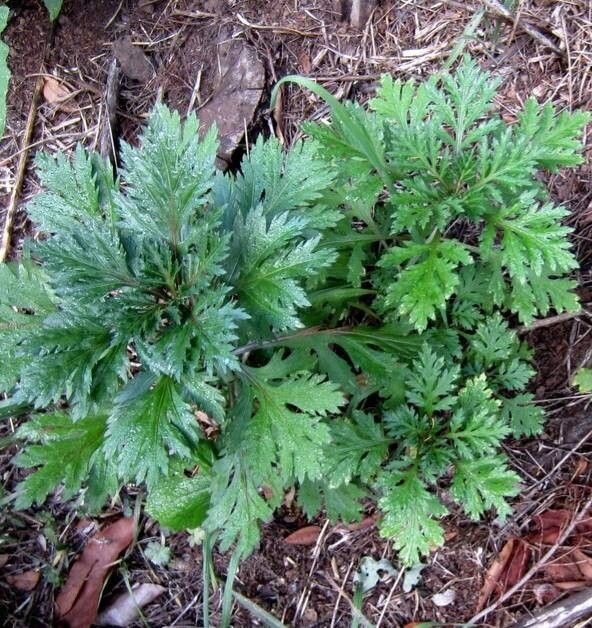
Ah, Argyranthemum winteri! If you’ve ever seen this daisy-like stunner gracing a garden bed or pot, you’ve surely been captivated by its cheerful blooms and elegant, silvery foliage. I’ve been growing these beauties for years, and let me tell you, they have a way of brightening even the dreariest corner. The best part? They’re wonderfully generous with their offspring! Propagating Argyranthemum winteri is a fantastic way to multiply your garden display without spending a dime, and it’s a truly rewarding experience, even for those just dipping their toes into the world of plant propagation. Don’t worry, it’s not too tricky at all!
The Best Time to Start
When it comes to coaxing new life from your Argyranthemum winteri, late spring to early summer is your golden window. This is when the plant is actively growing after its spring flush of blooms or is gearing up for another burst. You’ll be looking for nice, firm, non-flowering shoots – the kind that still have a bit of flexibility but aren’t super woody. Starting now gives those cuttings plenty of time to establish before the cooler weather sets in.
Supplies You’ll Need
Gathering your tools before you begin makes the whole process smoother. Here’s what I always have on hand:
- Sharp Pruning Shears or a Craft Knife: Cleanliness is key!
- Rooting Hormone (powder or gel): This is optional but highly recommended to give your cuttings a head start.
- Small Pots or Seed Trays: Make sure they have drainage holes.
- A Well-Draining Potting Mix: I like a 50/50 blend of seed-starting mix and perlite. This prevents soggy roots.
- A Spray Bottle: For keeping things moist.
- A Clear Plastic Bag or Humidity Dome: To create a mini-greenhouse effect.
- Labels and a Marker: So you don’t forget what’s what!
Propagation Methods
There are a couple of ways to go about this, but stem cuttings are my absolute favorite for Argyranthemum winteri.
Stem Cuttings
This is where the magic really happens.
- Take Your Cuttings: Choose a healthy, non-flowering stem that’s about 3-4 inches long. Using your clean shears or knife, make a clean cut just below a leaf node. A leaf node is where a leaf attaches to the stem – this is where the roots will want to form.
- Prepare the Cuttings: Gently remove the lower leaves from the stem, leaving just a couple of leaves at the very top. This prevents them from rotting in the soil. If you have larger leaves, you can even cut them in half horizontally to reduce water loss.
- Apply Rooting Hormone (Optional but Recommended): Dip the cut end of the stem into your rooting hormone, tapping off any excess.
- Plant Your Cuttings: Fill your small pots or seed tray with your prepared potting mix. Make a small hole with your finger or a pencil and insert the cut end of the cutting, ensuring the leaf nodes are below the soil surface. Gently firm the soil around the base.
- Water Gently: Water your cuttings thoroughly but gently, allowing the excess to drain away.
- Create a Humid Environment: Water your cuttings thoroughly but gently, allowing the excess to drain away.
- Place in Indirect Light: Find a bright spot that receives indirect sunlight. Direct sun can scorch your tiny new plants.
Water Propagation (A Quicker Peek!)
While I prefer soil for long-term success, you can get a sneak peek at root development by trying water propagation.
- Prepare your Cuttings: Follow steps 1 and 2 from the stem cutting method.
- Place in Water: Fill a small jar or glass with fresh water. Place your cuttings in the water, making sure no leaves are submerged. The leaf nodes should be in the water.
- Change Water Regularly: Change the water every 2-3 days to keep it fresh and prevent rot.
- Wait for Roots: You should see tiny white roots emerge from the leaf nodes within a couple of weeks. Once these roots are about an inch long, you can transplant them into soil, following step 4 in the stem cutting method. Be extra gentle when planting in soil to avoid damaging those delicate new roots.
The “Secret Sauce” (Pro Tips)
Here are a couple of little things I’ve learned along the way that really boost success:
- Don’t Smother Your Cuttings: When you cover your pots with a plastic bag or humidity dome, make sure the leaves aren’t touching the plastic. If they are, they can encourage mold and rot. You can use little stakes to prop up the bag.
- The Magic of Bottom Heat: If you have the option, placing your pots on a heated propagation mat can make a huge difference. This gentle warmth encourages root development from below, speeding things up considerably. It mimics what happens naturally in warmer climates.
Aftercare & Troubleshooting
Once your cuttings have rooted – and you’ll know because you’ll see new leaf growth and feel a little resistance when you gently tug – it’s time to transition them.
- Acclimation: Gradually introduce your new plants to less humid conditions over a week or so by lifting the lid of your humidity dome or opening the plastic bag for increasing amounts of time.
- Transplanting: Once they’re ready, pot them up into slightly larger pots with a good quality potting mix. Keep them consistently moist but not waterlogged.
- Troubleshooting Rot: The most common issue you might face is rot. This usually happens due to overwatering or poor drainage. If you see your cuttings looking black and mushy at the base, it’s a sign of rot. Sadly, there’s usually no coming back from this. Prevention is key! Ensure good airflow, don’t overwater, and use a well-draining mix. If you see yellowing leaves, it could be a sign of too much or too little water, or not enough light.
Happy Propagating!
Watching those tiny cuttings develop roots and unfurl new leaves is one of the most satisfying parts of gardening. Be patient with your efforts. Some might take hold sooner than others, and that’s perfectly normal. Enjoy the process of nurturing these new little plants – soon you’ll have a whole collection of cheerful Argyranthemum winteri to enjoy!
Resource: