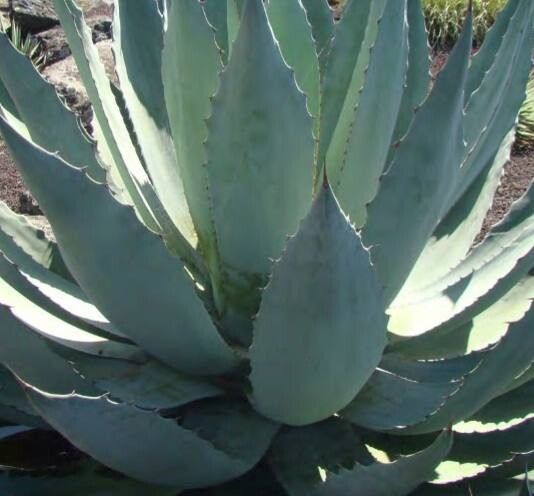
Oh, hello there! So glad you’re here. Today, we’re diving into the wonderful world of propagating Agave cupreata. If you’re anything like me, you adore the striking architectural beauty of agaves, and this copper-hued stunner is no exception. Seeing a beautiful plant like this create more of itself, well, it just feels like pure magic to me. It’s incredibly rewarding to watch a tiny pup transform into a magnificent specimen. Now, as for beginners, I’d say Agave cupreata is moderately challenging. It’s definitely doable, but it requires a bit more attention than, say, a pothos.
The Best Time to Start
For Agave cupreata, the sweet spot for propagation is spring or early summer. This is when the plant is actively growing, and those new pups are usually plump and ready to go. You want to catch them when they’re at least a few inches tall and have developed their own little root system, however small. Trying to take cuttings or divide very young plantlets can be a bit tricky.
Supplies You’ll Need
Here’s what you’ll want to have on hand:
- Sharp, clean pruning shears or a knife: For making clean cuts. Sterilize them with rubbing alcohol between uses to prevent disease.
- Well-draining potting mix: A cactus/succulent mix is perfect. You can also create your own by mixing potting soil with perlite or pumice (about a 50/50 ratio).
- Rooting hormone (optional but recommended): This helps encourage faster and stronger root development. Look for a powder or gel.
- Small pots or propagation trays: For your new babies. Make sure they have drainage holes!
- Gloves: Agaves can be spiky, and their sap can be irritating to some skin types.
- Small trowel or spoon: For scooping soil.
- Watering can with a fine rose: For gentle watering.
Propagation Methods
Agave cupreata typically propagates through offsets, which are the baby plants that grow from the base of the mother plant. This is, by far, the most common and successful method.
- Locate the Offsets: Gently inspect the base of your mature Agave cupreata. You’ll see small pups emerging from the soil around the mother plant. Look for ones that are at least a few inches across and have their own distinct leaves.
- Prepare for Removal: If the offsets are still deeply embedded, you might need to gently dig away some soil from around them with your trowel.
- Make the Cut: Using your sterilized pruning shears or knife, carefully cut the offset away from the mother plant. Try to get as close to the base as possible, ideally severing any connection to the mother’s root system. If an offset has a bit of its own root structure attached, even better!
- Allow to Callus: This is a crucial step for succulents. Place the removed offset in a dry, well-ventilated spot away from direct sunlight for 2-7 days. You want the cut end to dry out and form a protective callus. This prevents rot when you plant it.
- Planting the Offset: Once the callus has formed, you can plant your offset. Fill a small pot with your well-draining potting mix. Make a small hole in the center with your finger or a pencil. If you’re using rooting hormone, dip the callused end of the offset into it.
- Position and Firm: Place the offset into the hole and gently firm the soil around its base. It should stand upright on its own. You don’t need to bury it too deeply – just enough for it to be stable.
- Initial Watering (Careful!): Wait a day or two after planting before watering. Water sparingly. You want the soil to be barely moist, not soggy. Overwatering at this stage is the quickest way to kill your new plant.
The “Secret Sauce” (Pro Tips)
- The “Dry Start” Method: Instead of watering immediately after planting, I often wait a full week before the first watering. This gives the offset a chance to settle in and further reduce the risk of rot. It sounds counterintuitive, but succulents are masters of water storage!
- Gentle Stimulation: If you want to give your offset an extra boost, especially if you’re propagating in cooler weather or it seems a bit stubborn, consider bottom heat. Placing the pot on a seed-starting heat mat set to a low temperature (around 70-75°F or 21-24°C) can encourage root development.
- Don’t Overcrowd: When your offsets are still small, resist the urge to plant them too close together in a larger pot. They need good air circulation. It’s often best to pot them individually until they’ve established themselves.
Aftercare & Troubleshooting
Once you’ve planted your offset, keep it in a bright, indirect light location. Avoid direct sun, which can scorch the young plant. Water very sparingly – only when the soil is completely dry. You might find yourself watering only every few weeks initially.
The first sign that your offset is happy is when you see new leaf growth. This can take anywhere from a few weeks to a couple of months. If you touch the base and it feels firm, that’s a good sign too.
The biggest problem you’ll encounter is rot. If your offset looks mushy, is turning yellow or brown from the base upwards, or has a foul smell, it’s likely due to overwatering. If you catch it early, you might be able to cut off the rotted parts, let the healthy sections callus over, and try again. Sadly, sometimes it’s a lost cause, and that’s part of gardening!
A Encouraging Closing
Propagating Agave cupreata is a journey, and like any good journey, it’s about the process and the learning. Be patient with your new little plants. They’ll tell you what they need, and soon enough, you’ll have a beautiful collection of your own Agave cupreata to enjoy. Happy propagating!
Resource:
https://identify.plantnet.org/k-world-flora/species/Agave%20cupreata%20Trel.%20&%20A.Berger/data